


Next is to mix up some flesh wash. I use P3 Flesh Wash from Privateer Press, and thin it with Acyrllic Floor Wax. Rather than using a normal flesh wash I add a little Reaper Pale Olive and Ultramarine Highlight to the mix to give a bit of a dead blue-green look to the skin. Apply the wash over all the exposed flesh areas. When you want a patch of unnaturally sick colored flesh add a dab of the Olive or Ultramarine colors to the area and let the wash distribute it around.

Once the flesh wash has dried, then you can do the fun gory stuff. Normally one would want to do the blood after all the clothes have been blocked in. However, I tend to come from the school of thought as to finish the face and flesh first before doing the clothes as that tends to be the focal point when looking at models.
Start with a good blood red ink. I used to use the old Citadel Red Ink but that is long OOP. I have found Kohi Nohr makes a red ink that is very close to the Citadel Red Ink that I was able to get at Micheal's Craft store for a lot less than the Citadel stuff. Thin some of that on your pallet with some acryllic floor wax and then add a drop to the side of your pallet of some black ink, I use Reaper Master Class Black Ink.

Darken some of the red ink with the black ink and run this around the edges of the open wounds, in the mmouths and in the eyes.

Gradually add more of the pure red ink to the open wounds, mostly to the lower sides of the open wounds as blood runs out and down. Also add some to the mouth and fingertips, to simulate a zombie that just got some fresh lunch.

Next stipple some red ink under the mouth and around the chest and hands for some gory blood spray.


 Paint
in the eyes with white, or perhaps a yellow-ivory for a more sicklier
diseased look. A quick tip to painting eyes is to use a Micron 0.05 mm
felt pen to dot the eyes. For zombies, try to make the dots somewhat
smallish compared to the whites, as to making the eyes look bulging.
Furthermore, position the dots in ways the head is not facing. Looking
up is a good way to position them. This gives the model a bit more of
an unattentive 'zombie'ish' look. If you really want to go a bit
further, try using a red pen first and then filling in the center of the
red dot with the black pen. This sort of gives the zombie a sort of
sick or possessed 'rage-zombie' look.
Paint
in the eyes with white, or perhaps a yellow-ivory for a more sicklier
diseased look. A quick tip to painting eyes is to use a Micron 0.05 mm
felt pen to dot the eyes. For zombies, try to make the dots somewhat
smallish compared to the whites, as to making the eyes look bulging.
Furthermore, position the dots in ways the head is not facing. Looking
up is a good way to position them. This gives the model a bit more of
an unattentive 'zombie'ish' look. If you really want to go a bit
further, try using a red pen first and then filling in the center of the
red dot with the black pen. This sort of gives the zombie a sort of
sick or possessed 'rage-zombie' look. Paint in the teeth and any exposed bones using Reaper Yellowed Bone and Ivory. This really makes the zombie look more threatening as you can see the jagged and broken teeth from the dark and bloody mouth.

Next block in and paint the rest of the figure as normally, clothes, details and base. Shade and highlight normally as well. Weathering worn and ragged edges of torn clothes with some lighter shades. Be wary of worn clothes and damaged metal parts. Add some metallic colors to edges of scratched and dented metal parts. Don't forget to add some rust colors to exposed metal.


 Finish
off the bases as you would a normal figure, including any other
details. In this case many of the Incursion Sturmzombies are fitted
with some crude blades, metal patchwork and some devices that pump the
chemicals that keep them up and running around. For the blades I
generally give them a work metal look by using some Reaper Scorched
Metal over Shadowed Steel. Then adding some splotches of black and rust
colors. The patchwork and the cyber gear I sometimes give a similar
treatement, or if I feel it's stainless steel I go for a brighter color
like Honed Steel or True Silver. Some of the piping I will give it some
flourescent green to indicate this is the zombie chemical. Sort of a
reference back to the old movie, The Reanimator. I'll even add some of it trickling out of an open wound.
Finish
off the bases as you would a normal figure, including any other
details. In this case many of the Incursion Sturmzombies are fitted
with some crude blades, metal patchwork and some devices that pump the
chemicals that keep them up and running around. For the blades I
generally give them a work metal look by using some Reaper Scorched
Metal over Shadowed Steel. Then adding some splotches of black and rust
colors. The patchwork and the cyber gear I sometimes give a similar
treatement, or if I feel it's stainless steel I go for a brighter color
like Honed Steel or True Silver. Some of the piping I will give it some
flourescent green to indicate this is the zombie chemical. Sort of a
reference back to the old movie, The Reanimator. I'll even add some of it trickling out of an open wound.
Finish the clothes off with blood stains by using some of the same red and black ink. First start with using a mix heavy with the black ink around the stained areas. Remember that the stains should work themselves downwards. Then follow up with some more ink with more red mixed in. Add some splatter marks with a fine brush around exit wounds from bullet holes.
After some finishing touches and blackwash, using thinned Reaper Black Ink with Future Floor Wax, I then applied some Tamiya Clear Acyrllic to some of the bases to simulate water. While the clear is drying I'd add some thinned red ink and thinned flourescent green to simulate some of the zombie ichor dripping into the water. Also a few swishes of Citadel Gryhpon Sepia and Delvan Mud glazes to give the water a bit of murkiness. You will have to add more of the clear acyrillic to some of the deep sections as it really shrinks when it dries.

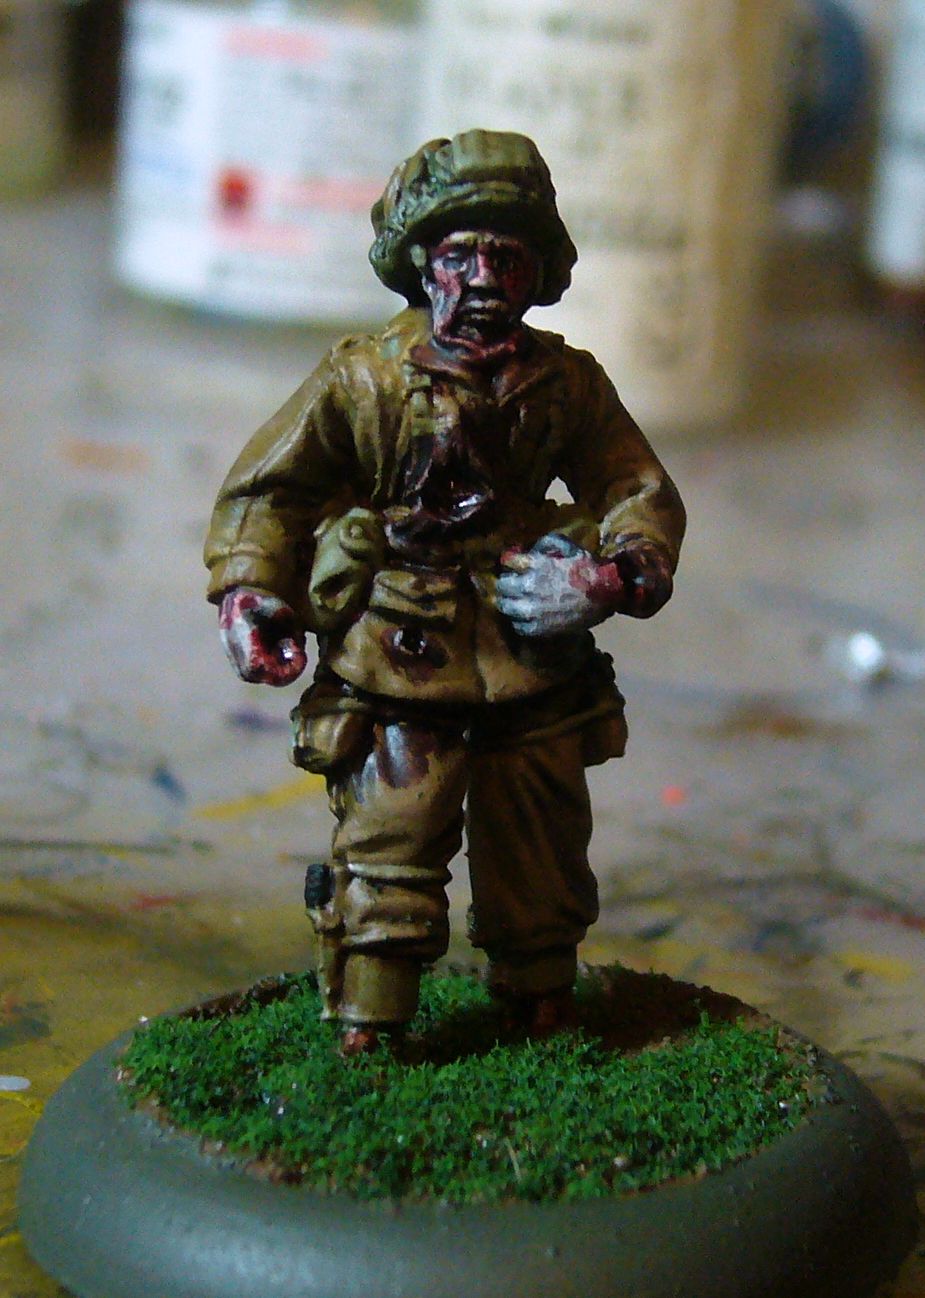
After finishing up the models and flocking the bases of the Airborne Zombies, I then gave them a coat of Testors Dullcote. The Future Floor Wax in the black wash give the model a glossy appearance. After Dullcoting, I'd then take a little Future Floor Wax and dab some on with a small brush in areas where there are some open wounds to give it a moist glistening look to it.
Here's what some of my finished product looks like.


No comments:
Post a Comment