There Will Be Blood – a gore painting tutorial
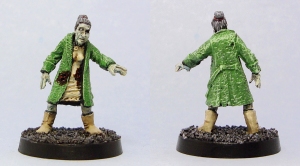
August 7, 2012 A lot of miniature painters like to paint blood on their minis. I think most of us have at some point painted that splash of red on a sword blade or something similar – I know I did that with probably the third or something mini I painted back in the roaring 90s. Nowadays I don’t have too many blades to paint, but tend to dabble in zombies, Xenomorphs and all sorts of critters that leave splashes of blood around. Gore is definitely called for. In this tutorial I will show a few quick and simple techniques for painting gore – wounds, blood spatters and the like.Lately TCR or Tamiya Clear Red has been all the rage in the world of gore painting, and rightfully so. It produces a very nice, realistic effect when used correctly and looks great when properly done. Just google “tamiya clear red blood tutorial” and you’ll see what I mean. Unfortunately the TCR method doesn’t really fit my style of painting, as it results in a very glossy, sticky look whereas I tend to make my miniatures as matte as possible, using gloss for choice bits such as visors or scopes. This is what I do when I need to paint some gore:
Step one – Red base
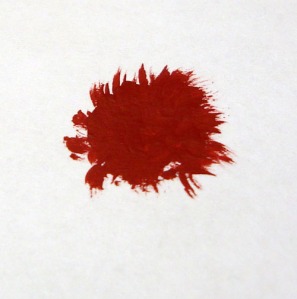
Take some dark red paint. My choice was Citadel’s Mechrite red, which according to Citadel’s paint conversion chart (pdf link) is currently Mephiston red.
Apply said red paint around wherever you wish to have gore. Remember, sometimes less is more! Painting half of the model red isn’t always the best possible solution.
Step two – Brown ink
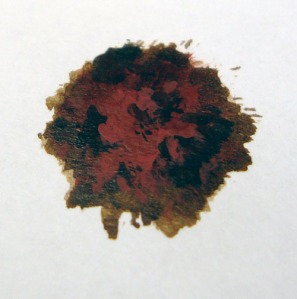
Paint some brown ink (I used Citadel’s old Brown ink, but any thickish dark brown will do) over the red. Don’t obscure the red completely. It’s more effective if you let the brown pool up in some places for a thicker, coagulated look. Depending on how dirty you want your blood to look, you can stay within the red or slightly overlap its edges.
Step three – Black ink
Dab some black ink (I used Citadel’s old Black ink) around. Blood tends to be quite dark, especially when it dries and coagulates. For a zombie, more black may be appropriate. At this stage you may already call your gore finished.
Step four – Red highlight (optional)
At this stage you can add some highlights with the original base color. Especially suitable for wound edges and the like.
Step five – White (optional)
Gruesome wounds? Add some bone fragments for that little bit of extra. You can give them a light brown inking, depending on how much you want them to stand out.
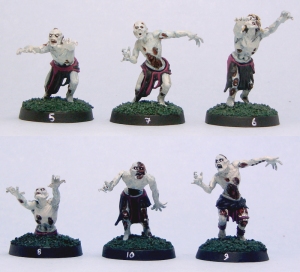
Aaaand that’s it. To finish the tutorial off, below are some of my examples. If you end up using this, do send me some pictures!


No comments:
Post a Comment