STOWAGE
 Chieftain Models
 Bolt Action
 Company B
 S and S Models


 Skytrex
  20/SP/A03 Assorted stowage strips (12 items) (pack 1)
  20/SP/A02 Track links pack for up-armouring models
  20/SPA/21 Sherman track links

  SMRA01 Assorted Crates and Boxes (Metal)
  SMRA03 Coils of Wire (Metal)
  SMRA05 Sacks (Metal)
  SMRA52 Assorted Parcels (metal)
  SMRA53 Assorted Suitcases (metal)


 Legend Productions Korea LF4104
     LF4101

 http://www.underbed.co.uk/reivervehicles.htm

     Tamiya TA32510

 TAMIYA
  Jerry Can Set 1:48 Scale - Kit No.32510
  http://www.hannants.co.uk/search/index.php?product_category_id=&product_division_id=&manufacturer_id=8229&product_type_id=all_diorama&code=&scale_id=955&keyword_search=&setPerPage=25&save_search_name=&save_search=

 VERLINDEN
  1:48 Cobblestones Building Blocks #2292

  1:48 88mm Ammo Pak 43 KTiger Jagdpanther 2341
  1:48 Ammo Cases Tank & Artillery #2227
  1:48 G.M.C. 2.5 Ton Truck Cargo Set #2380
  1:48 German Military Vehicle Stowage #2238
  1:48 Marine Sherman Armor & Stowage #2242
  1:48 Tiger I 88mm Ammo #2221
  1:48 Military Supplies #2215

 BLACK DOG       http://www.fireflymodels.co.uk
       T48025 German Equipment accessories set 1/48
       T48055 Sd.Kfz. 251/1 Ausf C accessories set
       T48001 BREN CARRIER accessories set
       T48002 CROMWELL accessories set
       T48017 FUEL CANS accessories set
       T48018 TENTAGE+BEDROLLS accessories set
       T48019 TENTAGE+BEDROLLS 2 accessories set
       T48020 TENTAGE+BEDROLLS 3 accessories set
       T48021 TENTAGE+BEDROLLS 4 accessories set
       T48026 British equipment accessories set
       T48028 Sd.Kfz. 222 accessories set

 OLD CROW
     "hull stowage"

 DIXON
  WWP1 Pack of British jerry cans (20)

 TAG
  Brit Backpack x 10 SKU: WEA261
  Brit Blanket roll x 10 SKU: WEA262
  Brit Helmet x 10    SKU: WEA260
  Crates x 10   SKU: WEA068

 http://thesceneuk.com/index.php?main_page=product_info&cPath=70_73_62&products_id=478

 GZG 25ACC-03 Stowage Boxes and Cans - ammo boxes, jerrycans,
 Crew personal stowage       GZG-25ACC-01

 EBOB
  Assorted supplies 6 oil drums, 3 packing crates, 6 petrol cans
  German weapons and equipment


 Scotia Grendel

        http://www.scotiagrendel.com/Products/index.php?main_page=index&cPath=59_62

        11906 - Jerry Cans  (12)

        11907 - Vehicle Accessory Pack 1
       Stowage, Pick and Shovel, and Fire Extinguisher,
       Fire Axe
Saturday, September 29, 2012
28mm/1:48 Stowage and Baggage
Thursday, September 27, 2012
50 cents dollar store tree
Christmas season brings many treats for the wargamer, when it comes to terrain. My best luck has been with the Cobblestone Corners brand of Christmas decorations, sold by Dollar Tree in the U.S. (manufactured in China).
 Last year, they brought us cheap hedges. This year, it's trees - a
wide variety of trees, 2 trees per pack, and each pack retails for $1 USD.
Last year, they brought us cheap hedges. This year, it's trees - a
wide variety of trees, 2 trees per pack, and each pack retails for $1 USD.
 I cleaned my local store completely out of pine trees (9 packs - 18 trees), and will go back for more.
 I prefer the pine trees because of their simple construction (basically, it's a trimmed brush stuck into a round wooden base).
 I don't think I'll have a "shedding" problem with these trees!
") To my eye, the trees work fine for 15mm through 28mm scales. They're a trifle big for 6mm/microscale, but not laughably so.
To my eye, the trees work fine for 15mm through 28mm scales. They're a trifle big for 6mm/microscale, but not laughably so.
 Two other tree varieties in the same line are worth mentioning. One
is basically the same tree, except the "brush" has been trimmed into
sections, and the bristles are coated with a dark flocking. This tree
shed a little in the package, but didn't look like it would shed further
on the tabletop.
Two other tree varieties in the same line are worth mentioning. One
is basically the same tree, except the "brush" has been trimmed into
sections, and the bristles are coated with a dark flocking. This tree
shed a little in the package, but didn't look like it would shed further
on the tabletop.
 Another variety is again based on the brush skeleton, but instead
uses what looks like pulverized foam as flocking. Some of the foam hold
paint better than others, which gives these trees a green-and-white
look. These trees shed quite a bit in the package, and look to me like
they'll keep shedding.
Another variety is again based on the brush skeleton, but instead
uses what looks like pulverized foam as flocking. Some of the foam hold
paint better than others, which gives these trees a green-and-white
look. These trees shed quite a bit in the package, and look to me like
they'll keep shedding.
 There were more trees that I didn't buy, but they were trees with snow. If you have a winter campaign in mind, you should check them out.

TMNT

teenage Mutant NINJA Turtle DONATELLO Action Keychain
http://www.ebay.com/sch/i.html?_sacat=0&_from=R40&_nkw=teenage+Mutant+NINJA+Turtle+DONATELLO+Action+Keychain&_nkwusc=eenage+Mutant+NINJA+Turtle+DONATELLO+Action+Keychain&_rdc=1
Scratch built anti grav vehicle part 2
after being painted
Scratch built APC painting WIP


Scratch built anti grav vehicle!
cratch built anti grav vehicle!


I've considered going in and trying to clean these up with some putty but they kind of are what they are and I need to have the three we have started done by Sunday for a game so it's unlikely I'll do any more detail work.
I'll be painting these in my Hell Knights cammo pattern with markings. I'm hoping that will make them look a bit nicer. All in all though I'm pretty happy with the results especially since these are made from scrap cardboard and junk. They probably cost less than a dollar in materials.
Titania City perhaps?
Titania City perhaps?

Sci-Fi Terrain bits


100 bottle cap barrels

Our other barrels are all generic so we decided these should have corporate labels as well as warning labels. Cutting out and pasting on the labels was by far the hardest part of the project. We cut and pasted literally hundreds of them.
You might recognize some of the fictional corporations we used. Not bad for a weekend project I guess. These are part of a larger supply depo project we are working on. Next up will be some other containers and we hope to have some large shipping crates as well. We already have a lot of labels printed out.
Sample Horrorclix repiants
 |
 |
Original Jester figure
|
Repaint
|
 |
 |
Original Banewolf figure
|
Repaint
|
 |
 |
Original candy stripper
figure
|
Repaint
|
 |
 |
Original zombie cop
figure
|
Repaint
|
 |
 |
Original dire wolf figure
|
Repaint
|
 |
 |
Original blood vampire
figure
|
Repaint
|
 |
 |
Original outpatient
figure
|
Repaint
|
 |
 |
Original runaway figure
|
Repaint
|
Space hulk modding
Since I prefer 3D-terrain instead of card-board, I was searching for a 3D-SpaceHulk for years.
I found:
I found:
So I started my third project: “Building a 3D SpaceHulk” Step 1: Floor TileFirst I created my own floor tile using the original dimensions of 30 x 30 mm. I used the same styrene sheet from Slater’s Plastikard as for my bases (Double Tread 1:50).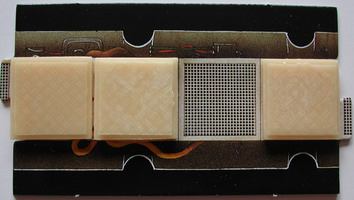 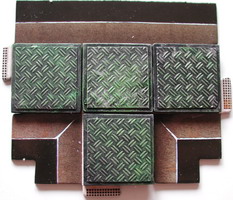 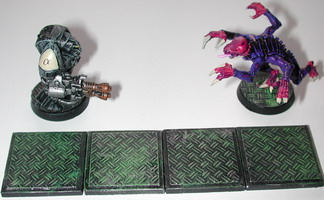
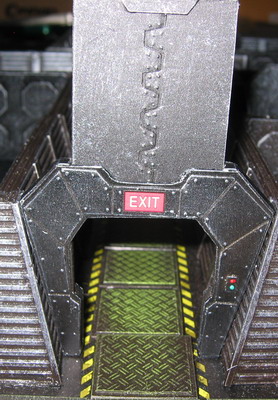
Step 2: The DoorI like the old door from Ainsty “Tech Tunnel 2” and changed it to a closed bulkhead. The line “Tech Tunnel” was replaced by “Tech Tunnel 4” and the door seemed to be OOP until Ainsty has been taken over by “Old Crow Models”. You find the door now here.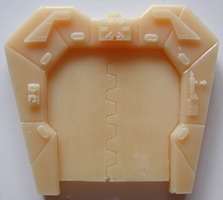 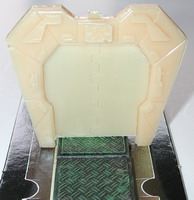
To avoid copyright issues with the recast, I built my own door with a removable bulkhead: 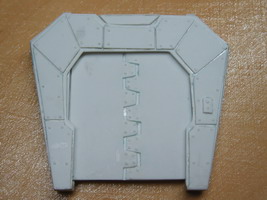 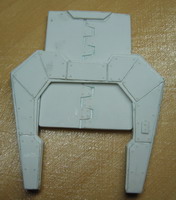 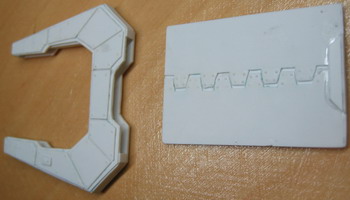 But this makes it tricky to create a mould for the main door. 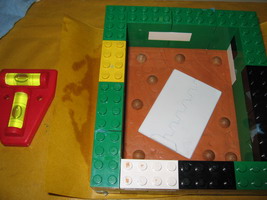 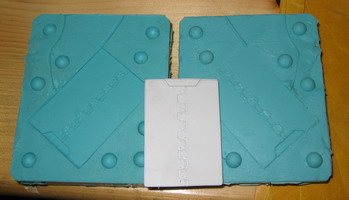 The bulkhead mould was easy to made. A simple 2 sided mould. 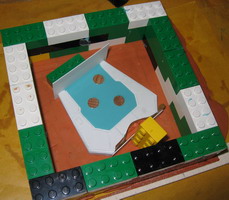 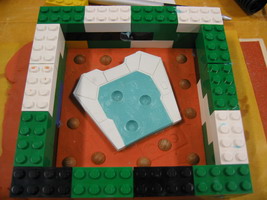 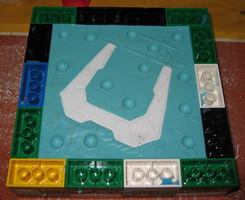 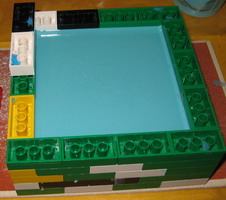 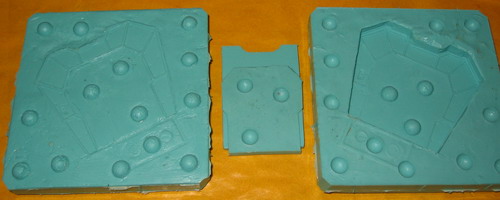 But the main door has to be made with a 3-part mould. This was the first time I made this. 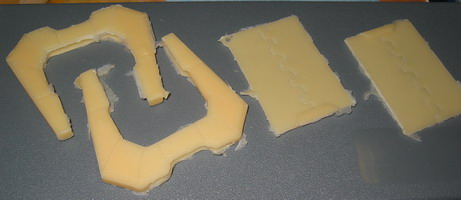 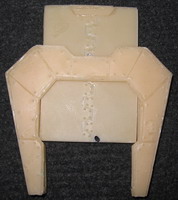 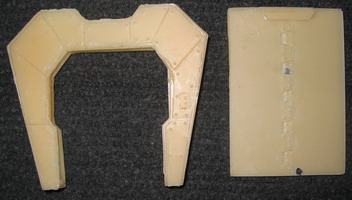 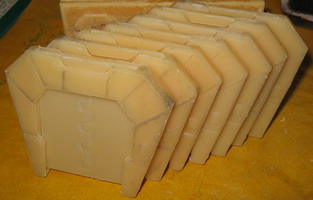 Although some airbubbles are in the bulkhead, I’m very satisfied with the result. Especially because I needed only 4 days at the gaming fair in Stuttgart 2006 to finish 7 casts. 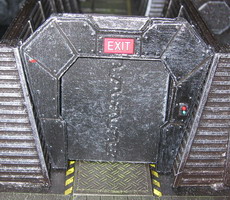 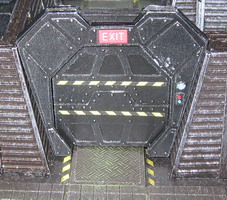
Step 3: Designing the WallsThis will be the most work. The first sketches are made and a lot of ideas in my head.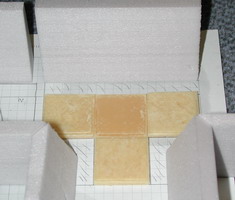 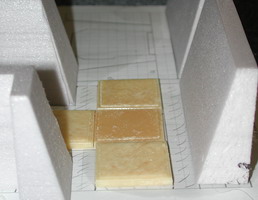

First I tried some tests with Styrofoam, but after I discovered styrene sheet I switched to this material. It’s easy to handle and it has a smooth surface. 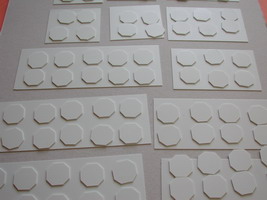 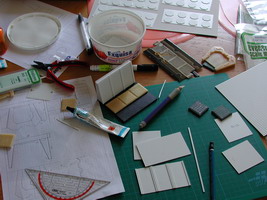
For the outside I used 1mm and 0,5 mm styrene sheet. For the inside I made some examples and decided to use “Evergreen Scale Models” Metal Siding Styrene Sheet No. 4530. 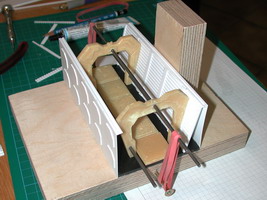 
To get the right angle for the door I built a tool, which I used for all modules to glue the walls inside. Step 4: Moulding the prototypesTime to play the Lego!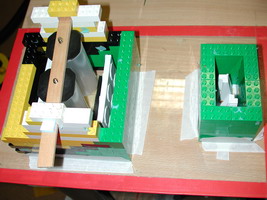 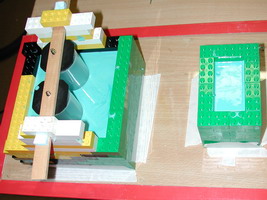
Now the first moulding. The 2 bottles save some silicon (Order No.: 03-001A) and make it easier to release later the casted module. 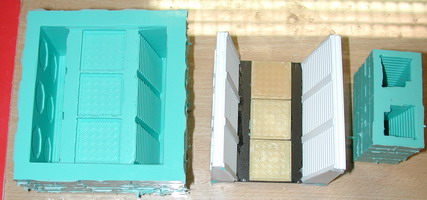
The first moulds are ready for casting. I was very happy that the prototype was not destroyed, while releasing from the mould. These casts are used to finish the other modules. 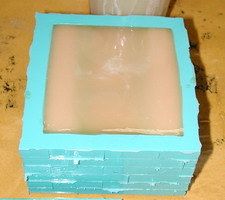 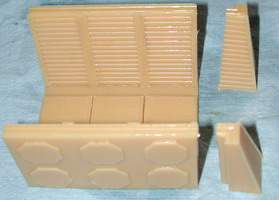
For casting I used resin from Rai-Ro (Order No.: 03-036A) which doesn’t damage the silicon mould. [Edit] Because of some quality issues I moved to another resin from Alpina: - Order No.: 0534145 “ALPA-Resin 12” - Order No.: 8088301 “RZ 30150” - filler Aluminiumhydroxid - Order No.: 0534007 “ALPA-COLOUR” black color 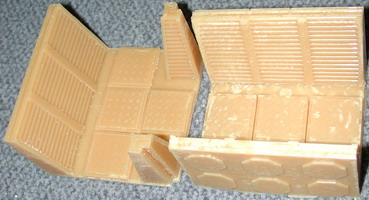 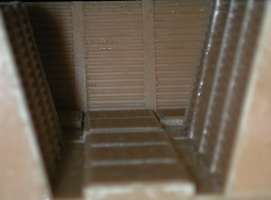
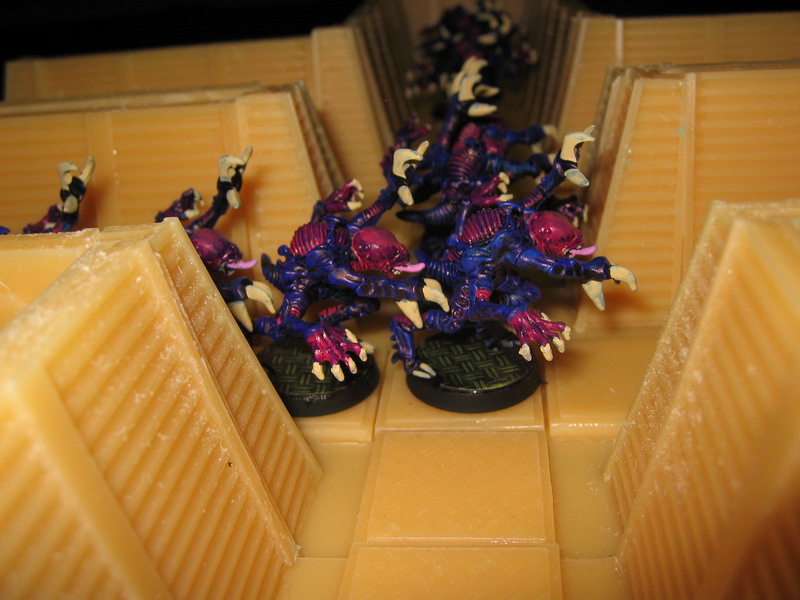
Step 5: The roomsFor the rooms I use for the 9 tiles in the center “Evergreen Scale Models” Sidewalk No. 4515.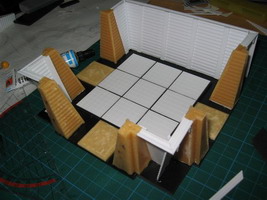
Step 6: End tilesThe 1st and 2nd Edition includes some end tiles. I decided to create some “iris bulkheads” for this.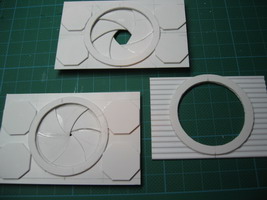
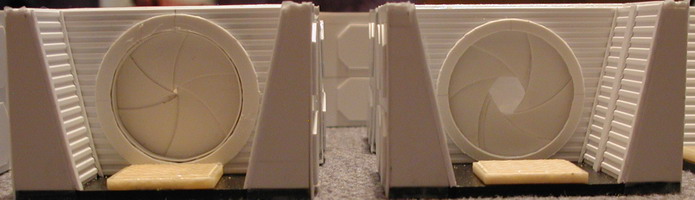
Step 7: All prototypes finishedHere you can see most of the core prototypes: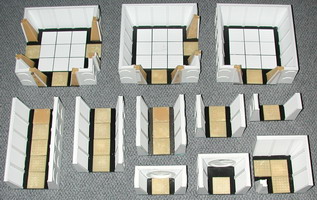 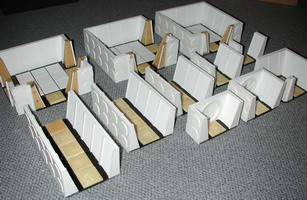
Step 8: Moulding the prototypesAnd here you can see the first moulds: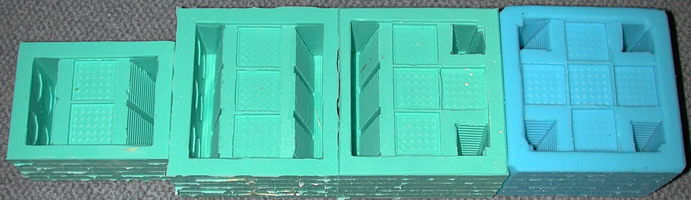
Corridor 2 tiles, corridor 3 tiles, corridor T and corridor X. For the X-corridor I tried a new silicon, which is cheaper, but has not the quality of the green one. It rips very easy, but it is good enough for this project. It’s from “Bethmann-Dental-Discount” and has the order number 2014 (2kg), 2041 (6kg) and 2040 (12kg). And finally all moulds are finished: 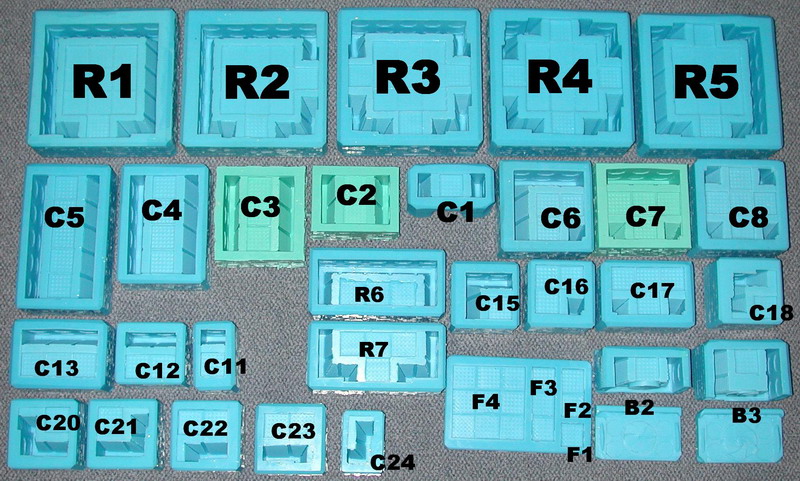 (Click on the pic for a bigger view) (Click on the pic for a bigger view)
And here you can download the overview of all tiles needed for the missions: Download Step 9: Casting all tiles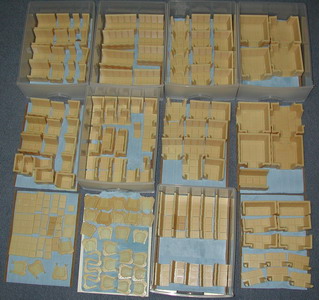 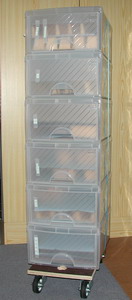 I need “only” 6 boxes for all tiles. I need “only” 6 boxes for all tiles.
Step 10: Sanding and washing all casted tilesTo get the right 90 degree angle for the tiles I use an electronic sander.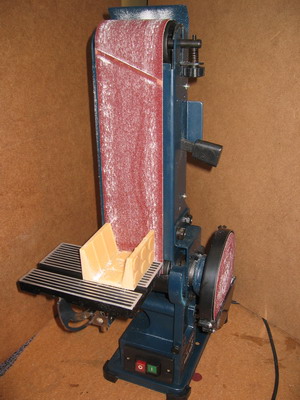
I can’t wait longer - I have to make the first setup: Mission 1 (Click on the pics to get a 800x600 view)  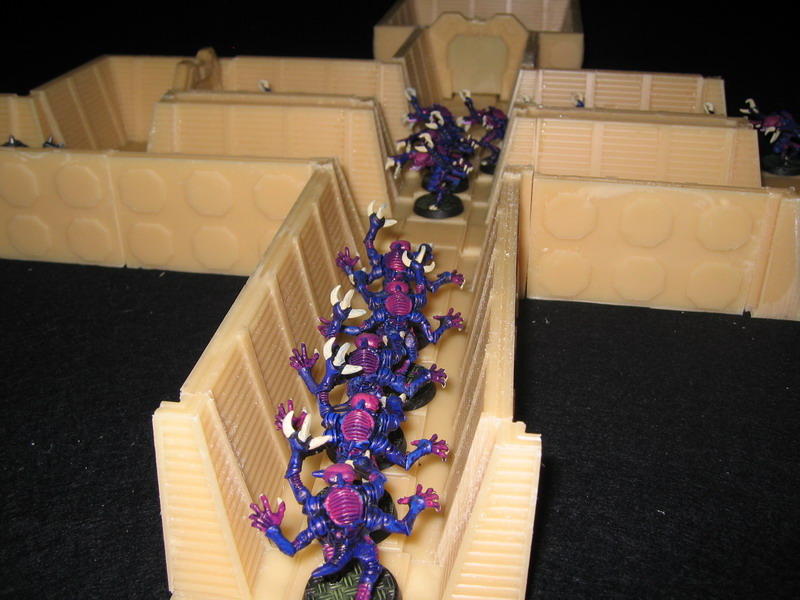
 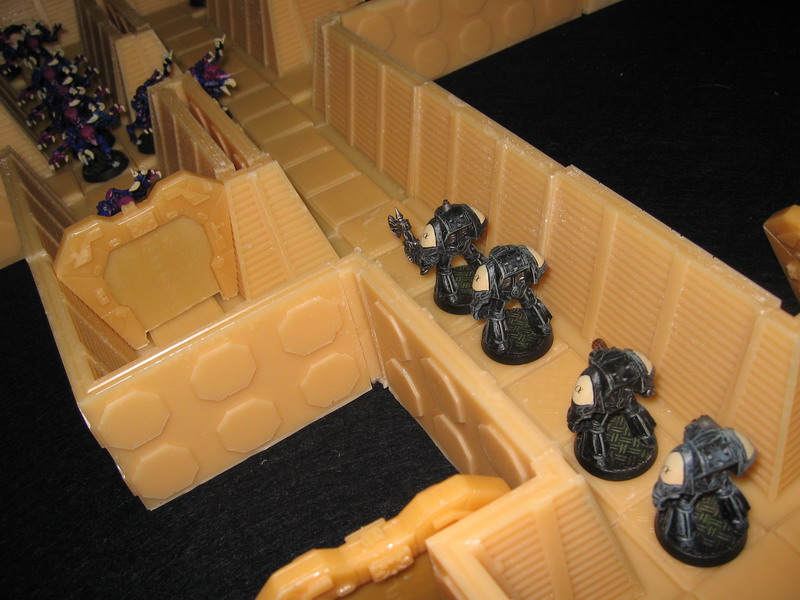
Before priming it is useful to brush all tiles with water and a little bit dish-washing detergent. Step 11: PaintingI plan to use black primer spray from Games Workshop and simply to drybrush the tiles with Boltgun metall.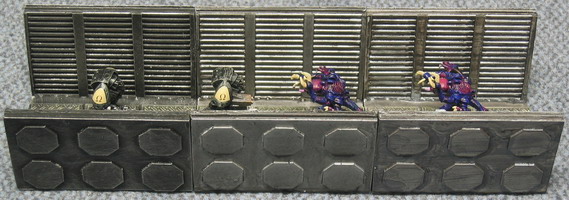
I made 3 tests: Left: Black primer, Boltgun drybrush Middle: Black primer, Grey painted, Boltgun painted, Black inked Right: Grey primer, Boltgun painted, Thinned black  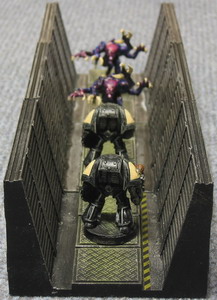
I want to add a black/yellow line besides the floor tiles, using white laser water-slip decals. Here you see a test with clear water-slip decals and in reality it’s too dark. In the end I (and the SpaceHulk community) vote for the Left color scheme. 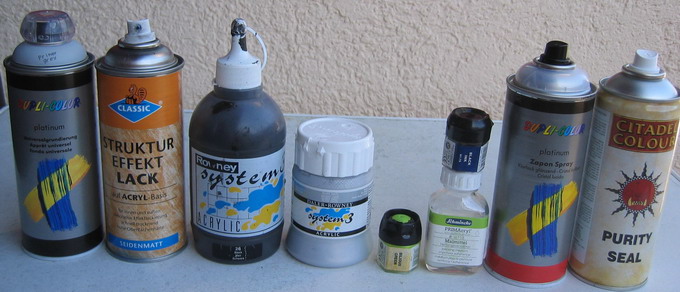
Step 12: FeltTo avoid moving the tiles while playing, each tile get a piece of “felt” underside. In Germany it’s called d-c-fix “Velour Selbstklebefolie”: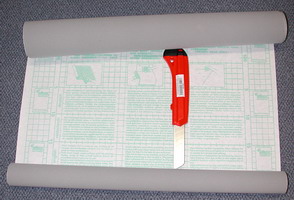
Step 13: Blips and CountersOf course a 3D-SpaceHulk needs special blips and counters. At the fair “Spiel 2006” in Essen I bought several green wooden discs (25 x 6 mm, ProductNo P0003c) and white wooden blank dices (ProductNo W0016) from www.spielmaterial.de . Using clear and white laser water-slip decals very nice and useful blips and counters were made: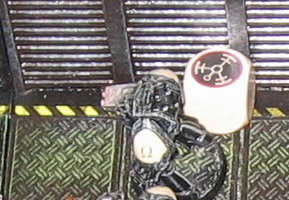 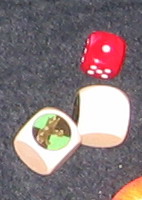 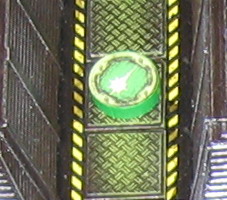
|
Subscribe to:
Posts (Atom)