Friday, November 15, 2013

28 terrain 1/35 kits

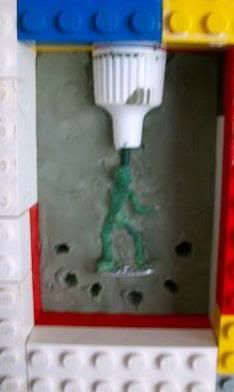
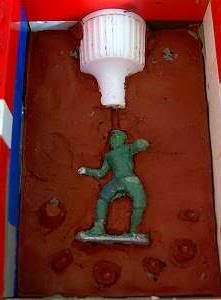
8mm scenery from 1/35 diorama kits

Hi again,

This week I thought I'd show a bit more on how I made the 2 warehouses in the background of last weeks figure shots.

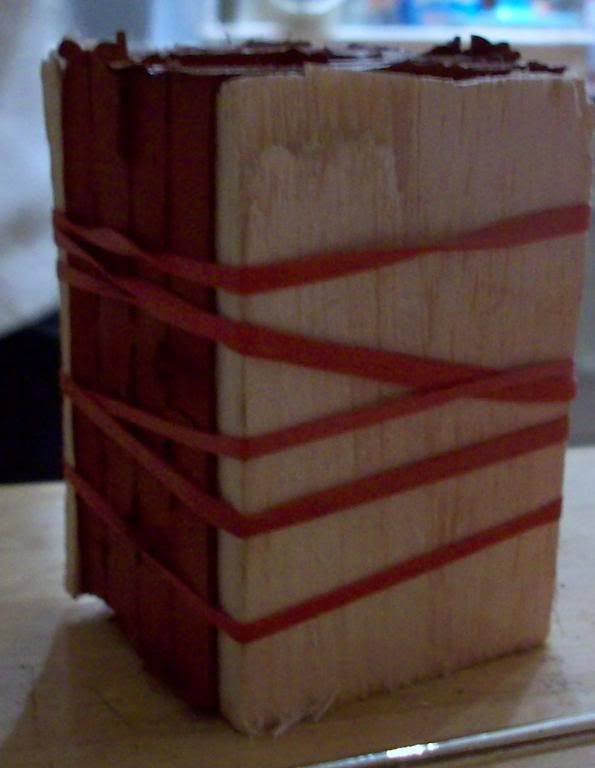
In a nutshell, they are made from a single Miniart Workshop kit in 1/35th scale. These are great kits as they contain loads of vac formed brick walls, roofs, rafters and injection moulded doors, windows and lamposts etc. Many purists would say the bricks are too large for 28mm but I think they look fine for gaming puposes.
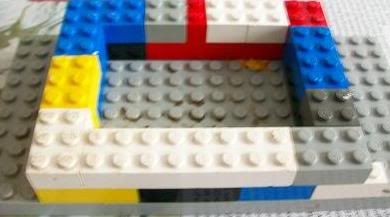
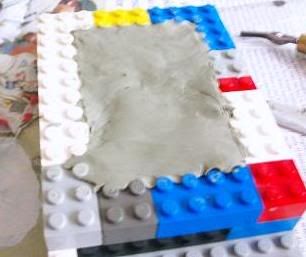
As I said, this particular kit has enough brick sections to make the inside of the building as well so all I did was glue each section to thin plasticard and made 2 buildings instead of having internal bricks.

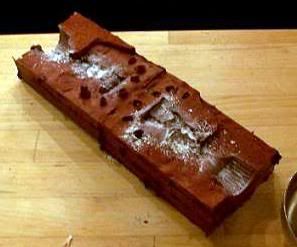
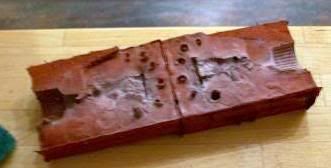
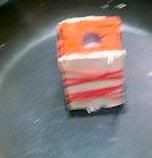
The tiled roof building is pretty much standard and the tin roof one was made using the extra bits. I had to make a new tin roof from thin corrugated card and used some of the supplied rafter sections to make the wooden planked loading bay door section. Sadly, you only get one double industrial door so I had to scratch build the two doors for the tin roofed building but this didn't take long. The roofs are removable and there's plenty of room inside for gaming.

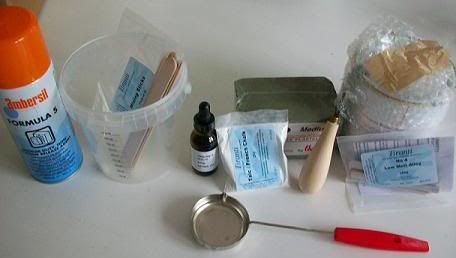
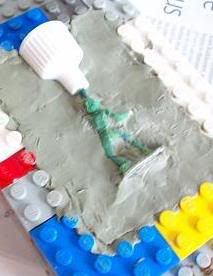
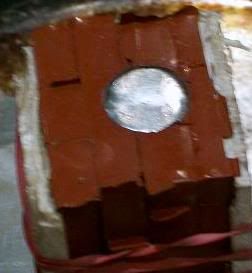
For the painting I undercoated them both with dark brown emulsion then simply used matt emulsion tester pots in shades of terracotta and green for the painted wood and codex grey for the concrete areas. I used a few GW brown washes to dull things down and rubbed some white chalk powder over some areas of brickwork to simulate paler cement (this makes a big difference to the overall effect).

Overall, I'm really happy how they came out as they are great for all sorts of periods and pretty sturdy as they are plastic.

Laters Si


instant mold sedition wars

If like me, you got a bonus Reaver body (from Biohazard-level Kickstarter for Sedition Wars) but need his arm and gun, you can use instant mold and green stuff to duplicate a gun and arm for him.

Here's how mine came out:

Posted Image
Posted Image
Posted Image

Not perfect, but as they say, good enough for government work.

Monday, November 11, 2013

Zombie Animals

Survival horror movies and video games have introduced us to the concept of animals afflicted with diseases, mutations, etc that turn these normally quite familiar and even beloved creatures into things of purest terror. When you think of it, we surround ourselves with fluffy friends and innocent animals as pets and food sources and take them for granted on a regular basis. So, when these things suddenly become a threat it the terror is sometimes even greater than that of seeing our neighbors shambling lifelessly down the street. I wanted this in my minis games.

Once again, I turned to what I had. I had dogs and pigs, a couple of horses. I wasn't quite ready to dive into zombie horses, just yet (though I'm sure I will) but the dogs and the pigs sounded like they'd do the trick. Pigs are wicked enough as it is and the idea of them suddenly turning into flesh-craving fiends was enough to make me jump at the chance to make it happen.

So, I had eight, skinny 15mm dogs from an old Essex minis set of Mayan Dog Handlers and three pigs from Irregular Miniatures. These would be my start. The process of converting them to horrid undead called for, in my opinion, a bit more work than simple repaints like I had done on the Peter Pig pirates. I decided that the most likely and simple place to show they were walking dead would be on their sides. Below is the quick and nasty recipe for zombie animals.

Photobucket

Step One
Figure out where you want to have them gored up and take your hobby knife and gouge out a few good chunks. If you are gouging the sides of the animal, make sure you keep the knife blade relatively vertical against the side of the creature and don't be too concerned with leaving vertical knife marks at the edges of the gouge (the reason for this will come later in the painting stage).

Step Two
Mix up some putty. I find that the softer putties work best for this as you are going to be working REALLY small here. Then, take the putty and push it in to the areas where you are making the gore. I formed the putty into the general shape of tears, entrails, and hanging flesh. Don't worry about being too specific in this stage. If it looks like a mangled piece of dog or pig, it's fine, just don't let it look too neat.

Step Three
After the putty has hardened all the way, prep the mini for painting like you normally would. I found that after I primed the animals, the putty work looked a lot more intrigrated into the whole minis and really came to life.

I won't go into too much detail on the painting process as everyone has their own style. I use a simple drybrush/wetbrush quick and dirty method with a few washes, afterward. The key point I'd like to make here is that you really need to look at the gore at this point. Much of it may be nondescript until you paint it up.

Remember those vertical knife marks? I learned that knife marks left in haste and carelessness made the perfect details to pick out with a little bone color as broken and exposed ribs. These really stand out and break up what otherwise, at this scale, looks like a bunch of red gore. Also, on one pig's face a mash of mangled putty at one side of his face was made all the more chilling by the picking out of a few spots of white to represent the still-present eyeball and teeth in the gore there. On one dog, I accomplished a nice hanging, disjointed jaw, by shaving off the existing lower jaw and repainting a hanging piece of putty with cleverly picked out teeth done in bone color.

Photobucket

Conclusion
I cannot street how much the painting part of this makes the animals. On every one of them, the gore bits came alive as soon as I picked out a few bony bits. Whether it was ribs, teeth, a leg bone or that milky white eyeball, the animals became truly terrible when I added those details. This could also be said for human zombies, but the figures I was using left fewer opportunities for me to do serious gore (with the exception of a few gut-hangers and limbless zombies).

Sunday, November 10, 2013

slime

lots of questions on how I did the glue effects on the dwarven forge tiles

lots of questions on how I did the glue effects on the dwarven forge tiles

I didn't paint the slimes - I got colored glue sticks from amazon - just make sure you get the correct size for your glue gun, most colored sticks are for the mini glue gun.... only a few are made for full size glue guns...(don't try to stick the wrong size in a glue gun).  ;-)  here's my learning xp on trying that(and how to fix the glue gun afterwards).  change glue sticks for the mixed colors.  kind of mix them together slowly.  red/burgandy is great as it looks like it just ate something
http://realminis.blogspot.com/2013/10/fixing-glue-gun.html


the extended "reaching" look   put on the glue and let cool enough so its not running, but still moves, tilt the tile and use gravity.... careful if its still too runny, as it will want to keep going and detach like a drip.... i found i had to keep tilting it back and forth if too running and even flip back and go back in, then try again when not so runny.
One on the right used this gravity effectfrom tilted tile  to reach out, one on the left, just dripped glue down the wall


webbing was just adding a thin strip of glue at a time and layering

layered thin trail slime effect


And the folding looking part - is carefully blowing on the glue to warp it a bit ( you can use a straw so you don't get your face so close)

bottom of slime below gravity effect - used a straw to blow the glue into the crevices and get the warped folded look

Various slimes

Various slimes

slime with skeleton bones rising up to take a peek

slime with skeleton bones rising up to take a peek

Watery slime with blood mixed in

slime with an arm sticking out

green slime

green slime

entrail colored slime that ate a dice

slime with skeleton bones rising up to take a peek

slime with skeleton bones rising up to take a peek

large slime with depression that a medium mini can fit in - here eating a trollop

large slime with depression that a medium mini can fit in - here eating a trollop

slimy green slime rising up to eat a trollop

green slime with blood in it

green slime with blood in it and clear parts eating a trollop

green slime with blood in it - think this was one of the best - blood and green mixed nicely

green slime with blood in it - think this was one of the best - blood and green mixed nicely - eating a trollop

green slime - arm reaching out

green slime eating a trollop, body can be vaguely seen in it

green slime eating a trollop body parts can be vaguely seen in it

slime

dome or rising / aggressive slime how too

dome or rising / aggressive slime how too:

start with a puddle of hot glue and cut off a piece of glue stick from another stick at an angle - let it cool for a few seconds so that its not quite as runny, but still liquid enough to stand your glue stick in it.  

let it cool

add a small layer on top - not too much or you will just melt your glue stick

let it cool and keep adding layers after each one cool, don't add too much to any layer, or you risk melting your earlier layers.

starting to take shape

now if you want it to be colored use the color you want - not too thick if you want the opaqueness to come thru nicely on the dome

let it cool

the opaqueness shows up nicely - as you add the layers of green, mix it with more clear/opaque to make a nicely mixed watery slimy looking puddle

viola - it looks like that slime is rising off the table to come and get you

green slime

turned out great!


Final step once you're done and slimes are all cooled - i always wait until at least the next day.

Is to seal the slimes - you can paint 1st if you didn't use the colors you like, but if you don't seal, the slimes will take fingerprints and fuzz can stick to them - this depends on the hot glue you use of course - some glue is better then others.

Saturday, November 9, 2013

casting/ mold making

« on: October 08, 2008, 01:35:41 AM »
Reply with quoteQuote

so i sat down with a bunch of ebob armatures in hand and thought....."what could i sculpt that is in high demand" and instantly i thought ZED (zombie). most of the dudes over on the future wars forum seem to be going bezarck for zombies at the moment. so i set about making one, basic features. and gave him a lopped off gory arm!
i was going to put him up for sale painted in his green state, but i decided not to and i decided to go one step further.....and cast him up.
most of the stuff needed to cast was provided in the kit i bought,


>silicone rubber (for making the molds)
>metal (for casting with)
>ladle (melting metal) chalk (for mold) release agent (to prevent walls of mold box and mold halves sticking together)
>catalyst (to help the silicone set)

and some other bits and bobs.
but i also needed (from home)

>two pans (one old and destroyable-reason being if there is over spill you might burn the pan) and one new or old (it doesn't matter)
>elastic bands
>Lego
>scouring pad
>thick or leather gloves (NOT woolen)
>matches or cocktail sticks
>tissue
>balsa wood

heres how the casting process went in stages

1. i took some Lego bricks and built a rough box around the figure allowing about 1-2cm on each side. (just to get an idea of measurements)

2. i then took some of the plastecene with the kit and pressed it into the box (only built to "2" bricks high"

3. i then half embedded the figure face down into the plastecene. and put a Vallejo paint lid in the top of the plastecene (to act as a weight in the gravity casting) and a small length of wire going to a part of his head.

4. i then built up the remaining two layers of bricks and gave the whole thing a liberal spray of mold release. (i MEAN liberal) i also stick a pencil nib into the mold a few times to create holds, to align the two halves when they are used in casting.

5. i measured out by eye the amount of silicone i needed and weighed it, then by using the manual worked out how much catalyst i needed.(it was about 16 drops). after giving the whole thing a good mix i poured it into the mold. and left it to set for four hours (you can leave it for longer but this is the minimal time i think )

6. when the mold is dry you can slowly pull away the bricks outside the silicone and peel off the silicone, if it is obviously not dry as you start to peel leave it over night.
once you have peeled it off and admired your work you can turn the mold in the box give it a very big spray of the release agent, remix the silicone and mold the second half.

......repeat step 6.....but at the end also leave the mold open for an hour to dry the two halves thoroughly.

7. i then took the two dry halves and talcked them with the French chalk. using the scouring pad. i blew off excess and bashed the two halves together lightly.


8. i then put two pieces of balsa either side of the mold and pressed it together. and wrapped it in elastic bands tightly.

9. i put the old pan on the stove and heated it for about 5 minutes.

 i put the new pan next to it on the marble surface and put the mold in it, the point of this is to catch over spill.

then i put the ladle on (with the , may i add. rather stupid PLASTIC handle) the pan and added enough metal to fill the mold.


 i actually used one stick to make about 8 figures. at this point i also put on my gloves
Remember children ALWAYS USE PROTECTION


10. i let the metal melt for about 2minutes reaching a very fluid consistency, and then i poured the metal straight into the mold and carefully/ LIGHTLY. tapped the mold with a wooden spoon.

11. i left the metal to dry for about 5 minutes the first time, but you really only need to let it dry for about 1-2 minutes,

KEEP IN MIND THE METAL WOULD HAVE BEEN MOLTEN THEREFORE STILL VERY WARM AND MAYBE HOT!!!
once dried i slowly pulled open the mold and found sadly that it hadn't worked.

MAIN REASONS WHY IT WONT WORK FIRST TIME AND NOT TO GIVE UP HOPE


> no air escaping (need to vent the mold) (might be a term i made up but it means that you need to cut lines with the sprue cutter to the top of the mold to let air out)
>not enough metal (just take the metal used RE-melt it and add more then try again.
>mold not ready / mold melts and or breaks. (sorry no fix you will have to start again)

if it does work CAST CAST CAST.

here are some of my results (varied success rate)

and here are some painted pics and scale pics.