Saturday, April 27, 2013

Converting and Painting Reaper Bones

Converting and Painting Reaper Bones


Although mine haven't arrived yet, the Reaper Bones Kickstarter shipments are wending their way across the world into eager hands, some of which have never picked up a paintbrush before. I had another Bones figure on hand to do some converting tests upon, and figured it might be helpful to go through my painting process to offer advice to folks who now have several hundred figures to paint up. Don't worry  new painters! It's not all that hard, it just takes some patience and practice. My tips after the jump.

Tools: Hobby Paints


Getting started on your Bones minis might seem a bit daunting. Paints? Brushes? What to pick? For paint, I prefer Vallejo paints. They come in small dropper bottles, so you can dispense just a single drop of paint if necessary, and they are remarkably smooth and "thin". There are a number of basic sets to get you up and running (for example Vallejo Orcs and Goblins Paint Set, Vallejo High Elves Paint Set, Vallejo Medieval Colors Paint Set ) or you can purchase them individually. I've found that I have more shades of brown than any other color (ranging from deep chocolate browns to khaki and ivory, with a diversions into greenish gray or warm orange red browns) because they are useful for all manner of belts, shoes, scabbards, hair, furs, skin tones, etc.

Games Workshop paints are also popular, but I found the flip top lids lead to the paints drying out after a year or two in some cases. Still, they seem to be lingua franca amongst figure painters, so it's easy to match colors when someone mentions a shade they used.

There are a number of other brands of modeling paints (Reaper, Army Painter, Coat D' Arms, just to mention a few) all of which are fine products. You should get them.

Tools: Craft Paints


Modeling paints can get pricey though, so if you are just starting out don't feel bad about picking up some craft paints. A number of figure painters use craft paints exclusively, and produce very good results with them. They are cheaper, more readily available, and come in just as many shades as hobby paints. Color matching is a bit trickier, and I've found they are thicker and require a bit of water to thin them out before applying. I freely mix both types of paints depending on the effect I'm trying to achieve.

Tool: Paintbrushes

I go through paint brushes frequently. I've tried to go cheap on brushes, and I don't think it's worth it. Steer well clear of "watercolor" brushes (the bristles are too limp to control easily), avoid synthetic brushes if possible. I try to find some natural sable hair brushes. I picked up some Army Painter brushes and have been very pleased with them.

Tools: Spray Paints

Reaper Bones don't require any spray primer, but if you branch out into figures of any other material (metal, plastic, etc.) you'll need a can of spray primer to give some tooth to the figure for the hobby paints to grip. Regardless you'll want a can of matte spray to apply after finishing a figure. The matte spray cuts down on the shine from certain paints and washes, and applies a protective coat to help prevent chipping or flaking to figures that will be handled by greasy pizza fingers on the table.

I use Army Painter Leather Brown Spray Primer for most of my priming, although I'll use a black primer or white for certain effects.  I typically use Testor's Dull Cote for my final overspray of finished models since I can pick it up at local craft and hobby shops.

Converting Reaper Bones


I was happy with my initial tests of painting a Bones figure. For my next test I wanted to see if they could be converted. For this bugbear I wanted to swap out its mornigstar for a spear, remove the spikes from its shield (which were a little over the top for me) and repose the shield arm so it was providing protection to the creature.


First I chopped off the morningstar and shield spike with a hobby kniffe. I also removed the shield to reposition later too. The Bones material is supposed to respond to heat, so I held the figure in boiling water for 45 seconds, bent the shield arm closer to the figure's chest and then held it in ice water for 45 seconds.


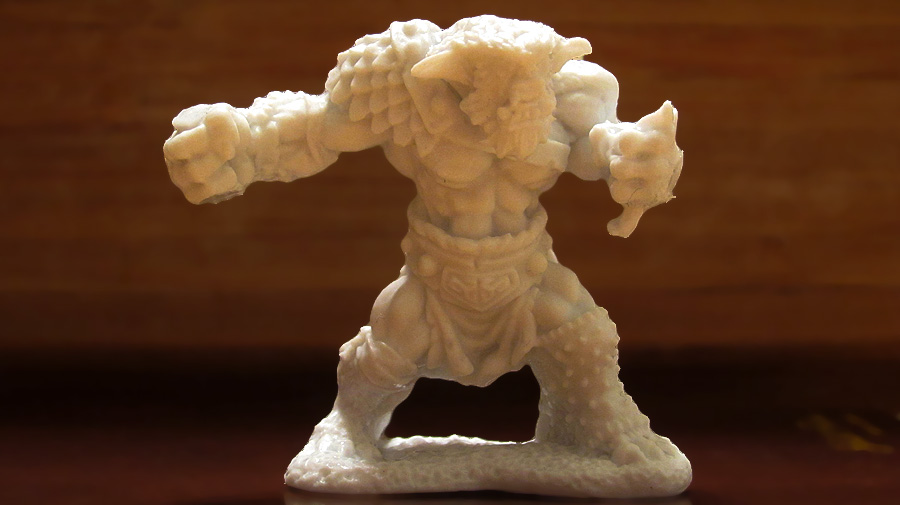
I drilled out the bugbear's weapon hand and used a wooden kebab skewer for the spear.


Painting Reaper Bones Bugbear


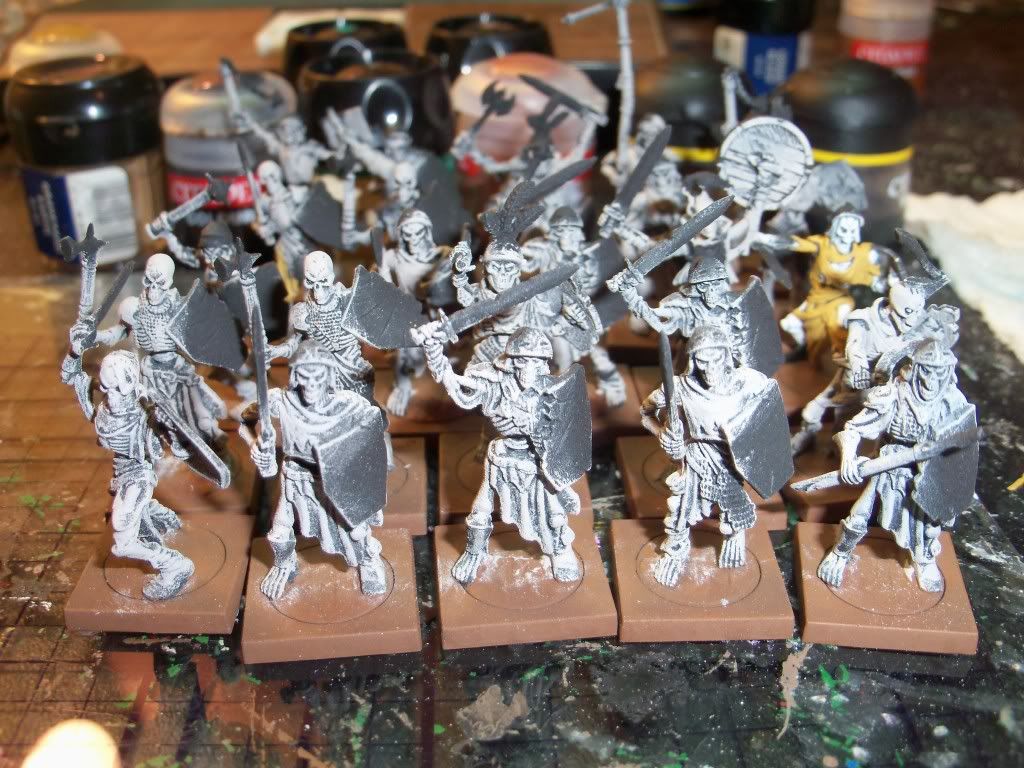
I usually start by "blocking in" the figure by giving each surface a solid color. I hadn't quite worked out the color scheme for the bugbear, so went about it bit differently this time. I started off blocking in the exposed skin and fur.


Skin blocked in with Vallejo Game Color Plague Brown . The Vallejo paint was a bit thin, but I was pleased with how it took to the Bones material. It almost acted like a wash, seeping into the cracks and crevices of the sculpt, and leaving a tint to the raised areas, naturally shading the figure. I picked up the technique of painting "inside out" from other mini painters. Start with the flesh, then work out (clothing next, followed by boots, belts, straps and packs that are on top of the clothing)


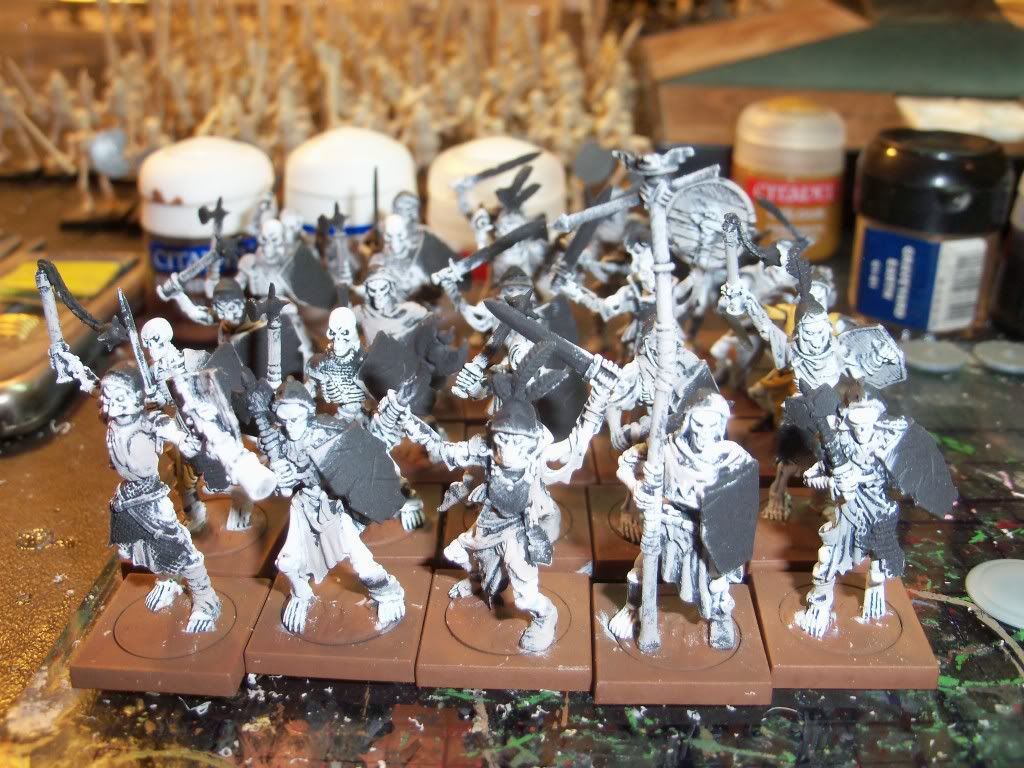
Adding Vallejo Game Color Beasty Brown to the darker fur areas on its head and back. To smooth the transition from the brown fur to lighter skin, I dipped my brush in water, the dipped it in a drop of the paint and applied it to the border between the fur and skin. The thin paint tinted the lighter yellow skin and created a smoother transition between the two.


Mostly blocked in. I chose a warm yellow and brown for the bugbear, and used Vallejo Red Leather and a dark green (a mix of Vallejo Black and light green craft paint) for the various leather armors and cloth items. I wanted the creature's fur and skin to be quite a bit darker than what you see here. The more colorful reds and greens should add some visual interest to the creature, but you can see I've left some of the straps unpainted at this point. I wasn't sure how dark the eventual skin and fur were going to turn out, and I wanted to be sure the straps placed over its skin would contrast.


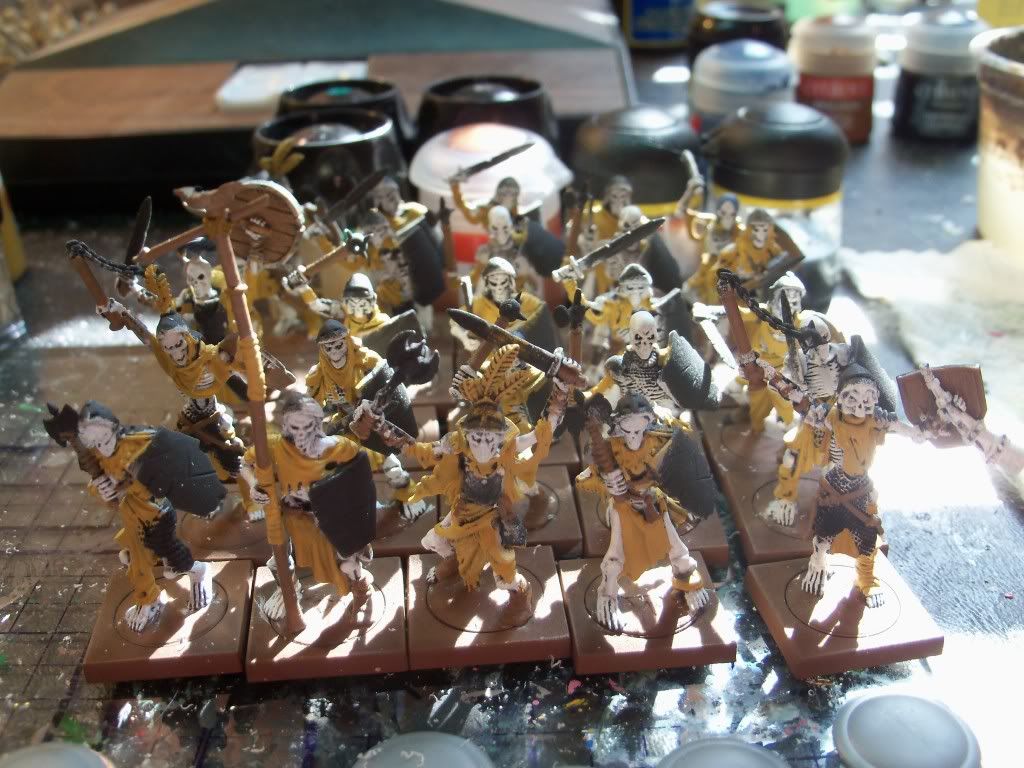
Next up I added a dark wash. I usually use Games Workshop washes, but I didn't have any in the deep brown shade I was looking for, so I created my own. I put down two drops of Vallejo Game Color Charred Brown on my palette and loaded my paint brush with water. Mixing the two gave a very thin deep brown paint. Brushing it over the brown fur, it worked its way into the deep crevices and tinted the highlights.


I washed all of the exposed skin and fur of the bugbear. Notice how it picked out the details of the creature's face, defined the fingers and toes, etc.


Now that the fur and skin were closer to their final color I picked a light gray for the straps to contrast with the deeper skin color, and finished blocking in the rest of the colors. With a similar wash to the other straps, belts, cloth, and armor, this figure could be considered table ready. I went on to add a few highlights and pick out some details though to finish it off.


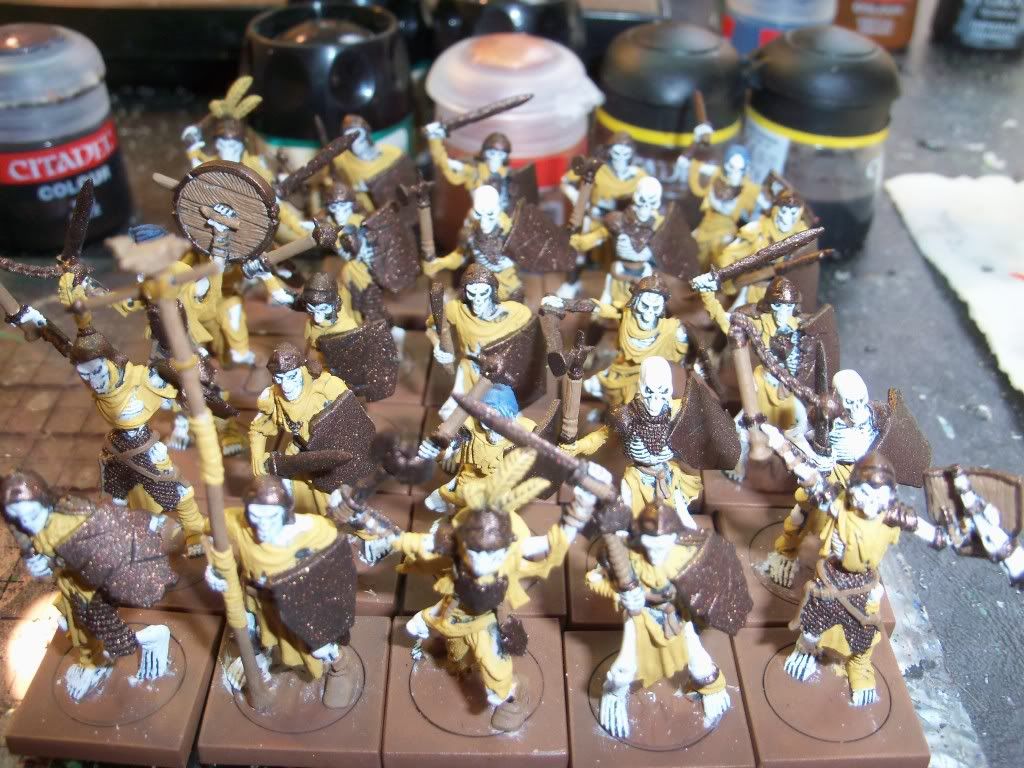
The scaled shoulder armor was blocked in with red leather (made from dragon scales maybe?). To highlight them I mix a drop of the Red Leather and a drop of light yellow craft paint. I painted the bottom half of each scale with this lighter shade. Next, I added another drop or two of light yellow to the mix and painted just the edge of each scale. It's a bit fiddly. I used my small detail brush, and hold my breath while I paint the scales. The goal is to get a suggestion of color on each scale, so that at a foot or two of distance the scales "pop".


For metal studs, I painted each black and placed a dot of Vallejo Oily Silver on each one. Teeth were picked out in Vallejo Bone White, tongue in Red Leather, and raised surfaces of the skin (knuckles, the edges of his pecs, thigh muscles, etc.) were given a dab of Vallejo Plague Brown. I wasn't happy with the original shield, so I used the boiling water method to flatten it, then reglued it with super glue into a more traditional position.

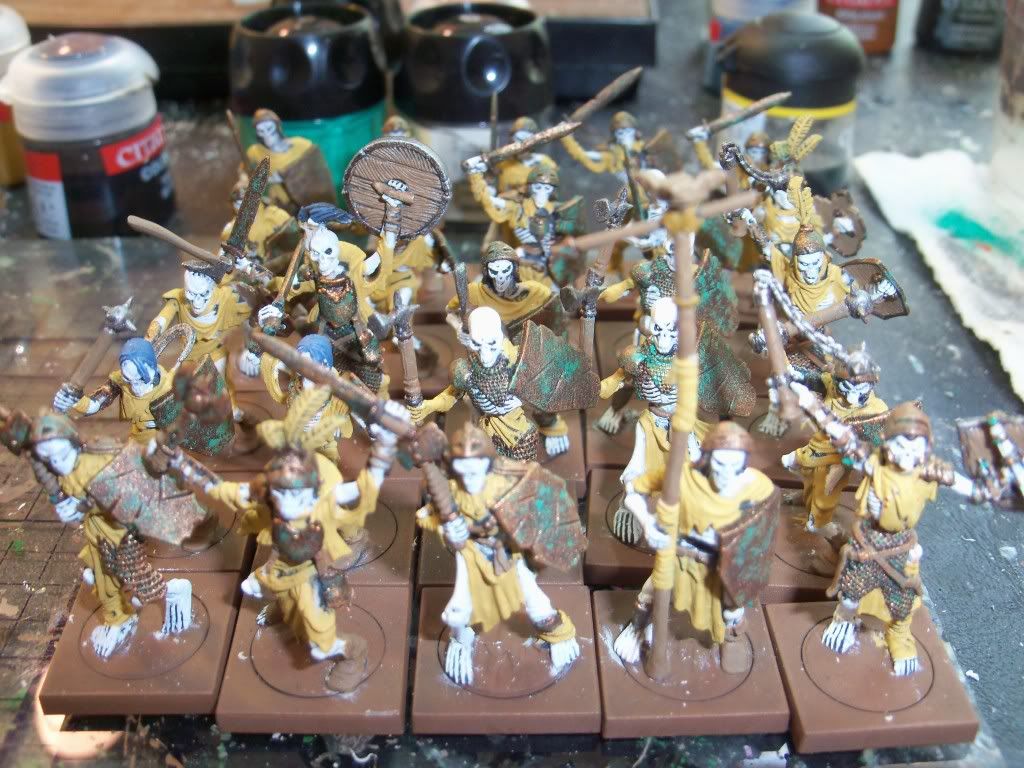
I left the base unfinished as I'm planning on creating a unit of these creatures for some mass fantasy battles in the future and will base them all together, but that's a post for another day.


One of the big revelations to me in painting this bugbear up is how well it takes thin paints. The white color of the Bones material allows you to gradually build up colors by applying multiple layers of thinner color. Also, the details on Bones are good, but comparing them to metal versions I think they are a little shallower. I'd be very careful in applying thick paint as it is likely to settle into crevices and obscure detail more easily. Good luck with your own painting! Patience and practice is all it takes :)
You might also like:

Monday, April 22, 2013

dip method

Though I love the look of painted figures on dramatic terrain, I find painting to be one of my least-favorite parts of wargaming.

Since I discovered dipping a few years ago, it has revolutionized my hobby experience. I'm painting more figures, enjoying it more, getting better results and spending far less time per figure.

Dipping is a shortcut method, and advanced painters may find little of use here, but for those who want tabletop-quality models quickly, dipping is an excellent option. It is not only quick and easy, but can also be quite inexpensive. It seems that every other week the same questions about dipping appear on the forums I frequent — and to that mass of interest I present the following article on brush dipping.

What is dipping?
For the purposes of this article, dipping is the application of a polyurethane-and-stain combination product (referred to hereafter as the dip) to a miniature to create shading and highlighting. Traditional dipping involves the immersion of the figure in the dip. Brush dipping refers to using a brush to apply the dip instead of immersion, and is the subject of this article.

What does dipping do?
Dipping is a time-saving painting technique that in one step achieves the following results:
  • Gives a shading effect to the model
  • Darkens the recesses of the model like a wash or ink
  • Creates a pseudo-highlight as it settles away from the edges of the miniature leaving it lighter than the rest of the model.
  • Provides an extremely durable protective coating on the figure.
Why brush dipping?
In the author's opinion, applying the dip with a brush (called the "splash on" method by some) is preferable to the immersion method for several reasons. First, it allows the hobbyist more carefully control the application of the dip. Second, by virtue of not requiring the painter to shake off the excess dip, it can be done indoors with far less mess, effort and preparation. Lastly, there is not a major difference in the results or the amount of time required.

Army Painter Quickshade vs. Minwax Polyshades Satin
Might as well get this one out the the way early. Much ink has been spilled on the interwebs over whether Army Painter Quickshade is a re-labeled variation of Minwax Polyshades, a highly specialized revolutionary wargaming hobby product, or something in between.

Having never used Army Painter products, I cannot say for certain how they compare to Minwax. However, I have extensive experience with Minwax and can recommend their products with confidence. Also, I appreciate the fact that they cost one-quarter to one-third the price of Army Painter's products. I will be using Minwax Polyshades names for this review, but for those using Army Painter, the approximate Quickshade-to-Polyshade equivalents are below.

Army Painter Quickshade/Minwax Polyshades equivalents and Description
  • Soft Tone/Pecan — A light brown dip, best used for applications where only a little shading is called for. This is my least used dip, but good to have around.
  • Strong Tone/Antique Walnut — A more heavily pigmented brown dip. This general purpose dip is good for almost everything. This is by far the most common dip I use.
  • Dark Tone/Tudor — This is a unique dip with black pigment. It is best used with colors that you would not want to add a brown hue to. Blues and some greens can look great with this dip, though it is by no means limited to those colors. I find myself using this dip more and more frequently.
To choose the correct shade of dip for your project, I recommend visiting the extensive Army Painter Gallery pages. The galleries are searchable by game, army, and basecoat color and often provide side-by-side images of the results of the three different shades of dip.

Supplies
  • Dip — See above. Minwax Polyshades are carried by most US hardware or home improvement stores. The exception is Tudor, which can be hard to find. I've either found it, or special-ordered it from ACE hardware. It's worth the effort. Army Painter products are available online or at most gaming stores.
  • Paints and Brushes — Whatever you normally use for painting your figures is fine for this. I use cheap craft paints and brushes, but there are definite advantages to high quality supplies as well.
  • Brushes specifically for the dip — Buy cheap brushes for applying the dip. As long as the bristles aren't too coarse, any ultra-cheapo craft brushes that aren't too small will do.
  • Paint thinner/brush cleaner/mineral spirits — The dip is not a water-soluble product, so you will need some paint thinner for brush cleaning and general cleanup. Don't bother with specialized model thinner. A can of mineral spirits from the Hardware store will do just fine.
  • A small glass jar to hold the mineral spirits.
  • Newspaper for protecting your surface and wiping dip off your brush.
  • Matte varnish, either the brush-on variety or a simple spray can. This will take away the shiny surface that the dip leaves when it dries.

Brush dipping step by step
Let's follow the brush dipping process with a group of fantasy elves.

1) Priming — As dipping will darken the model overall, I recommend a white basecoat to keep the initial painted colors brighter. Grey or colored primers may be acceptable, but try to keep them a shade or two lighter than you would otherwise use.


2) Painting — The basic dip technique requires only basic block colors. Neatly applied base colors are all that is necessary, though some folks will do a bit of highlighting before the dip. At this point, I also do the basing (sand, one color of paint) but no highlight/drybrush or foliage. As with the primer, remember to compensate for the darkening effect of the dip by using colors a shade or two brighter than you otherwise would.


3) Prepare the dip — Stir the can of dip to make an even consistency. It should be a pretty smooth flowing liquid. If it seems to viscous (sometimes it will thicken over time), you can stir in a bit of mineral spirits, but don't overdo it.

4) Apply the dip — With one of your dip brushes, apply the dip all over the model. One or two brushfuls of dip is usually enough for one 28mm infantry model.


5) Draw off the dip — With your dip brush, dab away dip from the places it is pooling on the model. Wipe your brush on the newspaper often. You want the dip to darken the recesses without completely filling them and to shade the other surfaces without making them look overly muddy or pooled. It's ok to leave some on the base to shade the basing as well. At this point and periodically throughout this process, it's a good idea to clean off your brush with some mineral spirits.

6) Final draw off — After you've drawn off the dip from the model, check again to make sure that it hasn't pooled up again, and then set it aside. If at any point in steps 4 through 6 you find you've missed a spot, you can always apply some more dip. The pics below show very clearly how the dip will pool and how it looks when the dip has been properly drawn off.


7) Last check — After a few minutes, or when you've finished 5 to 10 models, check your figures again. At this point, the dip will have thickened too much to be drawn off, but if you find that it's pooled or gotten too thick at any part of the model, a brush dipped in mineral spirits can be used to clean off that spot (or the entire model). When you've removed the offending gunk, you can repeat steps 4 through 6 for that section of the model.

8) Allow to dry for 24 to 48 hours — I highly recommend 48 hours if possible. If the dip is not completely dry, it can interfere with the later steps. Matte spray on top of not-quite-dried dip can produce an ugly crackled film.

9) Edge the base and do any additional painting — Most of my models will receive very little additional painting. The most common additional painting I do at this stage is painting the edge of the base, drybrushing the base texture, adding eyes and sometimes drybrushing any fur on the model. If you find that the glossy post-dip surface is too smooth and slippery for effective painting, you can proceed to step 10 (matte finish has more "tooth" than gloss finish), then return to step 9 and repeat step 10 again.

10) Matte finish — A matte finish will take away the glossy shine that occurs when the dip dries. It also provides an additional level of protection. I use clear matte spray from the hardware store or artists brush-on matte varnish, both of which are very affordable. Lately, I've been using the brush-on stuff more often, as it is much easier to apply at my desk, dries faster, and requires no additional setup.

10) Base foliage — Some folks prefer to add foliage to the base before the matte finish and some prefer to do so afterwards. I prefer before as the matte finish can help in adhesion, but it's by no means a firm rule. With the elves here, I was going for an early 90's Games Workshop look, so I went with the old-school method of ballast painted green with a drybrushed highlight and no foliage.


11) And you're done! Now get those miniatures to the table!

Want to see more? Here's a gallery of miniatures from my collection that have gotten their own dip treatment.

These two Void Junkers, the fantasy giant and the dwarf were dipped with Minwax Antique Walnut.


This Reaper Echidnox was also dipped with Antique Walnut. I include it as an example of heavy drybrushing applied after the dip.


This Scots Terrier shows that even over a fairly dark brown, the black pigment in Minwax Tudor can still provide contrast.


The Jaguar's spots were not painted first. The coloration is all due to the Tudor dip!

Friday, April 19, 2013

Painting Skeleton Warriors

I have a lot of skeleton warriors to paint for my Vampire Counts army, so lately I've been working on coming up with a good method for painting them. Since I have many to do, I need a very quick assembly line method of painting them that will look decent enough from a normal viewing distance during a game. I don't need them all to look perfect when viewed close up, since they will be packed together in units and viewed from a distance. They just need to look good as a unit, and I need to paint a lot of them.

With that in mind, here is the process I have come up with. It is fairly fast, and gets pretty good results. The unit I tested this method out on was a unit of 25 Mantic Games Skeleton Warriors. All the paints I used are from a prior set of Citadel Paints, so the names are not the same in their current paint line. However, there are probably equivalent colors that just have different names now.

I first prime the models black, then start out by painting all the bases Calthan Brown. Then I drybrush the bone and cloth areas with Dheneb Stone. I don't worry about getting it anywhere else, just make sure to get the bones and cloth. The main reason for this is to make the paint go on easier in subsequent steps, so that none of the colors will require multiple coats.
Painting Warhammer Mantic Skeleton Warriors

Paint all the bones with Skull White, leaving black in the recesses.
Painting Warhammer Mantic Skeleton Warriors

Paint all the cloth with a base color, in this case Iyanden Darksun to give them yellow uniforms. Leaving black in any recesses should be fine here, too, but for the most part it was easier not to. You also want to be careful not to get any on the bones. Drybrushing a lighter color on the cloth areas here might improve the result, but I didn't there. I may try that out and see if the result seems worth the time it takes.
Painting Warhammer Mantic Skeleton Warriors

Paint all the wood parts and leather straps with Graveyard Earth. You could use a different color for wood than for leather if you want, but I didn't find that it made much difference.
Painting Warhammer Mantic Skeleton Warriors

Paint all the metal parts with Tin Bitz.
Painting Warhammer Mantic Skeleton Warriors

Here I stippled Vile Green on the metal areas that I wanted to be ancient, aged bronze. Jade Green can also be used, or a combination of the two. Here I just used Vile Green. If you want steel weapons, skip this step.
Painting Warhammer Mantic Skeleton Warriors

Drybrush Dwarf Bronze on the Bronze metal areas. For iron or steel, drybrush Boltgun Metal. I did this in two passes, getting the large areas first, then doing a second pass with a smaller brush to get the small or hard to reach areas. This way I could get it all without getting too much of the paint on other areas where it didn't belong. Actually, I used a similar two-pass method for doing several of these steps, so I could do the large areas quickly in the first pass, and fill in smaller details in the second without messing up areas I had already finished by using too large of a brush.
Painting Warhammer Mantic Skeleton Warriors

Wash Devlan Mud over the cloth, wood, and leather. Try to avoid the bones and metal as much as possible. If the cloth was some other color, this might need to be two steps, with a brown wash on the wood and leather, and some other color over the cloth. But Devlan Mud seems to work well for shading a wide range of base colors, so it might work for most cloth colors.
Painting Warhammer Mantic Skeleton Warriors

Wash Badab Black over the bones. After this dries, you could do a quick drybrush of Skull White again over the most prominent areas of bone, like the faces and hands, to lighten them back up a bit. This takes very little time and I think improves the result, so I find it worth doing. You can do the same with some of the cloth areas that are most prominent if you want, though I didn't.
Painting Warhammer Mantic Skeleton Warriors

I think the results look pretty good, and the method is pretty fast, but it could probably be improved upon. Please let me know if you have suggestions on how to improve this method, either by getting a better result without adding much time, or by reducing the amount of time it takes while getting a similar result. Obviously you can save a step if you don't want the weapons to be Bronze, but I really like the aged bronze look, so I thought it was worth the extra time. Let me know what you think.

Saturday, April 13, 2013

Painting Vampire / Undead Flesh

Painting Vampire / Undead Flesh

Vampire and Undead Flesh Doesn't Have to be Difficult
 
I was asked, not so long ago, about painting vampire or undead flesh; this was in reference to the Vampire Count Coven Throne that I had previously painted.  I have a few different ways of painting vampire/undead flesh but this is the way that I've chosen to do it recently.
 
A lot of the time I'm looking to make vampires or undead creatures look recently dead and cold but not necrotic or decaying.  Additionally, I don't want them to be confused with an ice or frozen creatures; yes, that comes across my table often.  So, what to do?
 
When the Coven Throne came out I liked the purplish hue that their vampiresses took on.  I never did find out how they did it; I admit I didn't look too hard though.  I assumed it was layering with Hormagaunt Purple and perhaps Astronomicon Gray but...I didn't feel like doing all that Dallimore work.
 
So, I came up with something I could do quickly and with few steps...
 
 
It starts very simply, base coat all flesh with Fair Shadow from Reaper.  Fair Shadow is rather creamy colored with a hint of pink, as are the rest of the tones in the triad. 


 You'll notice that, in the base coating process, I'm not neat and tidy; you don't have to be.  After base coating and a thorough drying period wash with a light purple.  Bob and I mix our own.  You'll see in that first picture that the purple is rather bright and light; this helps with the undead appearance and coolness without becoming icy looking.


Next, after the wash dries thoroughly, use the Fair Skin Highlight and apply highlights.  Apply the highlights to brow arch, nose, cheekbones, jaw, chin, breasts, collar bones, shoulders, arm muscles, fingers, knees, fronts of thighs...etc.
 
If you have trouble thinking of where you should highlight I suggest looking at photographs of models in swimsuits or lingere because the lighting glistens and hits the high points.
 

If I'm feeling overkill I'll use the middle tone, Fair Skin, and then do the Fair Skin Highlight...but I didn't choose to use that on these figures. If the Fair Skin Highlight doesn't appear dead enough you can alway use white to take it a step lighter and then use that as a final highlight. I do that sometimes.

 
These lovely ladies are from the Seamus set of Malifaux figures.


I like to give my zombies that milky, undead eye without pupils.


Seamus is actually alive, so his skin is colored differently with Golden Shadow skin and Golden Highlight with a reddish-brown fleshwash.


This is a better view of the colors used.  I suggest purchasing these exact paints if you have a few undead to paint.  The keep on the Reapers is good and they are nice paints - remember to shake them regularly.  The triad sets that Reaper came out with are very handy because it takes the guess work out of choosing or mixing colors.