Mar 192010
(Originally posted 100319)
I was asked to show how I made the step pyramid we used in our Song
of Blades campaign recently. Luckily, I had prepared a few pictures of
the different steps. Remember, click each image for a larger view!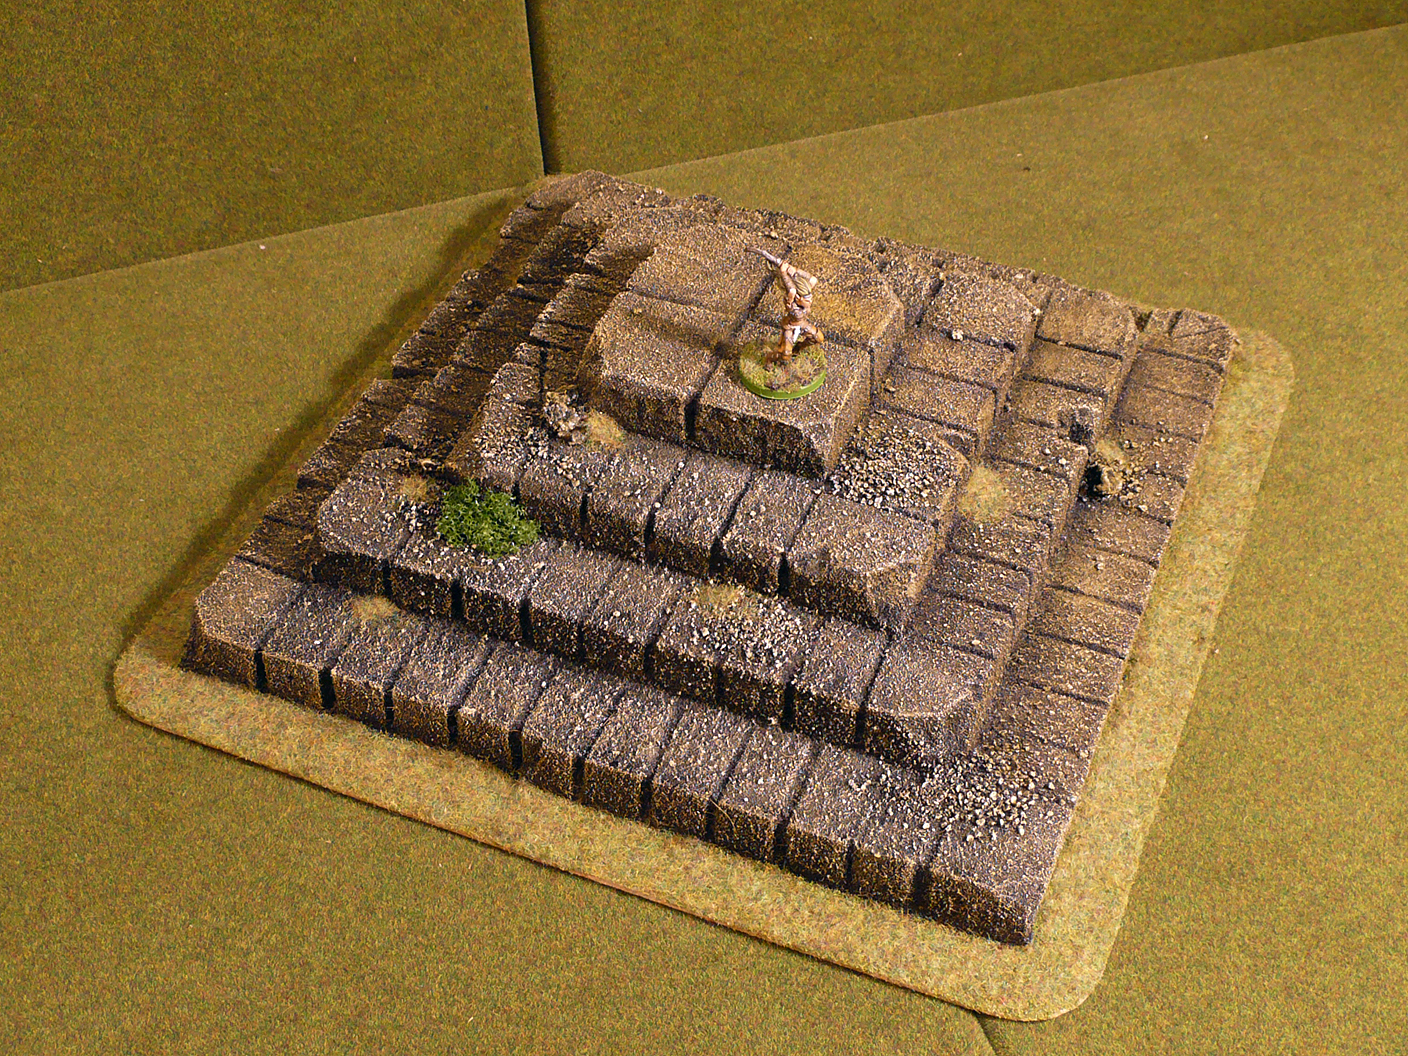
Step 1: The basics
I started out with a masonite sheet which I’d cut to a 30×30 cm square. I rounded the corners and gave the edges a slight bevel by sanding. I also sanded the surface for better glue adhesion.
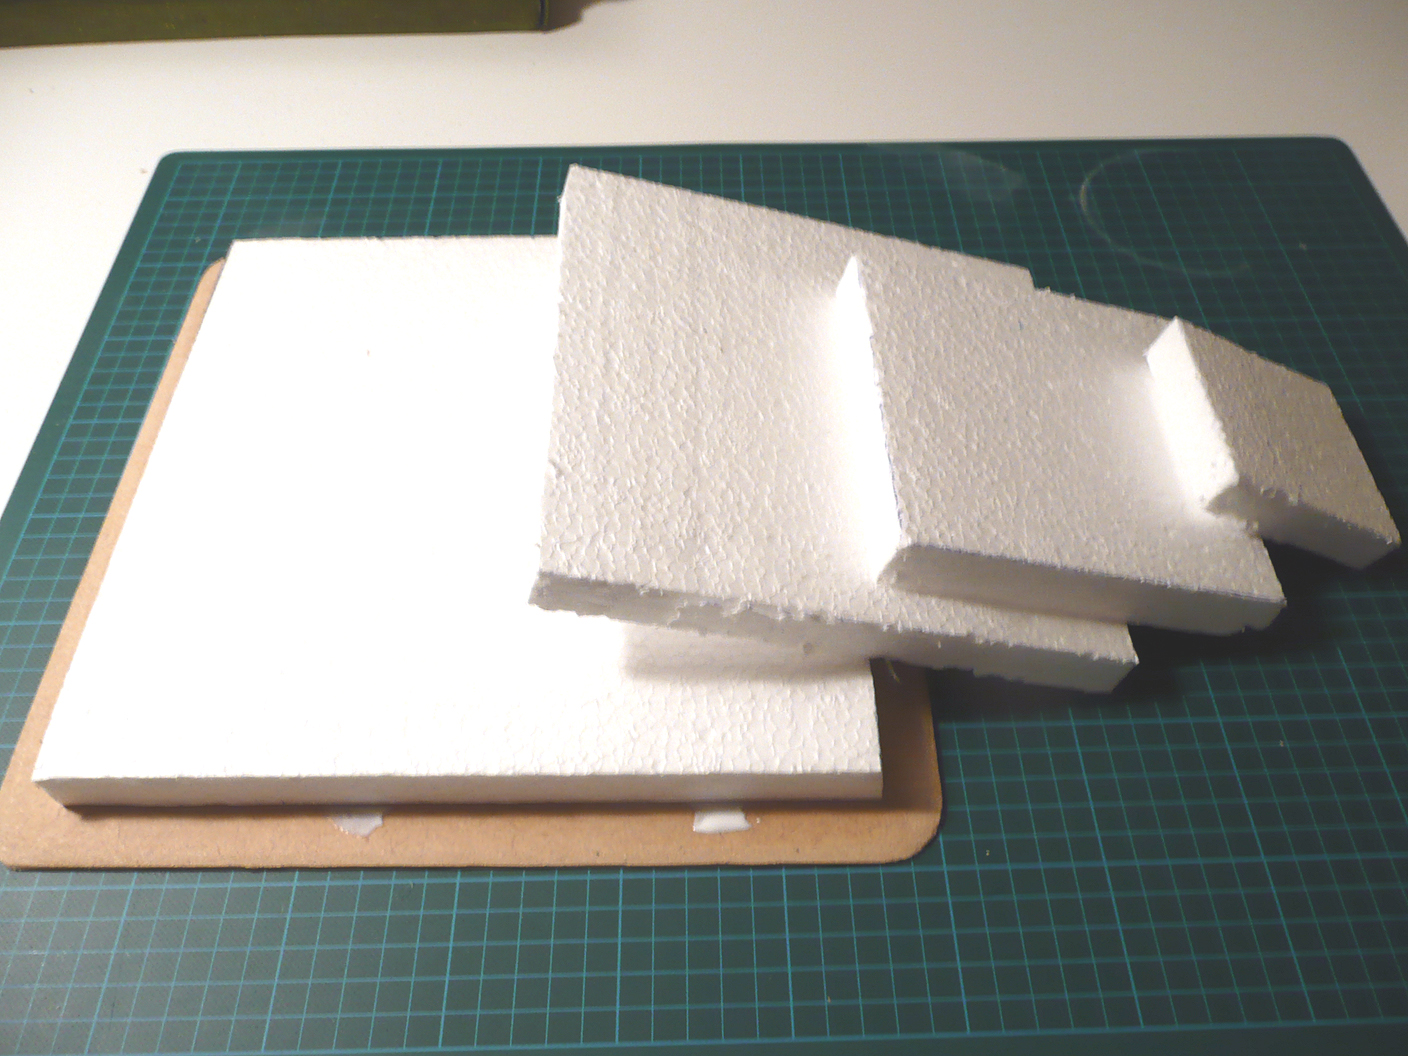
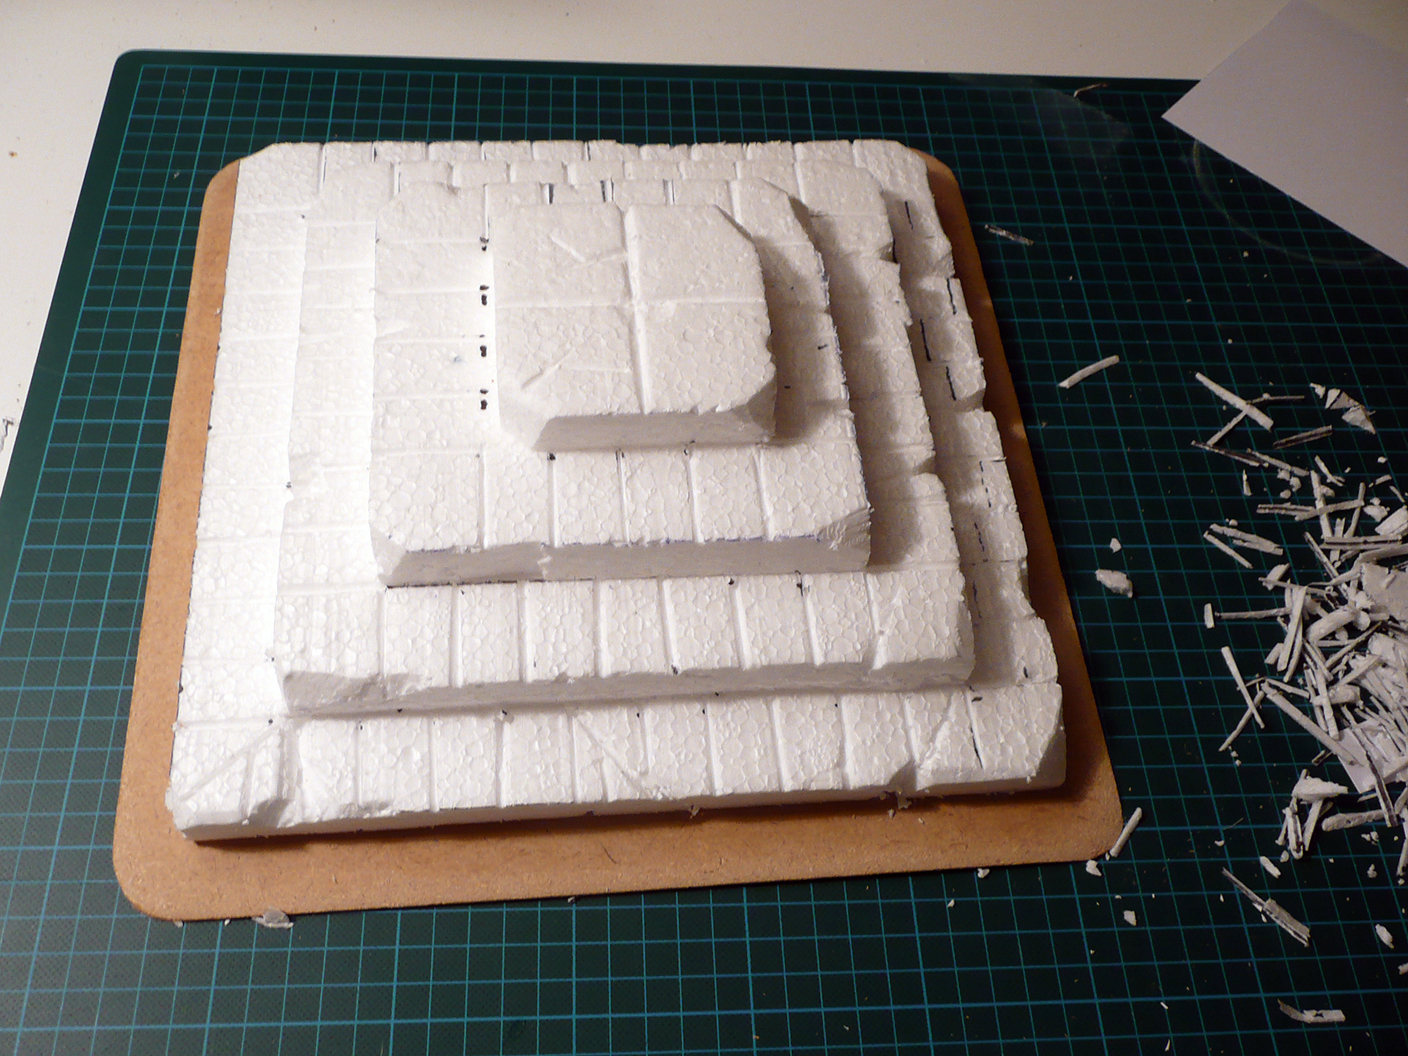
Next, I cut out regular white styrofoam (the expanded kind, made up of little styrofoam balls). It’s generally frowned upon by terrain builders, but it was the only kind I could get. It’s not as malleable as pink foam, but it works fine for this project.
I cut out four squares, decreasing the edge size of each by 4 cm. These form the four levels of the pyramid. I didn’t take particular care when doing this, but still used a steel ruler and tried to get the cuts as straight and horizontal as possible. Most important here is to have a sharp blade and use a gentle, loooong sawing motion when cutting. You can’t cut styrofoam as you cut card or foam core. It’ll only mess up the cuts and make the foam crumble or curl.
The result ended up like this:
Step 2: Joining stuff together!
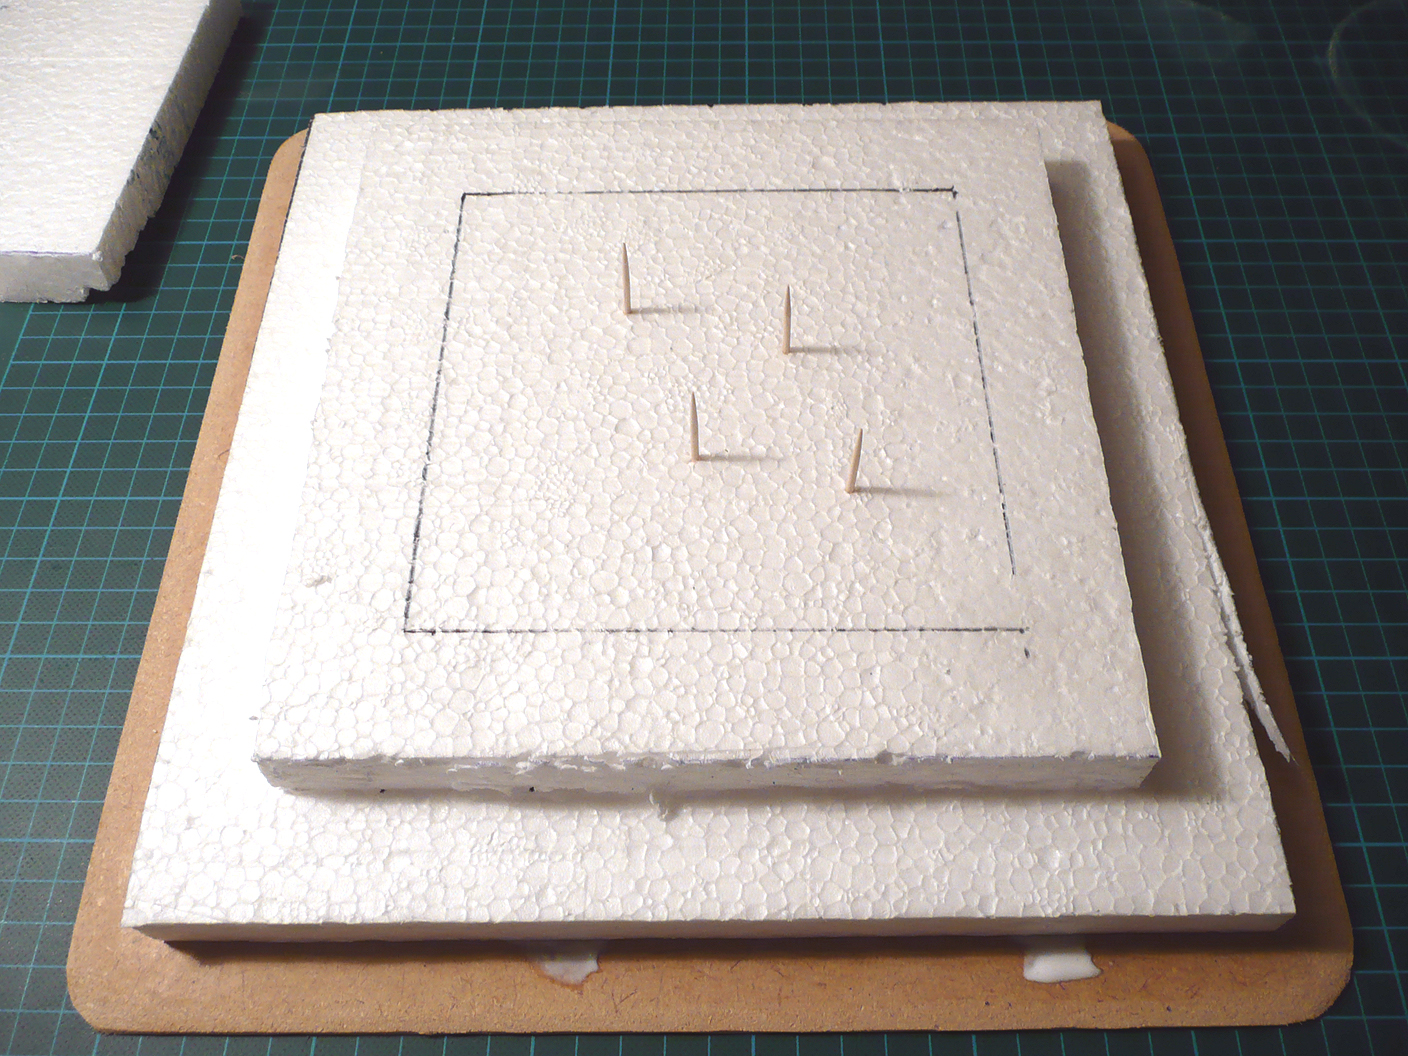
First thing I did here was to just tile the levels on top of eachother (and the base) and draw out an outline to get the levels fairly well aligned.
I then applied a liberal amount of PVA (wood glue) to the base, pressed down level 1, slid it around to spread the glue love and finally aligned it. Once in place, I pushed a few cocktail sticks into level 1 near the center, to rely not only on glue for adhesive support. Once again, I applied liberal amounts of glue to the area which would be covered by level 2 and then put level 2 in place, like this:
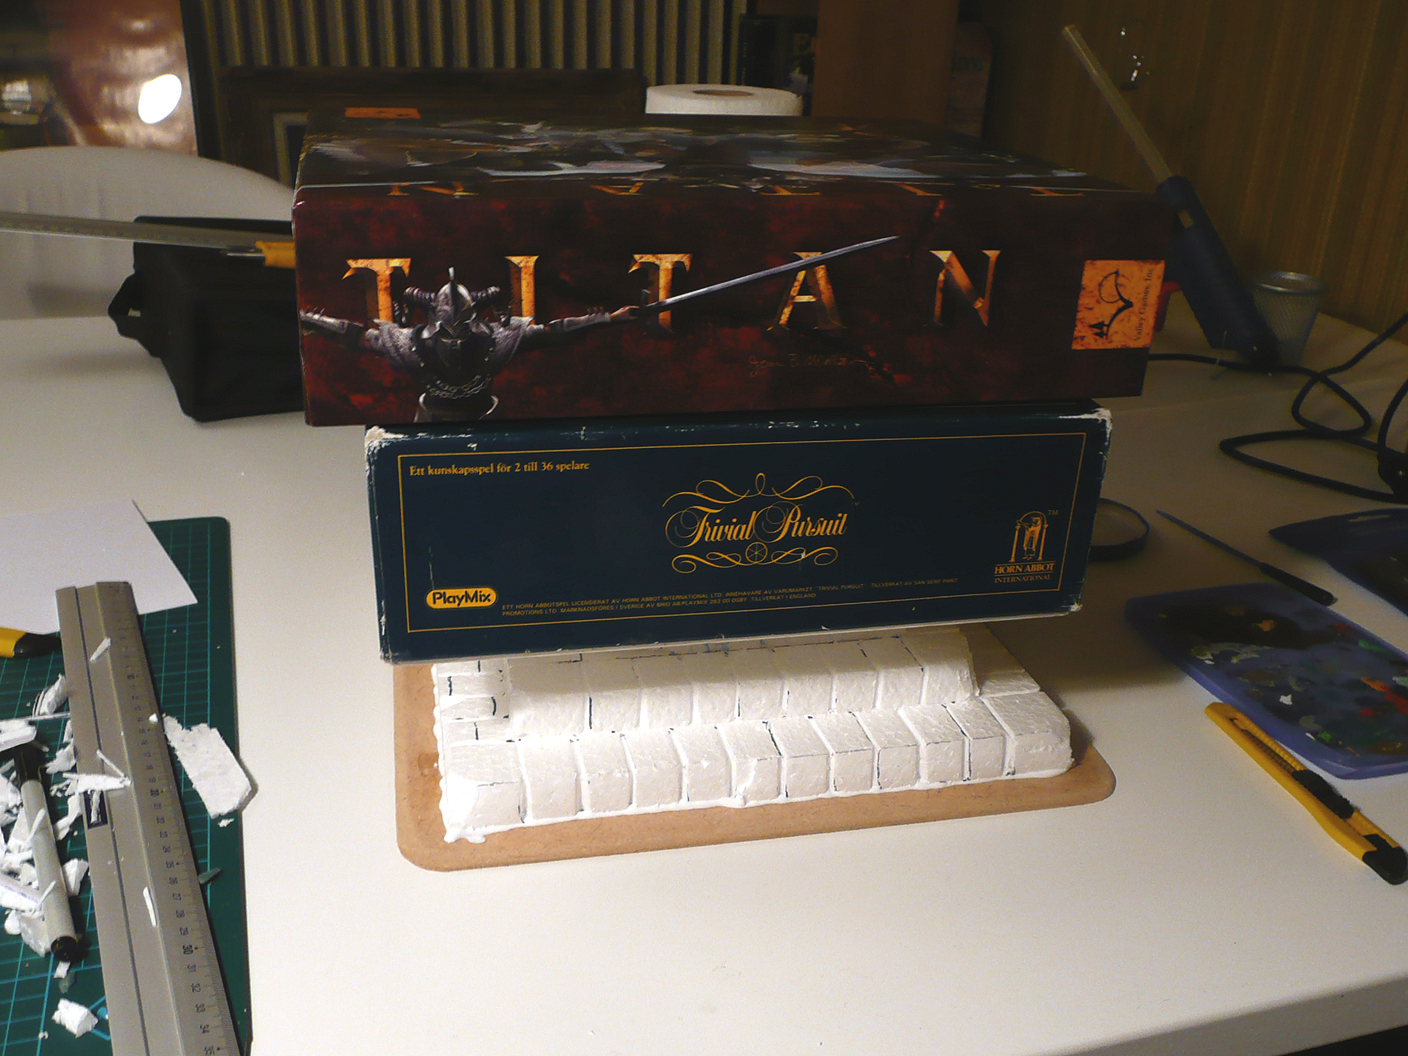
This was repeated for each level until the pyramid was assembled. At this point, I continued on with sculpting – but what you really should do is to apply preassure on the pyramid and wait for it to dry completely. I finally found a use for my old copy of Trivial Pursuit, and also had a reason to bring out Titan. Two opposites, but they have one thing in common. Actual weight!
Step 3: Sculpting!
This might seem complicated and hard, but I’m telling you it’s dead easy! This was the first time I sculpted stone work of any kind, so don’t fret!
I started drawing a rough grid, off-setting it by 1 cm on each level. I then started cutting out small “scores” along the grid. This was done by “slicing” along the lines with the blade tilted first to my left and then to my right. It took a while, but not more than 30 minutes or so to do the whole pyramid.
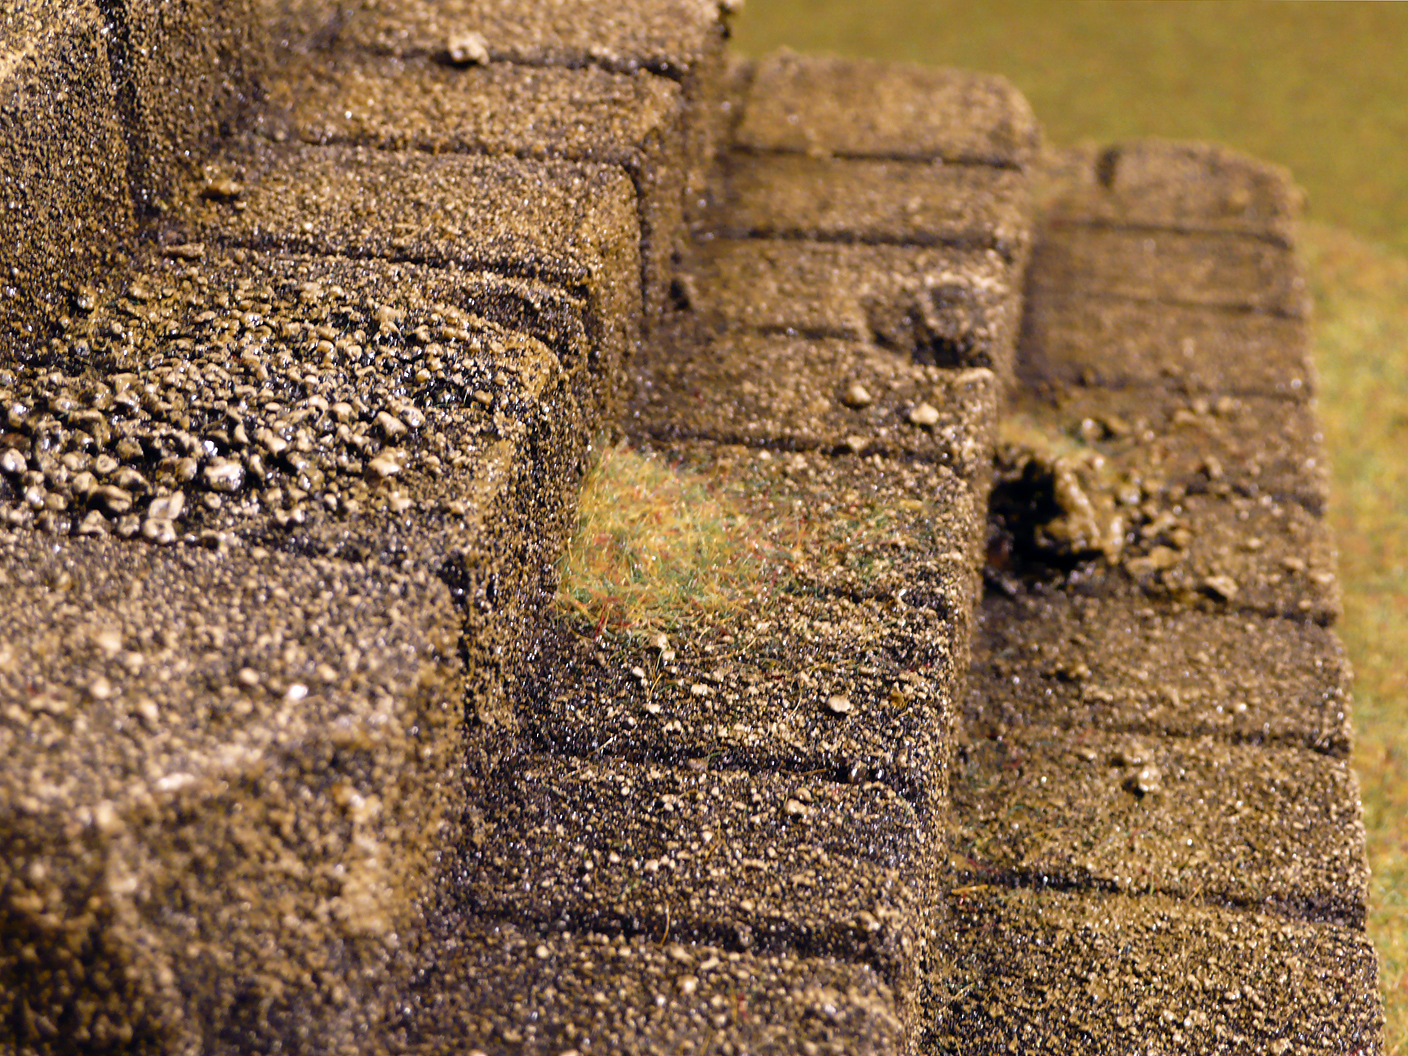
After I had the stone slabs sculpted, I did some detail and weathering damage here and there. Still using the same “angled slicing” as above. I also shaved off the perfect angles of corners and edges. Here’s a work-in-progress shot:
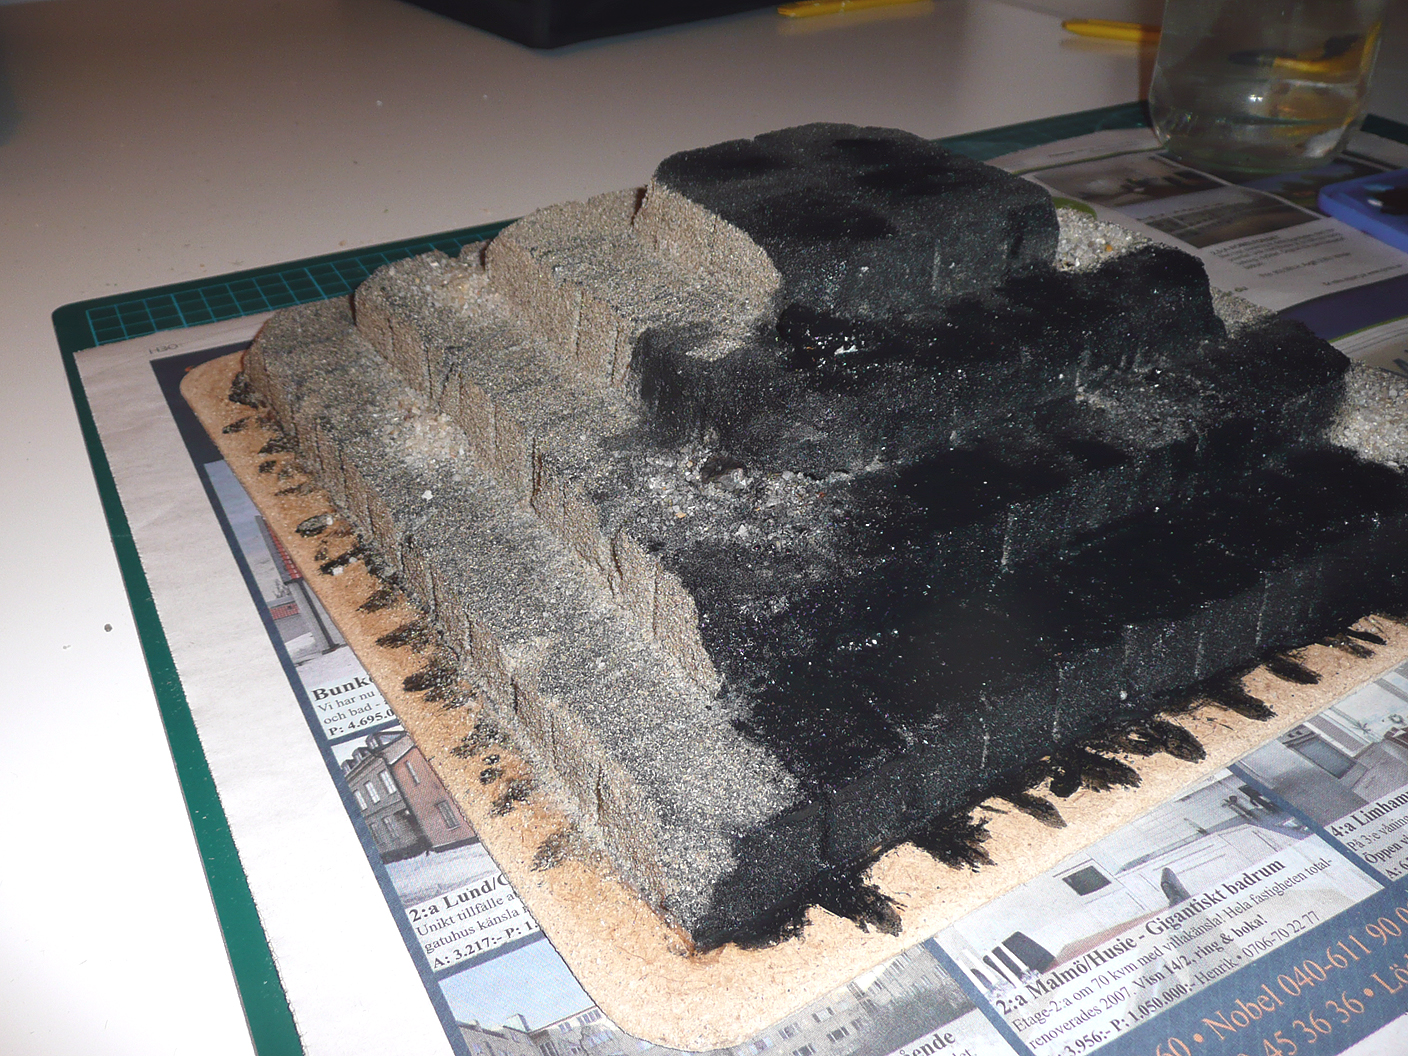
Step 4: Base coat, sand and gravel
The first base coat must be applied with a brush! Any aerosols will melt the polystyrene and you don’t want that. I mixed some PVA glue with water and then added black acrylic craft paint to the mix. This was applied liberally with a large brush all over the piece. Make sure to get the mix into every nook and cranny to prevent the white of the polystyrene to show through!
While the base coat is still wet, I poured coarse gravel on select spots where there should be rubble. Some small pebbles were also glued down with an extra dab of PVA. The rest of the base coat was covered in very fine sand. This was then left to dry completely and thoroughly, and finally I gave the whole piece a coat of watered down black acrylic paint. In hindsight I should’ve used a dark brown instead of black. Here’s the result, halfway through the last base coat:
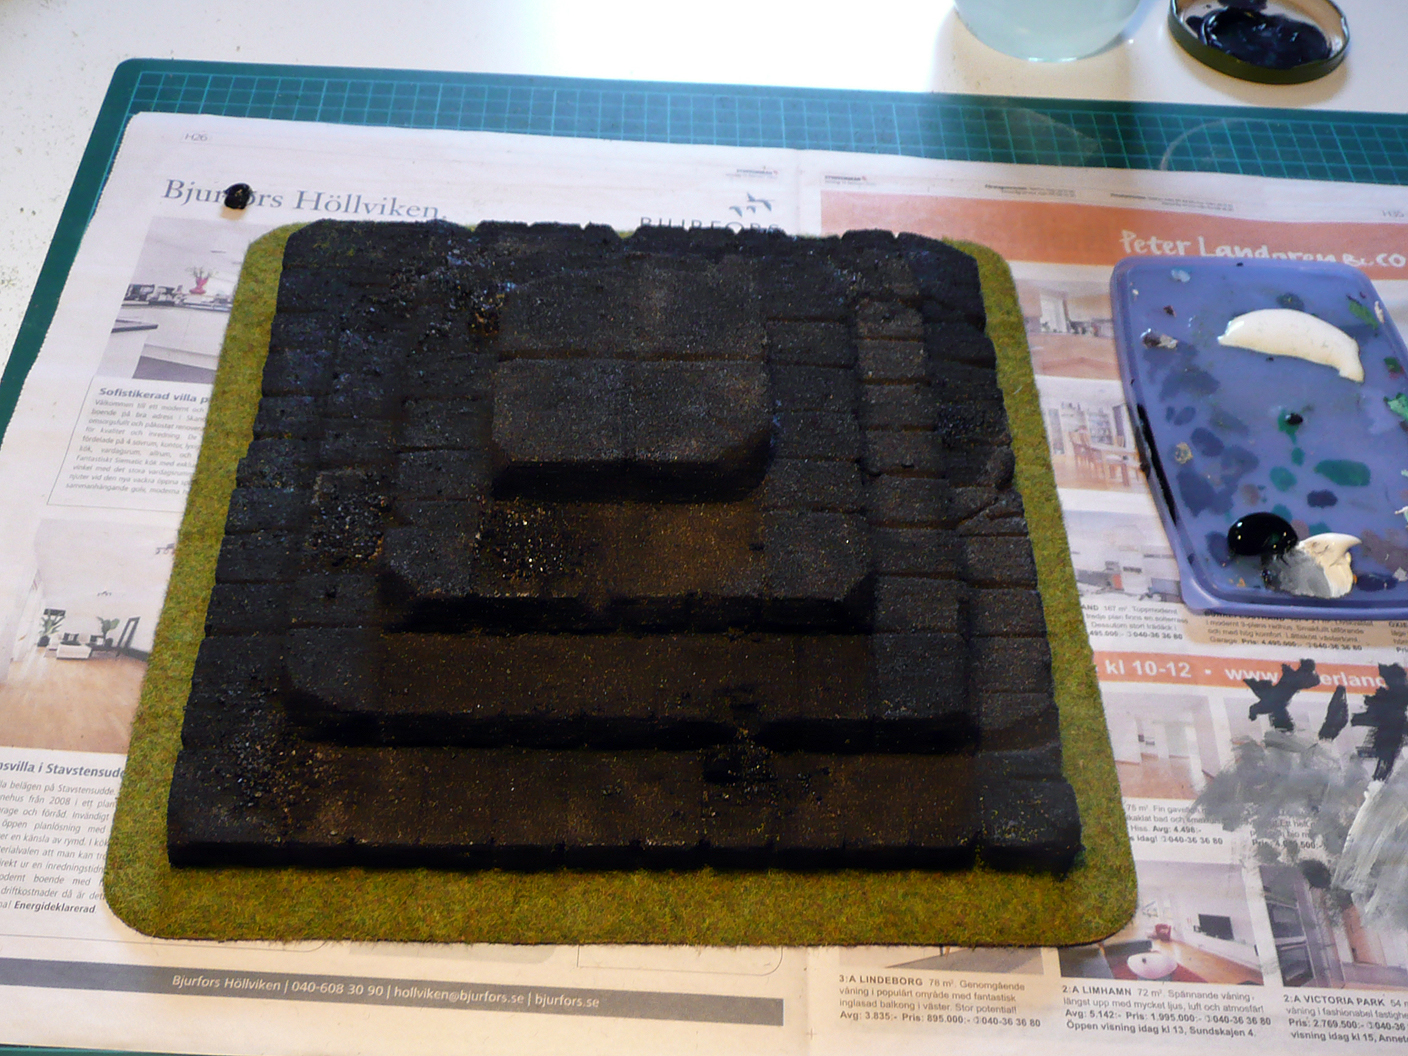
Step 5: Finishing up!
This part was not really documented, I’m afraid. What I did next was to cover the base in flock and static grass, just in case I’d have to game with the piece before I had been able to finish the dry brushing and touch-up. Luckily, I did have time to finish the whole piece before we started playing.
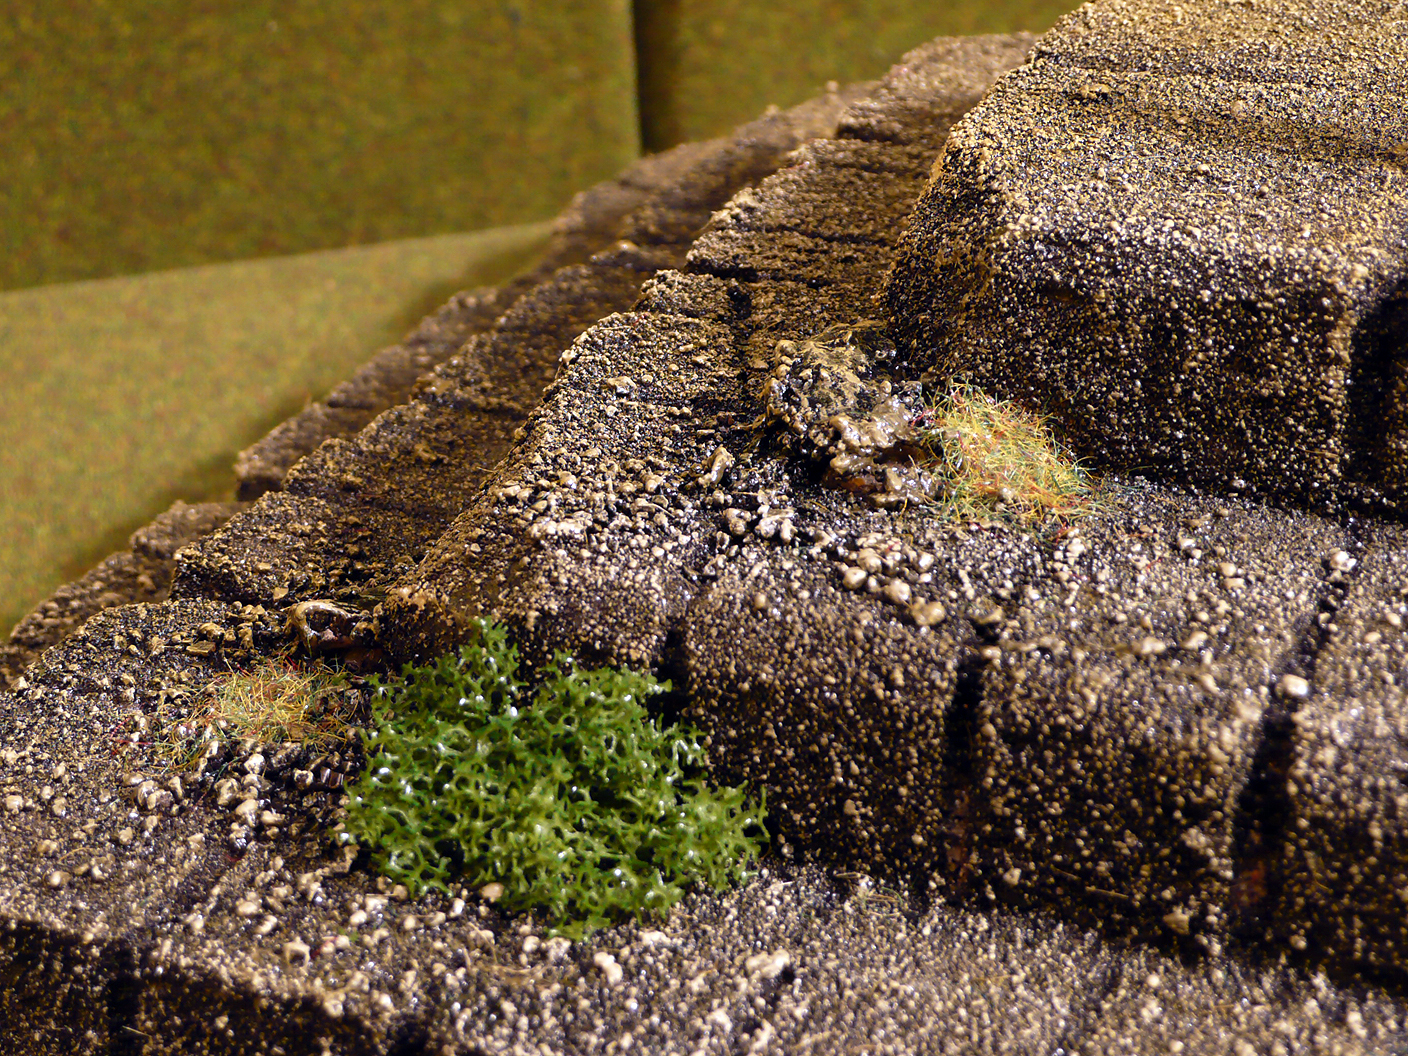
I drybrushed in several steps, starting with a dark brown on a fairly wet brush. Here’s one shot of the piece at that level.
I then added an ochre to the dark brown in steps, with an increasingly drier brush. At the end, I added some white to the ochre to get some nice highlights on the raised edges and debris. The last touch was to add static grass and a piece of left over foliage from my trees here and there on the pyramid. I sealed the whole thing with a glossy spray on varnish. Now, when more than a week have passed I’ve also given it a coat of dull varnish to take the shine off. These pictures were all taken of the piece with glossy varnish though.
Here are a few of the finished piece, with a 28mm miniature for sense of scale.
So, that’s pretty much it. With left-over materials and two evenings of fiddling after work, I have this pretty neat scenario centre piece!
No comments:
Post a Comment