Rocky seashore bases
Years
ago Demon_Color used to be a member of our team. At that time he
described the way he created the seashore base, which he used for his
mounted High Elf hero. If you want to see how to create such a base –
keep reading…
Step one: Preparations
We need to acquire the following marterials:- the base (the most important thing
 )
) - cork (even from a bottle of wine)
- Poxilina (or some other fast-curing putty)
- glue (doesn’t need to be the one I used, even white glue will do)
- static grass (or some other kind of grass used for making dioramas)
- modelling tools
Step two: The rock
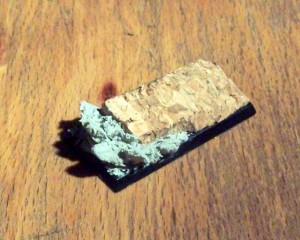
Now we’re taking the cork (which can come in different shapes) and model it with a modelling knife to the shape we want for our rock. We tear the edges a bit, to make the rock look even more like a rock.Our rock can’t cover the whole base, because we want to sculpt some sea waves on it, too. I suggest to make the rock on 3/4 or 3/5 of the base.
We glue the modelled cork to the base.
Step three: The waves
Now we get down to modelling the sea waves. We cut off a 4-5mm thick block of Poxilina, and mix it until the colors blend with each other. We attach it to the part of the base, where we wanted the waves to be, and model it with a dentist’s spatula/ carver or a modelling knife.Our moves have to be quick and firm. We need to remember that a wave hitting ricks is something undefined. Use your imagination (but don’t exagerate, because there still has to remain some room for the mini
Step four: Painting
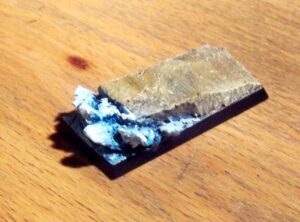
Now that we have everything modelled (and our hands washed after working with this toxic stuff) we can start painting.I suggest using the following paints for this purpose:
Water: GW (Midnight Blue) – (Midnight Blue + Ice Blue) – (Ice Blue) – (Ice Blue + White) – White
Rock: GW (Bestial Brown) – (Snakebite Leather) – (Vomit Brown) – (Bleached Bone) – (White)
Use drybrushing of course
Step five: Finishing touches
So we’re finishing our work.Now we only need to attach the mini to the base and to sprinkle some grass over the rock.


No comments:
Post a Comment