Sunday, November 6, 2011

Recently I posted up some of Dan's amazing Night Lords on here and his lightning effects are top notch to say the least.
So I grabbed this tutorial from his forum thread to share with everyone. You can checkout more of his work from this blog here.
From Dan the Deamon,
I took some quick pics to show the process. Those seriously interested need to check out Nihm's Lightning Tutorial. I used this this. There are some things that I had to find out the hard way though.
Thin your paints a lot
You want all the paints going on almost translucent. If they are too thick your lightning will be harsh and chalky.

Above you can see (left to right) enchanted blue watered down, enchanted
blue watered down further, and ice blue watered down extra.
When mixing the colors on your pallet you want them to be thin enough to receed back into themselves after you've moved them around. It's hard to describe but there is a sweet spot.
When mixing the colors on your pallet you want them to be thin enough to receed back into themselves after you've moved them around. It's hard to describe but there is a sweet spot.
Enchanted

Ice Blue

Skull White
These are some crappy pictures to show you how translucent the paints
must be. Follow Nihm's guide and keep each color inside the one before
it.
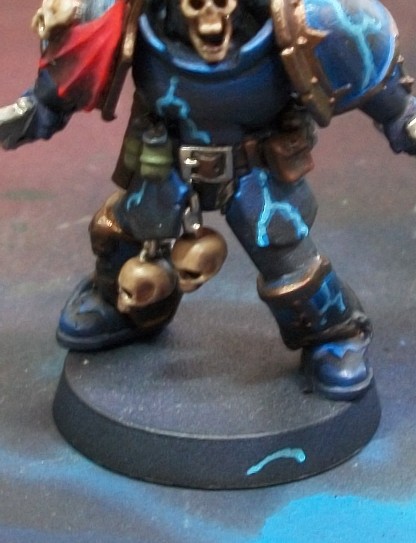
Also notice the base of the figure during the ice blue/skull white
phases. I wiped the excess paint off on the base and practiced keeping
the colors inside the lines before I applied anything.
The last thing you want is to attack your wonderful models with ice blue before you know just what your brush is going to do.
Da Finished Product;

The last thing you want is to attack your wonderful models with ice blue before you know just what your brush is going to do.
Da Finished Product;

No comments:
Post a Comment