Paint rust and chipped paint like a Golden Demon winner
Although
historical modelers have been doing realistic weathering for many years
already, fantasy and sci-fi miniature painters often lack the knowledge
how to paint rust and chipped paint or other kinds of weathering.
Stefan Kochowski (Illusionrip), winner of many Golden Demon awards,
tells us how he achieves these effects:
In this receipt we’ll make rust for 4 persons, so if you need it for 8 persons just double the proportions.Preparation: 2 hours
Cost: 50 Polish dollars
Difficulty: not super very difficult ***
- So for this operation we will need:
- Maskol
- airbrush
- Tamiya putty
- yellow tac
- 2 hands: one left and one right
- used brushes but with more or less thin point
- white primer
- paints for airbrush
- 4 sausages with ketchup
I would like to make some texture on it, but if you want you could skip this step. For this I use some Tamiya putty. With a big brush I put some putty on a plate, take the putty and just apply it on my blade. Then I’m tapping the putty with my brush, to give it an effect of hard rust attack.
After this step, you have to wait about 30 minutes to let the putty dry on your object. While drying take a plate, a fork and a knife. It’s important not to skip this step or you risk having bad rust. Then put the 4 sausages and the ketchup on your plate. Take the fork and the knife, cut a piece of sausage, put it in the ketchup and then in your mouth, swallow the piece of sausage, and repeat the operation until you don’t have sausages on your plate anymore.
Now your putty is dry…..
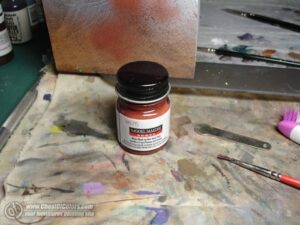
Now we will basecoat our blade with our first rust color. So we set up our airbrush, and regulate the flow on a white paper, to avoid mistakes on our object. Don’t forget to wash your airbrush scrupulously between applying each different color. The problem with acrylics is that they dry too quickly in an airbrush, so the airbrush could stop working quite quickly.
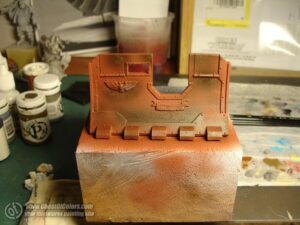
Then we apply our scond layer of rust, a darker one. We won’t apply it on the whole object, but only where the rust could be the oldest. Fresh rust is orange, old rust is more blue dark, so try to find a part of your object where the rust could be the oldest.
Now it’s time to use a smelly product called Maskol. You could find it in all modeling shops. This works like a latex tape.
To apply it we will use the sponge technic: Take a piece of green sponge, you know the one who is the hard part of two-layers sponge. If your wife or your mother catch you stealing and cutting a piece of sponge, ignore their remarks and just tell them with a totally detached attitude: “You, my dear, don’t understand anything about the art, it is not the artist who is going to the paint but the other way”. Use the moment while your mother or wife are trying to understand the sentence you just told them to escape and return to your project. (I can bet that after such a sentence your mother or your wife will have the biggest respect for you.)
Here is the tool:
With the sponge you take some maskol and tap it on a tissue to remove the most of Maskol (more or less like in the the drybrushing technique).
Then you tap your sponge on the blade, and you repeat the operation until you are satisfied with he result. Beware to never use maskol with a brush, because maskol can’t be removed with any thinner, so the brush will definitely go out of order.
Now, we should let the maskol dry, count about 15 minutes. If you have some sausages again, do no hesitate….
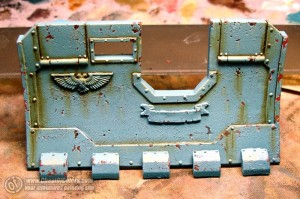
Now we will apply our last layer with an airbrush. I use a turquoise color, for this I mixed blue and green/khaki and grey to desaturate the color and then make contrast with the rust.
I apply a darkest first layer on whole he object.
Once it’s dry, apply a second one – lighter and with a little zenithal effect, I mean that I only airbrush it from the top of the object.
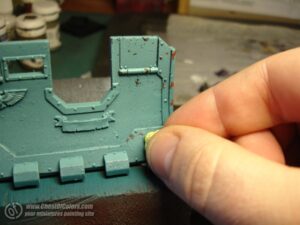
Now it’s time to let this bloody rust appear. I use some yellow tac for this, but you could use blue tac or white tac. I think that a rubber eraser could work too, but I haven’t tried.
In fact I use my yellow tac like a gum to remove the liquid mask and then let our rust appear.
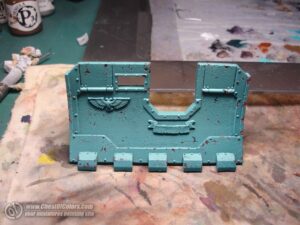
Now we will give our rust some more volume. Just under it, apply a very thin line of the turquoise color but with a lot of white in it with a fine brush. It will give this aspect of depth to your scratches.
Now we will add rust but with several washes of brown in all the edges, to give our object some deepness and richness. We could simulate some thine line of brown under rivets, to simulate streaks of rust.
And then we will add some glazes of bleached bone to define the different part of the blade.
I hope it will help you, see ya soon,








No comments:
Post a Comment