The main activity was rivetting and making cables for the walls. Not a single side must be left empty, that’s the rule of the post apoc!
For the rivets, i used (as always) a styrene rod from Evergreen, and i glued everywhere some metal parts were meant to be.

Then i worked a bit for making a pick, because i wanted to sculpt something. It will not be noticed at all, but i wanted to try something different, and the day someone will tell me “so cool, a pick!” I will be really happy.

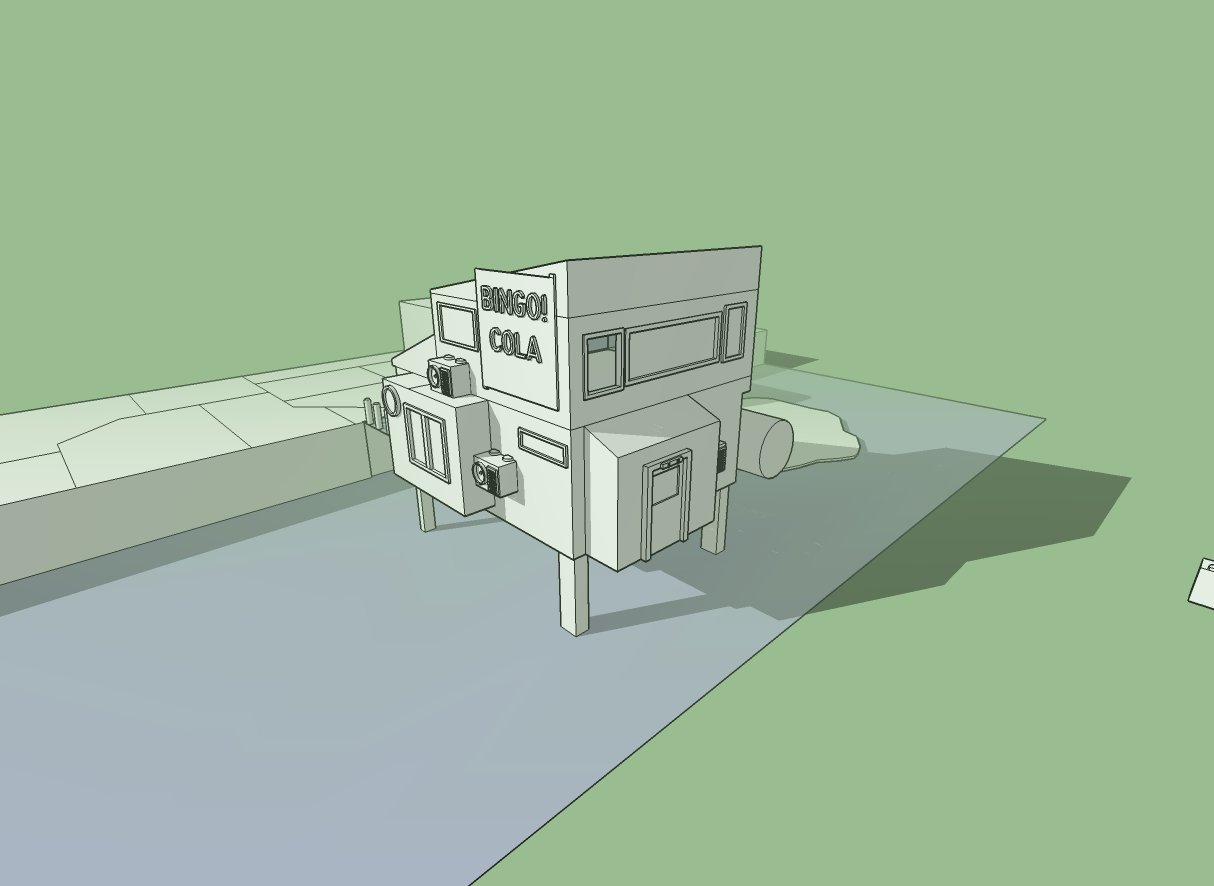
As you can see in the Sketchup Preview, one of the sides will be floating on a dried river, so i wanted to make a kind of deck there. The whole building will be painted as a sort of boat renting office, with fees, advertizing and a bit of kitch signals. I used some electrical cable (a thin one) to represent the interphone cables… really useful also in scenario games, where the villans must not reach the interphone to raise the alarm level.
if you look accurately, there are some other details there, like a rope coil on a side.

Then i sculpted a neon light, meant to be casted, somedays. Actually i didn’t use it at the end.

I also sculpted other details, such as this aerator terminal, and many others.

I’ve been into the resin casting for more than a year, and i have many moulds that i didn’t use or i don’t use any more. One of those is a (wrong sized) Impetus base, which is perfect for representing a huge billboard (maybe a coca cola one, or something a bit more postapocalyptic).
Some holes are always good, so i tried to age this billboard a bit!

I also sculpted some road signs (or small advertizing signs) and an air conditioning device. I’m gonna use a lot of those.

Some of those, for example, were used for this two pieces:

I also sculpted some basic doors. but i wanted to use one (a miscast) as addictional protection. So i cutted a part away and added some rivets…

…and glued it on the wall! Here you can see some of the details i’ve done!


Some more details i wanted to add: a big arrow pointing (will have a MOTEL writing) will be putted on the roof.
 And i also used some of my tiled floors for the paving, cutting them with the exact shape.

Some drops of PVA glue… and it’s done!

I did the same with the first floor. I added a bar counter to make it more playable. For the second floor a ladder is missing… gonna sculpt it soon!

And that’s the final outcome! some other details will be added when they will be ready… but the main work is done!


Next, i have to make the base structure below the building, and then paint it!
No comments:
Post a Comment