Modeling - Mud Effects
Labels:
Flames of War,
Late War,
Painting,
Tutorial,
USA
While dry brushing looks great not all weather conditions create a dust-like effect on vehicles. In wet, rainy, muddy, and snowy spring/fall conditions that dust turns to mud. Mud effects are another way to give your army the grit and grimy look of hardened Veterans (or hardened conscripts if you play Soviets). I recently got my inspiration for muddy tracks while flipping through the pages of Battlefronts Blood Guts and Glory briefing for Flames of War (BGG page 47).
When I started my American force for the Bugle, I knew I wanted to have snow troops, but I did not want them to be on all white bases. What I wanted to capture was that cold muddy look of the Western Front in late 1944. Call it fall with a little winter. I also wanted to be able to paint up infantry and guns later on that did not have snow bases, so needed my tanks to match both a winter themed army and a summer themed army. Mud effects helped me meet these goals for my force and allows my tanks to fit in with a future force which will not be mounted on snow bases.
Supplies
To create mud effects you will need a couple of supplies.
White Glue
Brown Paint of various shades
Water
Various sized ballast or sand
Dixie cup
Small stick for mixing
Small putty knife or old paintbrush
Brown or black wash or preferred Quick Shade Tone from Army Painter
Painted Tank or Vehicle - for mine is used the new M4A3E8s from Battlefront
Step 1: Mud Prep
Before you start applying mud you will want to prep your tank tracks. Take the old paint brush and dry brush the track, under carriage and sides of your tank with the brown you plan on using for your mud. This will help make the tank look extra muddy and give the appearance that mud has been smeared all over. You will later be applying the mud effects over the areas you prepped, so make sure you get paint where it is needed.


Step 2: Making Mud
Mix 2 parts white glue 1 part brown paint into your Dixie cup. Once the glue and paint are mixed, add ballast or sand into your mixture. BGG recommended using plaster as well. I used plaster on previous tanks and I found it made no difference once the model was done. If you want to use plaster, please feel free to do so. When making your mud, experiment with the quantity of ballast/sand, paint and glue until you get a mixture that works for you. I like my mud to be more chunky and rocky, so I mix in a lot of ballast - if you prefer less ballast, go for it.

Step 3: Get a little Mud on those Tracks
Once you are done making the mud mixture, apply it around the tracks, under carriage and sides of your model using your putty knife or paint brush. This can take some time to work the mud onto the vehicle in a desirable/ acceptable manner. If necessary, use your fingers to smear and spread the mud. Once you have applied the desired amount of mud, allow the model to dry. Once dry check to see if the ballast is firmly attached or if it easily flakes or breaks off. If it does go to Step 3.1. If the mud does not break off, go to step 4.


Step 3.1: Seal that Mud
If the mud flakes or breaks off, mix 1 part water 1 part white glue and apply it to the top of the mud. Make sure you get it in all the nooks and cracks. The glue will dry clear and will solidly seal the mud to the tank and prevent future breaking or flaking of the mud.
Step 4: Wash and highlight that Mud
After the model is dry, wash the mud effects with a brown or black wash. Once the wash has dried, highlight the mud with lighter tones of brown and/ or grey using your preferred dry brush method.
If you prefer dipping your models (like I do) go ahead and dip the model using Army Painters Quick Shade or your preferred dip instead. Allow 12 to 24 hours to dry. Once the model is dry apply a coat of flat matte to dull the shine left by the Quick Shade/dip. Once the flat coat dries, highlight the mud using your lighter tones of brown and/ or grey using your preferred dry brush method.


Personally I like the Quick Shade because it makes the mud look wet. Alternatively you could do a regular wash on your tank, but use quick shade on the mud to give it that wet muddy look.
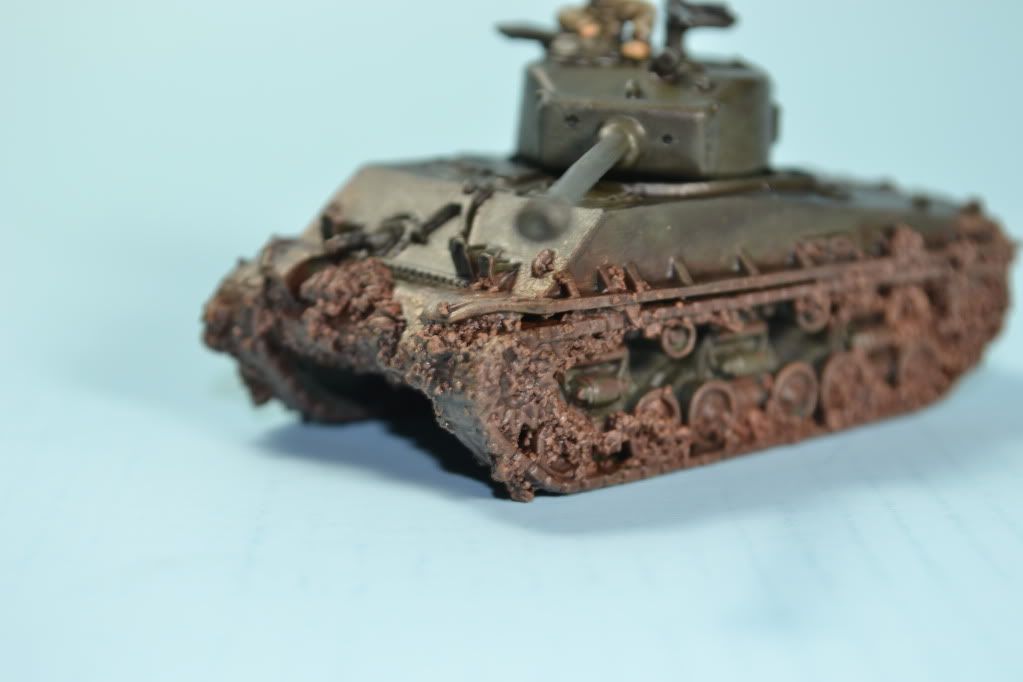
Once done you will have a tank that looks like it has been tearing it up in the mud. This method is quite easy to do and does not require a ton of skill. Mudding a tank will increase the amount of painting time it takes to finish the model, but it adds a lot of character to the piece and can be well worth the extra effort.
No comments:
Post a Comment