by Emmanuel Nouaillier
Emmanuel Nouaillier shows how to scratch
build and age miniature structures. This is will introduce my personal
approach and techniques for scratch building and ageing buildings,
pertaining to the typical northern French urban landscape of the 1940s and
early 50s.
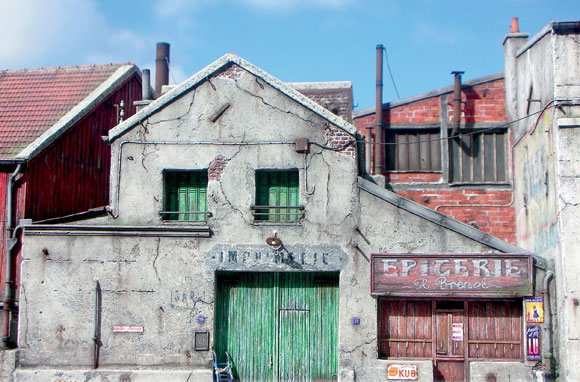
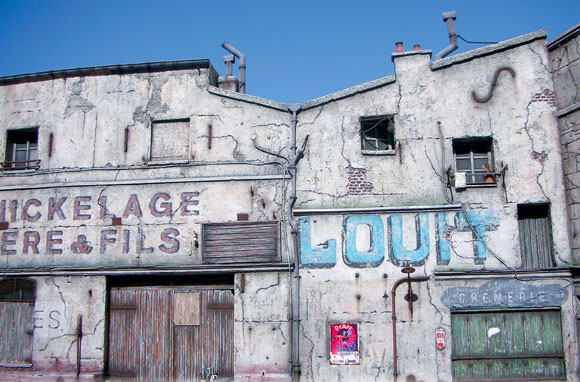
I believe that a proper rendition of textures and adequate weathering of the different elements is important when making a miniature scene, where the optimal development of each small detail of a diorama becomes more a necessity to modellers who want to show, with utmost realism, models that are better detailed and weathered I will explain stage by stage in future articles how to create peculiar materials and elements and how to give the models ‘life’ while employing generic methods.
I believe that a proper rendition of textures and adequate weathering of the different elements is important when making a miniature scene, where the optimal development of each small detail of a diorama becomes more a necessity to modellers who want to show, with utmost realism, models that are better detailed and weathered I will explain stage by stage in future articles how to create peculiar materials and elements and how to give the models ‘life’ while employing generic methods.
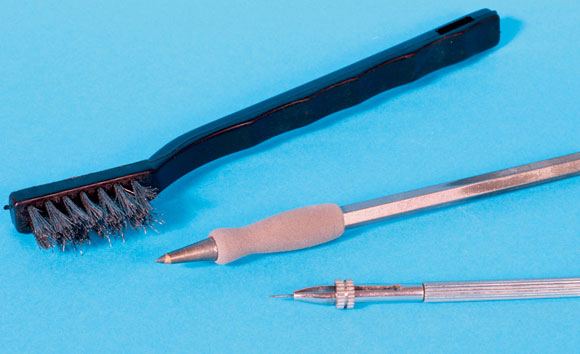
Some of the ‘basic’ tools that I use to work the foam and give it some aspects and different alterations in scale. The fine wire brush is used to produce a good looking surface finish in particular cases.
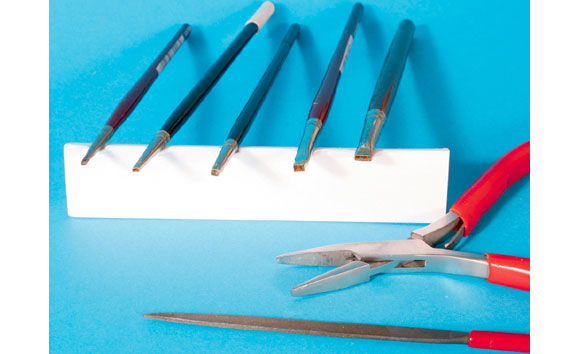
To emboss bricks or cobblestones into the foam, I’ve made tools from old paintbrushes with no more bristles left, and shaped the ferrules into the form desired with fine pointed pliers.
Peeling off the outer card of Feather Board will be very interesting for the modeller who wants to create his own brick wall, concrete surface or cobbled street.
For cobblestones and stone sets, pressing one of the tools into the foam individually reproduces the stones. If you wish, you can stamp with deeper cuts for deeper joints, carve off missing bricks or reproduce holes with the point of a needle.
Creating a cobbled street with its typical dips, displaced cobbles and uneven surface will be easy by employing this technique. Here you can see a part of a street in 1:72 scale in the course of being worked.
In order to set my modelling efforts into
context, I think it would be useful to give you some background which
should help you understand the reasons for the choice of proceeding
outside the normal presentation of ‘military modelling’, as it’s
habitually practiced, where armoured vehicles are introduced in the middle
of ruins - sometimes very realistic, but often showing kits of houses,
buildings, that are ready to build and paint. My approach is different.
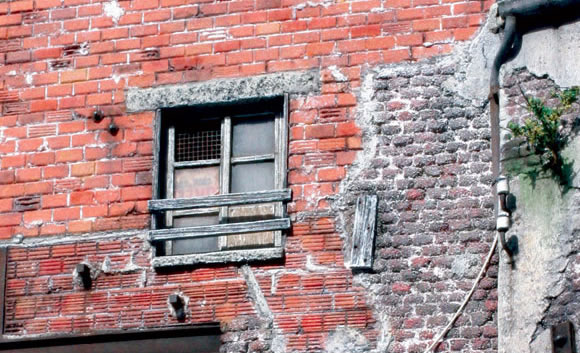
Inspired by the wish to capture ‘atmosphere’ in miniature, I have always made dioramas that in the course of the time have revealed an artistic approach. Having spent a long time with general military modelling and then turning to figures for a while, I decided a few years ago to make my first diorama that had as its only topic a very shaded, old urban and industrial ambience. Applying the methods of painting and ageing I’d learnt, and building the scenes for their ‘visual aspect’, my only fixed idea was to be very close to reality as possible in the effects of decay and deterioration of building materials and all this in 1: 8 and 1:72 scales. I have come a long way since that first experience and I have also discovered the possibilities offered by some unknown, or rather lesser known, materials for creating many desired elements on which I like to simulate ageing effects and create an overall drab aspect.
Generally, to create miniature buildings I have relied upon four main materials: feather board (polyurethane foam sandwiched between two sheets of card), Forex (a light expanded PVC), coating and plastic card.
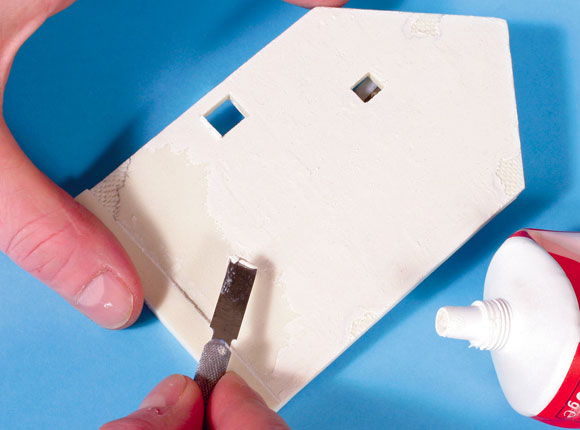
Applying a layer of coating onto foam to simulate the façades of particular buildings will perfectly convey the decay and the state of degeneration.
Scribing brick bonds in plaster onto Forex can be a tedious work, but it produces the textures that will help to create typical buildings or parts of them. As for the red bricks, some realistic alterations and additions will be added by engraving.
|
feather board
|
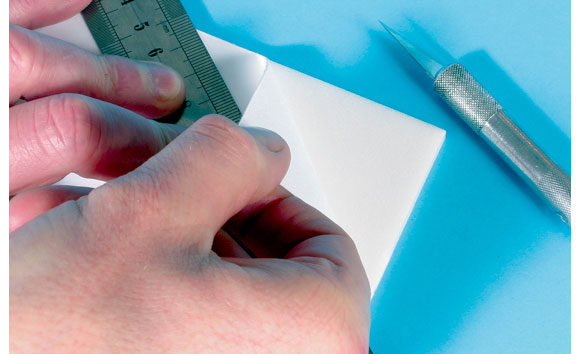
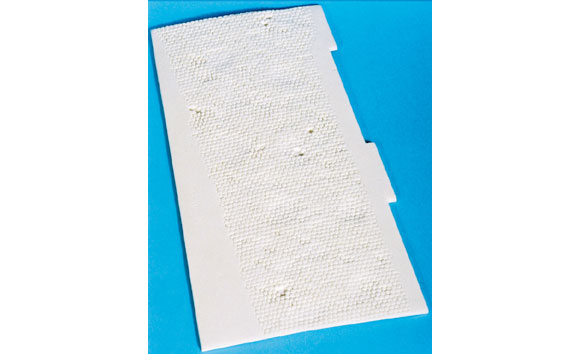
Feather Board is made with a central core of polyurethane foam between two
layers of thin card. It is perfectly flat, even over large areas (one
metre square) and very light. It is available in various thickness (3mm,
5mm and10mm) and I get mine from Zebulon. The foam core is compatible with
all sorts of adhesives as well as all paints that we use for modelling.
Used as it comes, this material is perfectly suited for creating the basic
shell of a building, then you can glue embossed plastic sheets or card
onto it, or apply a layers or coats of plaster to simulate the façades of
particular urban buildings or any specific decorative features.
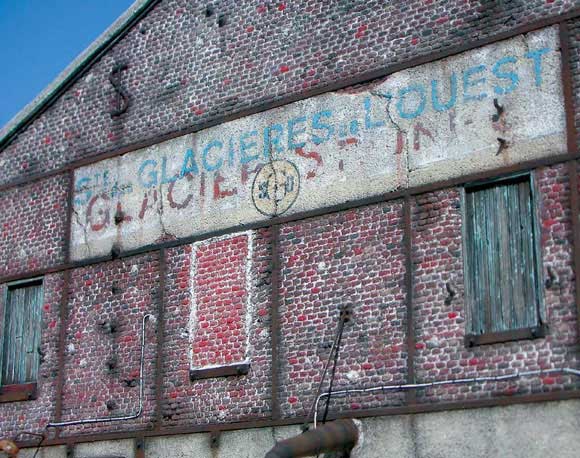
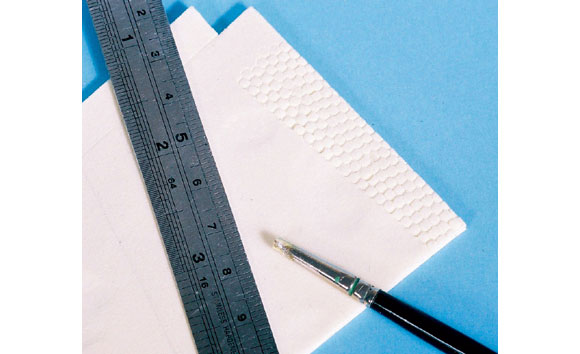
Embossing can take a long time, especially if one undertakes to reproduce large brick buildings. This finished example is a part of the façade of an industrial warehouse.
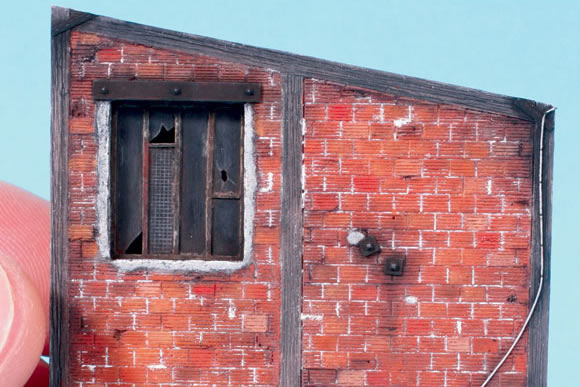
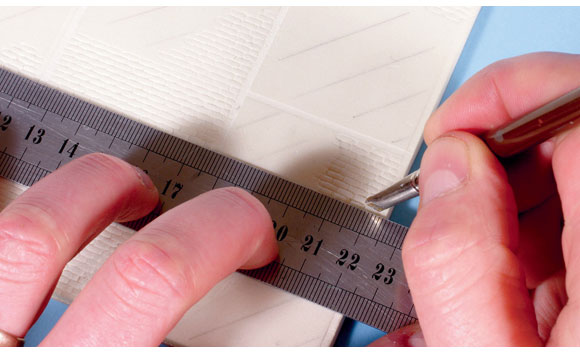
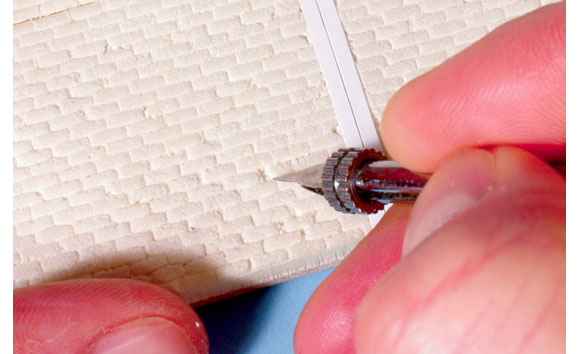
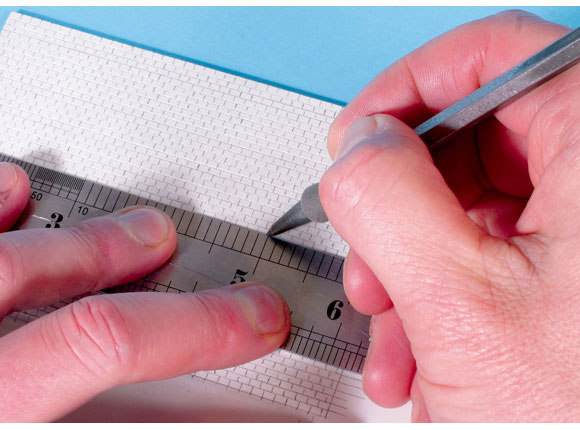
There is another less-known, yet very interesting method, which involves peeling off the outer card. Thanks to the nature of the foam, it can be scribed, worked, embossed with the aid of hand-made punches, ‘matrixes’ or ordinary tools such as scribers, blunt scalpel blades, points of needles, fine wire brushes, etc. Thus it’s possible to obtain all sorts of effects and to make cobbled streets, brickwork, concrete, and stones, as required, to reproduce streets, pavements and all sorts of façades and buildings.
In
addition to this, the nature of the foam is well-suited to imitating the
surface of the brick, the finish of the stone, or the texture of concrete.
Furthermore, for a cobbled street you are able to reproduce the worn
patches caused by road traffic by simple depressions in the foam, or to
imitate cracks in brick walls due to stress, and breakage of the rendering
between the bricks.
This comment has been removed by the author.
ReplyDeleteIf it's too thick , it will fall off the trowel in a heap and not in the smooth line you want. Add to much water and it's messy and weak. Just follow the manufacturers directions and you should be fine. bricklaying tool box
ReplyDelete