| 1. | Future is a water-soluble acrylic floor coating made by the S. C. Johnson Company. It's usually used to put a protective coating over your floor.
I have not researched exactly what this product is or how it works - but
others have. I would strongly suggest that you read the article
written by Matt Swan on the web site at http://www.swannysmodels.com/TheCompleteFuture.html I have not put a direct link to it because I didn't want to send their bandwidth through the roof. However, be sure to bookmark the article or save it to your "favorites". To make sure you can view it later offline, go to "file - save as" and at the bottom choose "web page complete" which will save the complete web page as one file on your hard drive so you won't lose it later on. |
 |
| 2. | One use that modelers have found that Future is very good for is making ink washes flow better. It can also be used to make ink washes out of acrylic paint. As most of you know, acrylic paint thinned with water doesn't work well as a wash. The paint breaks up and doesn't flow over the object.
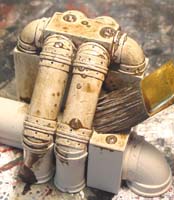
The three pipe sections you see on the right have been spray painted white first. The spray paint job wasn't the best but it should suffice for this demonstration. 1. On the first example I mixed 1/4 teaspoon of black paint with 2 tablespoons of water and painted it over the white spray paint. 1. On the first example I mixed 1/4 teaspoon of black paint with 2 tablespoons of water and painted it over the white spray paint. Once it dried, you can see that the wash did not flow smoothly over the surface. It stuck in some of the cracks but the general effect was to simply make the whole thing a shade darker. 2. For the second attempt, I mixed 1/4 teaspoon of black paint, 1 tablespoon of water and 1 tablespoon of Future. This one came out better. Rather than making the whole thing a blotchy shade of gray, it flowed more into the cracks and stayed there. 3. I thought to myself "If a little does good, a lot could do better", so I mixed 1/4 teaspoon of black paint with 2 tablespoons of Future. Oddly enough, the paint didn't want to mix with the Future very well. When I painted it on, I could see more brush strokes. The paint seemed to stay suspended in the mix and not flow down the pipe. I'm thinking that Future straight is just too thick to make a wash on it's own without thinning with water. |
| 1. | Even though you can use paint as an ink wash, actual ink is better to use. Others can give you the science behind it, but in general there is more color in ink than in paint. The photo shows a drop of brown paint and of brown ink. By looking at the drop or the outside of the bottle, it's hard to see the difference. However, once you start painting with it, you'll see that there is more actual color in the ink. The ink seems to have a range of browns, reds and yellows that change depending on the thickness of the coat. | 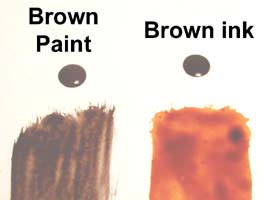 |
| 2. | 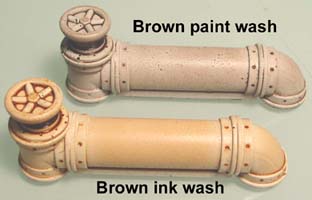 When you apply both of these as a wash, the difference is even more apparent. Both of these pipe sections were spray painted white first.
The top pipe had a wash made of 1 teaspoon of brown paint - 1 tablespoon of water - and 1 tablespoon of Future. The paint color really doesn't come out as much. It gives you one single brown tone that looks sort of lifeless. When you apply both of these as a wash, the difference is even more apparent. Both of these pipe sections were spray painted white first.
The top pipe had a wash made of 1 teaspoon of brown paint - 1 tablespoon of water - and 1 tablespoon of Future. The paint color really doesn't come out as much. It gives you one single brown tone that looks sort of lifeless.However, the second pipe was coated with a wash made of 1 teaspoon of brown ink - 1 tablespoon of water - and 1 tablespoon of Future. Right off you'll notice that the brown ink has a lot more yellow to it, but it also has various shades from yellow to red which give it a bit more life. Adding the Future floor finish to the wash also helps it not dry so fast, makes your ink wash go farther and helps it flow to a nice smooth coating. |
| Please note that this is a general guideline on how to mix the wash. Colors will vary depending on the brand and type of paint and ink you use for your mixture. Be sure to test all of your colors before applying them to your full layout. Also note that color is a matter of taste. If you mix up the wash according to these directions and it looks too red, then by all means add some green or black to get the colors to look right for you. |
| 1. | This section will cover how to paint rocks and other equipment abandoned outdoors. To do this, we must mix up some special rock wash to paint over the items with.
1 Tablespoon Future floor finish 1 Tablespoon of Water 1 Teaspoon of Brown Ink 20 drops of Black Paint |
 |
| 2. | We have to put the wash over something, so we'll start by giving the piece a good solid coat of light cream color from our Earth Tone Painting Instructions page.
The photo on the right shows 3 different things you can use the cream paint and rock wash combination on. The top photo shows it used on a rock cavern mold piece. The second and third photos show painting the floor and pipes from the abandoned chemical plant. |
 |
| 3. | Brush on the rock wash we had mixed up from step 1 above. You may want to wear a rubber glove on the hand holding the item to be washed. Cover it completely and set the item down on some plastic or trash bag. Use a paper towel to soak off the excess wash out of the brush and then paint over the item again to wick off any excess wash. To make rocks look good, you really need to take off the excess. | 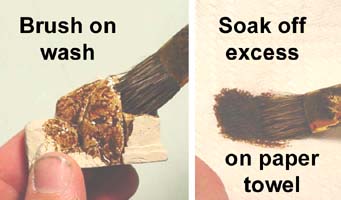 |
| 4. | This is how a rock piece looks when the wash dries. You could stop here and consider it finished at this point. When washing pipes or equipment, you might let the wash pool up more in the rivets and joints. Just wick away the large drips on the bottom edge using the brush. | 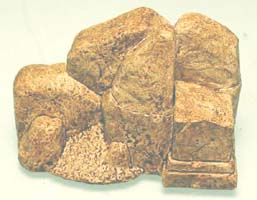 |
 |
| 5. | 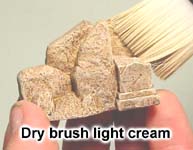 If the piece doesn't stand out like you want with just washing it, you can always dry brush the original light cream color gently over the top.
This will help all of the sharp corners and edges come out. If the piece doesn't stand out like you want with just washing it, you can always dry brush the original light cream color gently over the top.
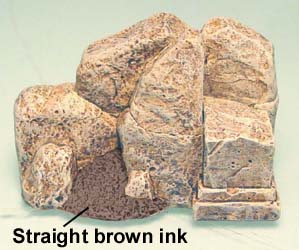
This will help all of the sharp corners and edges come out.These rock pieces are sculpted with some piles of dirt on certain corners. For these places I just painted brown ink straight on. |
 |
| 6. | If you are painting pipe pieces or old equipment, you may also want to dry brush a 1/2 cream color 1/2 white paint mixture over them as well. Man made items look better and stand out more when the edges are highlighted. Also, this will lighten up the pieces somewhat so other weathering effects can stand out such as water stains or rust. | 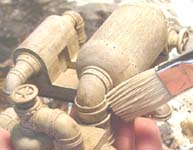 |
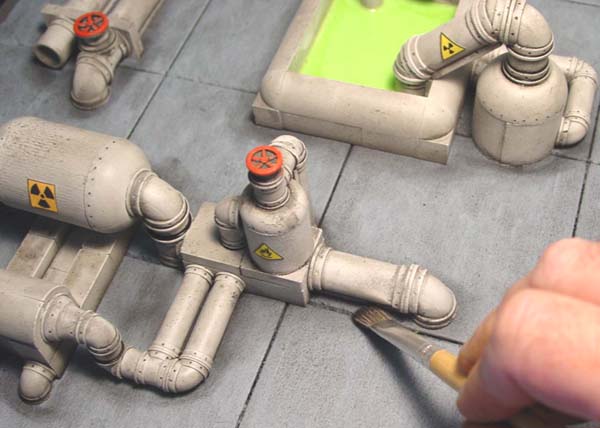
| 1. | To make water stains on the pipe pieces, I'm using our special rock wash and adding a couple drops of green paint to it. This will change the color just enough so that it won't blend into the rest of the ink washed background. Dip your brush into this wash, then dab it on a paper towel to get rid of the excess. Here I'm adding stains to the abandoned chemical plant. | 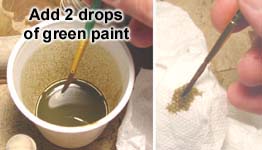 |
|---|
| 2. | Now that the excess is soaked out of the brush, use the brush like a magic marker. Paint a stripe down the side of a tank starting from the horizontal top seam.
Make the stripe wider at the top gradually thinning at the bottom. Go back and forth over the line several times. The more times you paint, the darker the stain lines will become. Use this technique to put vertical stains on any place you think water would naturally drain down. |
 |
|---|
| 1. | 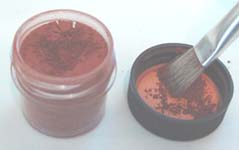 Weathering powders are simply finely ground pigment that is brushed on a model. This is the same pigment used in paints and pastels.
The reason that many people like the powders is that they can be used to add stains, dirt and grime in a more natural looking way. Weathering powders are simply finely ground pigment that is brushed on a model. This is the same pigment used in paints and pastels.
The reason that many people like the powders is that they can be used to add stains, dirt and grime in a more natural looking way.If you tried to make a model car look dirty by using dirt colored paint, you would get brush strokes of dirt colored paint on the model that would not look natural. Weather powders allow you to lightly dust on pigment which looks very close to the way wind blows dust and grime naturally onto surfaces. |
|---|
| 2. | Since weathering powders are finely ground pigment, they are much like soft pastels. Pastel sticks or crayons are basically pure powdered pigment mixed with a binder. The advantage of having the pigment as a powder is that you can lightly brush it on and blend it into other shades rather than having it make a solid line by drawing with it. | 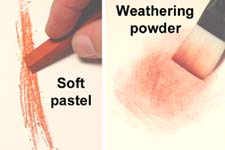 |
|---|
| 3. | Since pastels and weathering powders are both made of ground pigment, you might ask "Why can't I just make my own weathering powders out of soft pastels?" Well, you can. Here I have taken a rust colored soft pastel and am lightly scraping it with a hobby knife to get powder from it. This particular brand of soft pastel is called "alphacolor". Be sure that you do not use oil pastels as these will be too oily to scrape any powder from. |  |
|---|
| 4. | However, once I had tried "Doc O'Brien's Weathering Powders", I definitely prefer them over scraping pastels. You get several colors in the box and they will last a long time. Unlike using pastels, these powders are very finely ground and have a lot of color to them. They are so fine that they tend to stick to the surface very well on their own. | 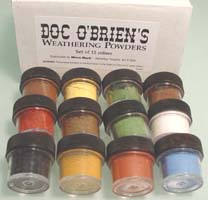 |
|---|
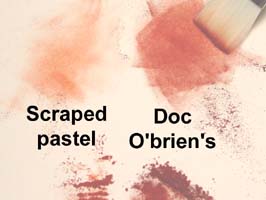
| 5. | I did a quick comparison between a scraped soft pastel and the Doc O'brien's weathering powder.
The two powders looked identical in color. However, when I used a soft paintbrush to brush them on a piece of paper, the O'Brien's had much more pigment to it and a little powder went much further. It may be due to the fact that the pastel has an inert binder holding the pigment together. However, I believe either will work fairly well. |
 |
|---|
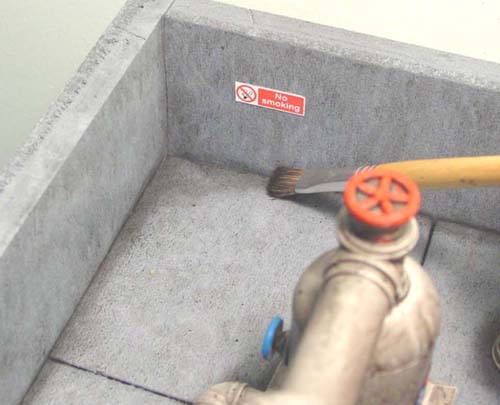
| 6. | 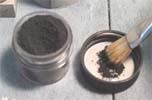 To use the powder, take the lid off, dip your brush into the powder and knock off the excess in the lid.
Now simply brush it where you think dirt and grime should be found in corners and around equipment. I'm using black powder on the Modern chemical plant. Click on the photos to see a larger version of them. To use the powder, take the lid off, dip your brush into the powder and knock off the excess in the lid.
Now simply brush it where you think dirt and grime should be found in corners and around equipment. I'm using black powder on the Modern chemical plant. Click on the photos to see a larger version of them. |
 |
 |
|---|
| 7. | For more rusted items, take some powder and use it on joints and edges. The photo on the right is from the abandoned chemical plant. Click on the photo to see a larger version of it.
I also used different colors on the ground such as green and yellow. These give a variety of color and life in a very subtle way. The green gives a mossy look to the stone on the ground. If you intend to handle the model a bit, you may want to seal the powder on the model by using a fixative of some sort. You can use hair spray, but most art stores carry a matte sealer used to spray over pastel and chalk drawings so they won't smear or let the color come off. |
 |
|---|
| You can finish off the details of a scene by gluing on ground foam scenic materials and adding items like field grass.
To see how other finishing touches were added to this display, please visit the abandoned chemical plant finishing instructions. You can find more information on making foam hills and adding scenic ground foam on our Tips and Tricks 7 page. |
No comments:
Post a Comment