Making Moulds
Hi everyone!
Well, todayI wanted to share with you the way i make my moulds. There’s nothing secret here, I started making my first moulds around 4 years ago (maybe 5), making my first commission from an italian website, more a bunch of idiots actually, named TSTModellismo. They were so unprofessional that they changed idea during the making of this piece, leaving me with my unfinished piece. I was young, and the piece was quite modest, but it wasn’t really demotivating for a 16-years-old boy.
Ok, well. After this (well I’ve a website, at least i can take some satisfaction!), let’s start with the tutorial:Well, todayI wanted to share with you the way i make my moulds. There’s nothing secret here, I started making my first moulds around 4 years ago (maybe 5), making my first commission from an italian website, more a bunch of idiots actually, named TSTModellismo. They were so unprofessional that they changed idea during the making of this piece, leaving me with my unfinished piece. I was young, and the piece was quite modest, but it wasn’t really demotivating for a 16-years-old boy.
What i’m telling you here is nothing revolutionary. I started from the Hirst Harts tutorial, as many did, and i just made my own experience. I discovered that some problems are a real issue, and other don’t.
About the silicon:
The silicon I used are GLS50 from Prochima and BL30 from Anichità Belsito. While the first one has an amazing level of detail (all the matt surfaces will remain so, and any texture will be transposed) the other is much more cheap, and faster to vulcanize.
Anyway, working with silicon is quite annoying, the liquid is dense and sticky, and if you touch it you have to spend some time cleaning. And it happens every time. The good thing (expecially for gls50) is that it is a real fluid: you can pour it, and it will infiltrate everywhere, until all the spots will be covered. So the main deal is to mix it properly.
Materials:
Every material is ok for a mould. Expecially if you use the “slow” silicon rubbers, every kind of material will work properly. All the rough or porous surfaces will be filled with silicon, and when removing the master everything will be ok.
Well, maybe not everything: all the weak materials will most likely break when removed from the silicon rubber. But don’t worry: the first cast you’ll make will be your new master. It happened to me many times: I had to make a new master, after a long use of the previous one, and i simply used a first cast for it. Of course, the more you will wait, more defect you will find on the new mould!
Shapes:
If there are whide undercuts, you should need to shake and to mix with some sticks around to avoid air bubbles in the silicon (which means the same difect in all the resin pieces! That’s annoying!), but if you pay attention to the shape of the sculpted thing, there will be no troubles.
Now, let’s start with the Step to Step!
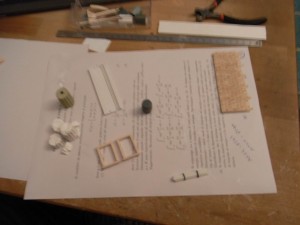
First of all, I have to find a decent sculpting piece.
Here i took some columns, a roof piece, a barrel, some metal rods, and two window frames.
For the hulk I use some poliplat. It is quite an interesting material, and maybe it is a waste using it for that purpose. But i have it, and i like to work only with PVA glue, so I prefer to use it instead of cardboard or other systems!
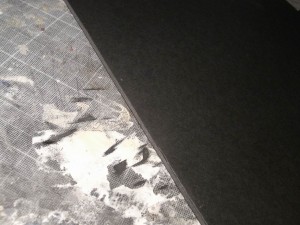
But I had a little amount of it, that day. So I cutted it in half: There’s no difference in the moulding process, since the inner part is flat!
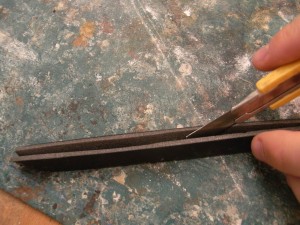
Here’s an example in a closer view. Some Quantum Mechanics in the background.
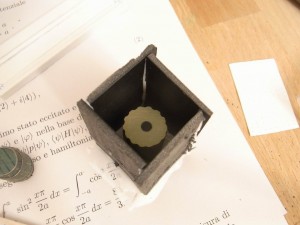
And that’s a group view.
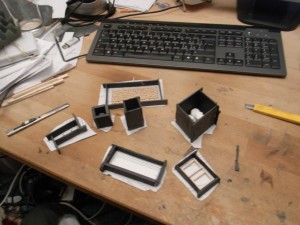
Now: pouring the silicon! It is approx 150 g of GLS50 (around 45 euros per Kg), with a 5% of T30 catalyzer. You’ve to mix it properly to avoid unreacting areas. It happens, and it means 1-2 weeks more for the hardening. It sucks.
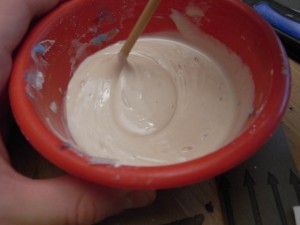
Once mixed, I just have to pour it. It is quite heavy, but it will fit in every creek and hole!

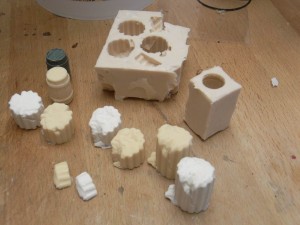
Here is a final Shot: After 24 hours for the complete vulcanization (they say much less, but i prefere to wait properly) the pieces are finally ready! Then i casted some plaster and resin pieces… near each one you can see the copy. I suggest you to click on the image for a better view…
Conclusions:
Using moulds totally changed my life (modelling life). The time you invest making one piece should be decuplicated, since it will be reproduced with a minimum effort. On the other hand, i’ve been captured by the temptation, and now i just sculpt for the sculpting’s sake. When i make somethink i immediately mould it, and i don’t use my time for my projects, instead i make new moulds for no purposes. That’s a curse! =)
Joking apart, the point of view when you are capable of using moulds will change A LOT. And the quality of the produts as well.
Cheers,
No comments:
Post a Comment