Irrational Number Line Games, LLC
home forum stuff-to-buy about-us contact
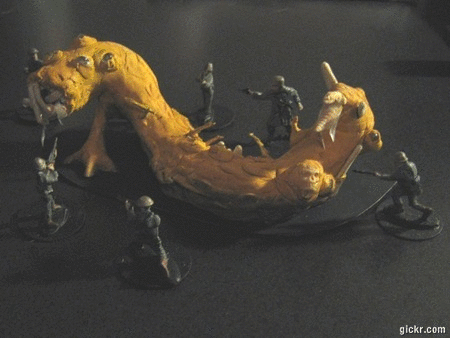
Shoggoth
Since a thousand miles, even at 1:56, won't fit on my dinner table, I decided to make a shoggoth segment. But since they are supposed to be big, I though I would try to make as many different view of the shogggoth as I could get without it looking hinky. The goal is to allow you to photograph it with other minis from several angles to make it look like it is a lot bigger than it is.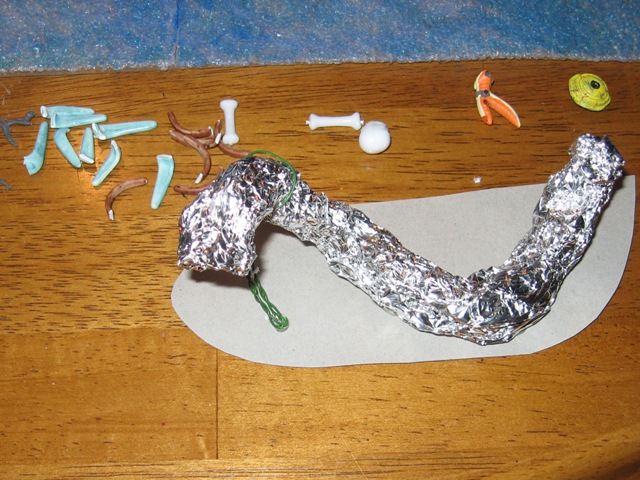
After the armature comes the clay. In this case, I am using Crayola Model Magic clay. It is pretty east to work, air drys pretty firm, and is non-toxic. The trifecta for working inside the living room.
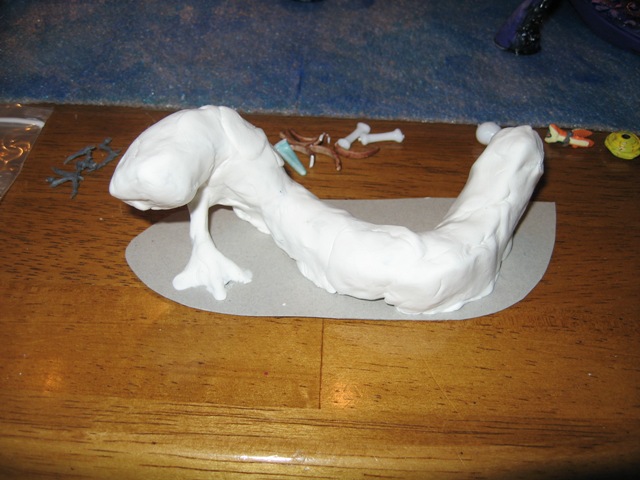
 Next comes the odds and ends. The giant pseudopod in front is nice, but
it really needs lots of little mouths, eyes, and various types of appendage
to be a good shoggoth.
Next comes the odds and ends. The giant pseudopod in front is nice, but
it really needs lots of little mouths, eyes, and various types of appendage
to be a good shoggoth.
The teeth are spines cut from hair clips. So far, this is pretty much like the tentacle project. So, we are going to add a little variation now.
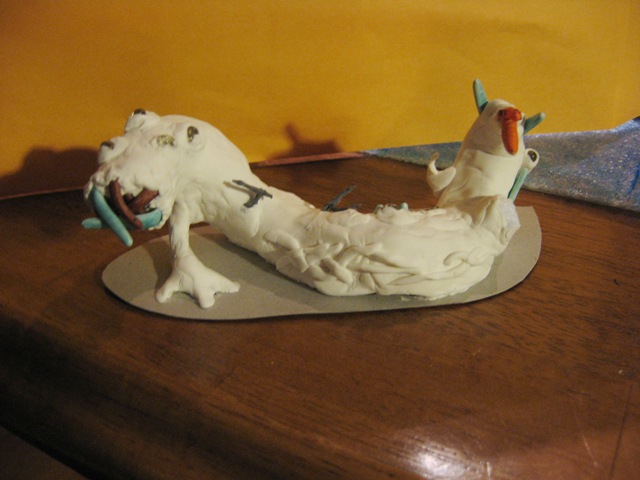
 The back end (does something like this really have a "front" or "back"?)
gets an insect torso (LSH Changeling from HeroClix, actually), and a few
Defiance Games bug legs are good, creepy
additions. As are a few manually made clay tentacles and lumps, etc. The
crowning piece, though, is the eyes. These are glass beads that I have
embedded into the clay. I will prime and paint around them, so they stay
clear and shiny. It is also important that the clay behind them is white. I
have embedded clear beads into dark colored clay and not ended up with the
effect I wanted because the backing wasn't light and reflective.
The back end (does something like this really have a "front" or "back"?)
gets an insect torso (LSH Changeling from HeroClix, actually), and a few
Defiance Games bug legs are good, creepy
additions. As are a few manually made clay tentacles and lumps, etc. The
crowning piece, though, is the eyes. These are glass beads that I have
embedded into the clay. I will prime and paint around them, so they stay
clear and shiny. It is also important that the clay behind them is white. I
have embedded clear beads into dark colored clay and not ended up with the
effect I wanted because the backing wasn't light and reflective.
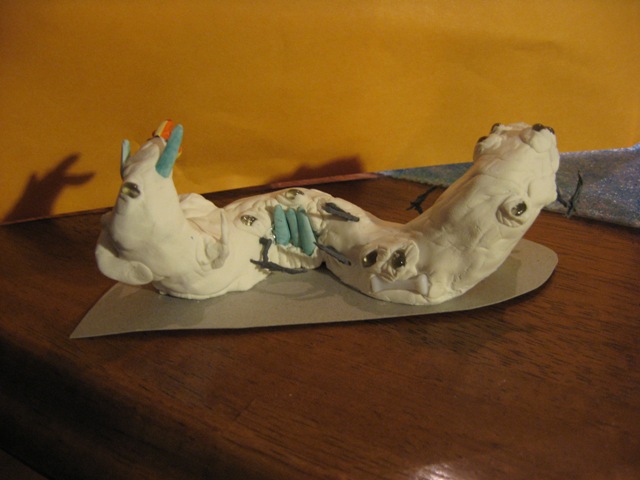
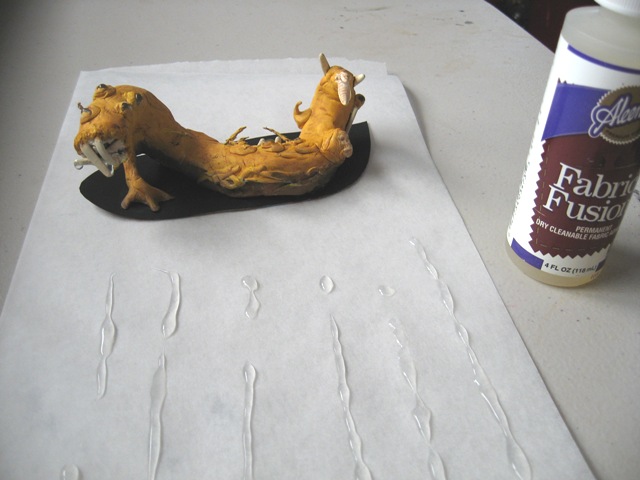 Since it is a space slug, it has to be shiny. Also, Howard says so. And I
really like making this mucous project. Just take a piece of parchment paper
(or wax paper) and make a few runs of fabric glue on it. Now go have a couple
beers and watch some sports on TV while it drys. When dry, the glue strips
will peel right off as long, shiny strips of transparent goo. These are
great to add on to project AFTER you seal them. If you cover the glue
with sealant, it tends to go foggy. Of course, that is also a nice effect,
but not the one we want for a slavering monster.
Since it is a space slug, it has to be shiny. Also, Howard says so. And I
really like making this mucous project. Just take a piece of parchment paper
(or wax paper) and make a few runs of fabric glue on it. Now go have a couple
beers and watch some sports on TV while it drys. When dry, the glue strips
will peel right off as long, shiny strips of transparent goo. These are
great to add on to project AFTER you seal them. If you cover the glue
with sealant, it tends to go foggy. Of course, that is also a nice effect,
but not the one we want for a slavering monster.
Space slugs and Lovecraft monsters do well with putrid, sickly colors. So I went with an ochre and brown motif, and used a dark green wash. All in all, not a bad look. The eyes and slime add just the right je ne sais quoi to the monster, which is a good quality for things that come from a dimension beyond understanding.
No comments:
Post a Comment