Basics: Line highlighting made simple
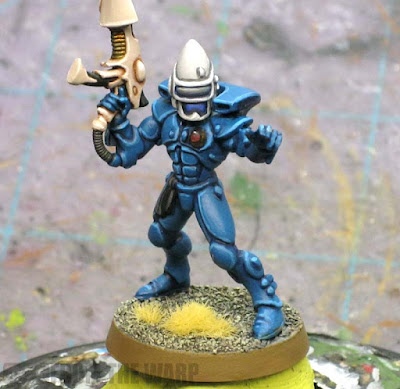
Line highlighting can be easy if you take a few steps in the beginning and set yourself up for success. Part of it is knowing what to do before you get to the highlighting stage and the other part is taking your time once you get there.
That's not to say it will take you forever to line highlight a model, but as with any aspect of painting, it takes some time to get really nice results. Sure, your bigger models will take longer and if you're sloppy, you'll have to go behind and clean it up. But... the end result is definitely worth it.
So what tools do you need?
Aside from paints, there is one thing you really do need to have. That's a good quality paintbrush with a fine tip. If you find yourself sitting there trying to think if you have any of these in your collection... you don't. And if you think you can use your basecoating brush to do your fine highight work, you can't. You really ought to pick up a better quality brush, take good care of it and use it for this purpose only. Once you have a good one, you know you've got it.
It might seem a bit much, but having a good brush to do this will make it easier. Believe me, trying to do this with an old brush with a bad tip will only cause you more problems than it's worth.
I have my views on what constitutes a good brush and I recommend folks look around and find what works best for them.
Here's the process I went through to find a good brush.
I'm not going to get into paint consistencies other than to say you can thin your paints to the point you feel comfortable working with them. I do it slightly with most of mine. Notice I said most of mine as I have some paints I don't thin at all. It all depends on what color/brand I'm using. This is a personal preference thing.
What thinning really does to your paints is make them flow off the brush and onto the model a bit easier and you don't have to press down as hard on the model with the brush to get the paint onto it. It will take some experimenting on your part to find what paint "consistency" works best for you.
Now what kind of shading should I do?
What do I need to do before I line highlight?
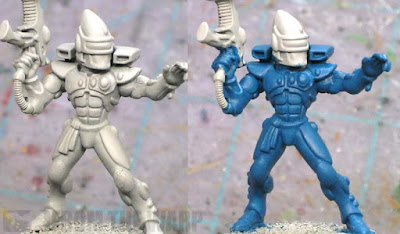
Basically it comes down to getting your model ready. Priming, basecoating and shading. Those are what you need to have done. For me, line highlighting is the final step. In my example here, I've used an Eldar Guardian since he has quite a few armour plates for me to practice on. Once your model is ready, you'll have one of two situations you'll be faced with as you start your line highlighting.
It will depend on how you shaded your model that will determine what you're faced with. Why does this matter? Because ideally we'd like to be able to go behind our work and clean it up as needed to get the best effect. Depending on what you did up to this point, it could be impossible or it could be a piece of cake.
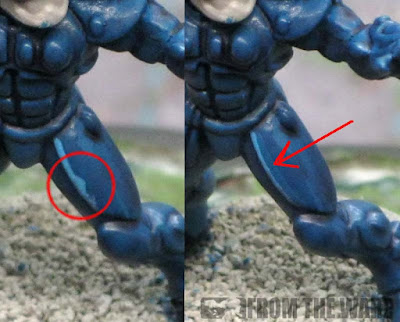
Subtle surface color variations = no "invisible" correcting
If you've covered the surface or section to be line highlighted with a wash or any effect that has darkend the entire surface and created subtle variations in surface color, you'll have a difficult time cleaning up your work.
You won't be able to go back with your basecoat and clean up any mistakes you make while highlighting without seeing your attempts to fix your mistakes. Look at the photo above, on the left, you can see the highlight along the edge and where I made a mistake. On the right, you can see where I tried to fix it with the base color. It ends up looking like a thin highlight with a fat line next to it.
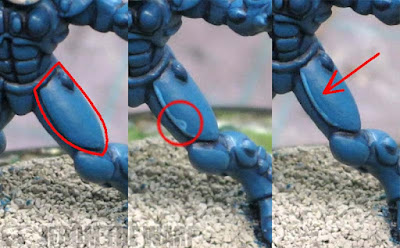
No surface color variations = correcting is possible AND invisible
If you take the previous example and make one of two changes...
1. You keep your wash limited to the recessed areas only
2. You go back over your surface areas with your base color after washing leaving the wash in the recessed areas only
... you'll be able to make corrections as you line highlight your model.
How do you make corrections then?
You make corrections to your line highlighting by going back in with your original basecolor and cleaning up any stray marks or painting along side your highlight in order to make it even thinner and more crisp along the edge. This works if you've kept your shading to the recessed areas only or already went back in and repainted your base color so you're highlighting on a consistent colored surface.
In some cases where you have the subtle variations across a surface and you make a "mistake" while line highlighting, you can erase your mistake if you quickly rinse out your brush, leave a little excess water in it and then try to wipe or scrub away the stray mark. This will work most of the time. Of course it won't work on that one character model you've got a hundred hours into if you're anything like me.
But how do I paint my line highlights in the first place?
When it comes to painting your line highlights, you want to make sure you do a couple of things.
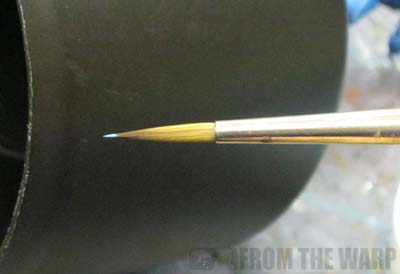
1. Do NOT load the brush up to the very top of the bristles with paint.
I use very little paint on the very tip of the brush and after a few strokes, I rinse out my brush and start over. This keeps the paint from drying in the tip of the brush and making my lines too large.
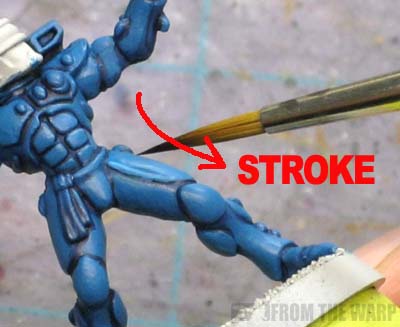
2. Make sure your strokes go in the correct direction
I always start away from me and pull back towards me. Do not try and push the brush to the left or right or even worse... away from you. You want to be able to apply a consistent pressure (to keep the line the same thickness) and pull it towards you for a smooth line.
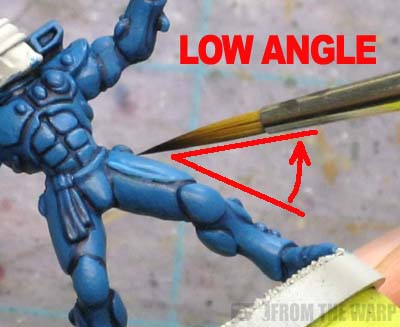
3. Hold your brush at the "proper" angle.
This is perhaps the biggest thing. How you hold your brush matters. You want to "pull" your brush along the surface and not stab or poke at the model. We want to be able to apply a slight amount of pressure (like normal) and drag just the tip of the brush along the edge we want to highlight.
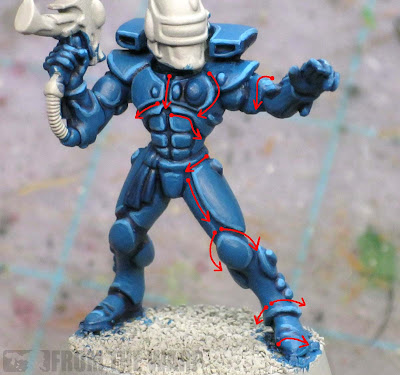
4. Don't try to do it all in one pass.
This ties in with the first part. We aren't going to line highlight the whole model in one go. It will take a number of smaller strokes. In the photo above, you can see the starting points for each stroke (the dot) and the direction the highlight is pulled. Remember to hold your brush and the model so that you maintain the correct angle as well!
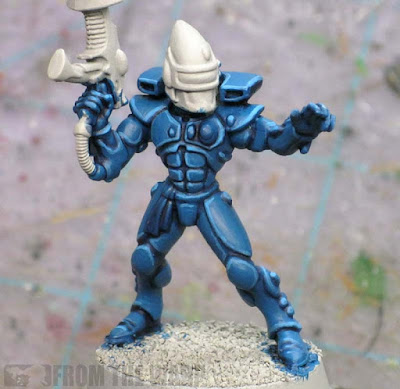
And here's the armour after some cleanup work
You can see that by repainting the armour plates with the base color (or limiting my washes to the recessed areas only), I can go back in with my original base color and clean up my stray marks. It took a bit longer to do the model like this since I had to apply my wash carefully and then clean up the armour before highlighting, but the look is much more "finished."

Applying the line highlighting effect to other parts of the model
Here you can see the gun has been given the same treatment as the armour. It started as a base of GW Dheneb Stone. I carefully applied a GW Ogryn Flesh wash to the recessed areas only. After that dried, I went back with the base color and cleaned up the weapon. This gave me a nice, clean and consistent surface to apply my line highlights to. I took P3 Menoth White Highlight and went over the prominent edges to define the shape of the weapon.
Even following the tips above, it's going to take some practice to get the feel for line highlighting. You'll get a feel for how much pressure you need to use, how long of a line you can put down in one stroke, where to start each stroke, etc.
And the more you practice, the faster you'll get at it too. The first few times, it's going to add a substantial amount of time to your painting. After a while, it will get faster and it won't add much time at all.
NOTE: Since it was mentioned in the comments, I did a follow-up post that talks about using the side of your brush to line or edge highlight and some of the things to watch out for when trying that technique.
No comments:
Post a Comment