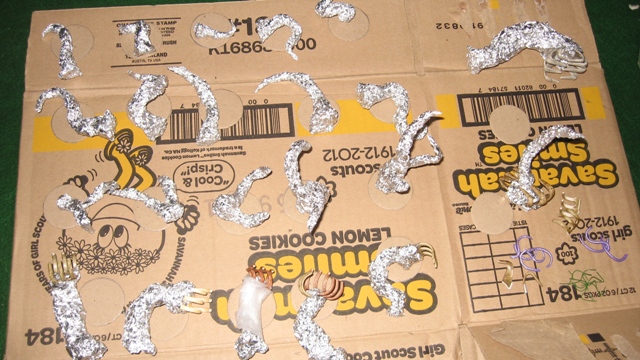
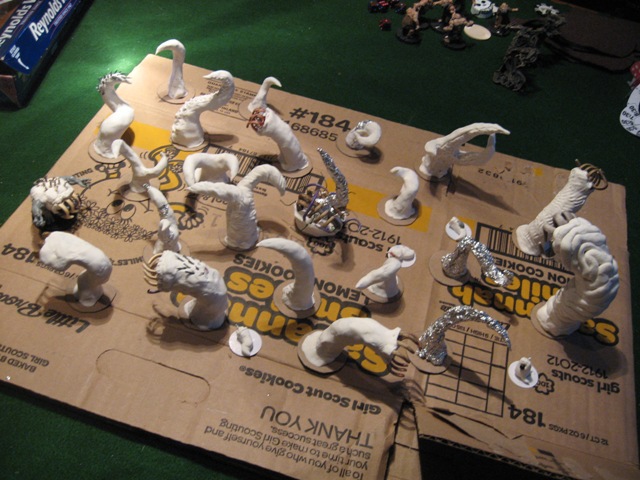
 While we will be using clay for the tentacles, we want to start with
a frame. The clay we are using is
Crayola Model Magic.
It is easy to work with, air dries, and is non-toxic. The drawback is
it isn't very firm. So we need a frame. Fortunately, the frame doesn't
need to support the details. So, I rolled up a bunch of aluminum
foil into tentacle and snake shapes. I even use this technique as a
frame for more "traditional" or "artsy" sculpting with Fimo or
Sculpey.
While we will be using clay for the tentacles, we want to start with
a frame. The clay we are using is
Crayola Model Magic.
It is easy to work with, air dries, and is non-toxic. The drawback is
it isn't very firm. So we need a frame. Fortunately, the frame doesn't
need to support the details. So, I rolled up a bunch of aluminum
foil into tentacle and snake shapes. I even use this technique as a
frame for more "traditional" or "artsy" sculpting with Fimo or
Sculpey.
Some of the figures there have "teeth". You can model teeth and details yourself (I do for the ftagn ), but these are big models with big teeth, so I am using hair clips instead. They are about the right size for teeth in a mouth that can swallow a 28mm figure, and come in all sorts of shapes. NOTE: INLGames is not legally responsible for legal action resulting from your hanging around teen girl hair accessory stores in the mall. My wife picks mine up for me.
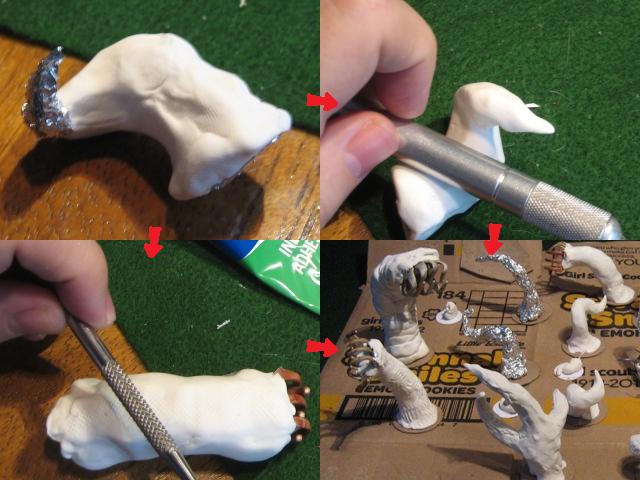 Next, we just wrap up the frames in the clay. You may not want thumb
prints in your final figures, so you will need to remove them from the
clay. This is pretty easy with the smooth part of the handle of a
craft knife. You can also use the gnurled part of the handle to make
a pattern in the clay. With clay on, you can see several of the different
textures that are possible - smooth, lumpy, hashed, segmented. Have some fun
making patterns in the clay with things lying around the room!
Next, we just wrap up the frames in the clay. You may not want thumb
prints in your final figures, so you will need to remove them from the
clay. This is pretty easy with the smooth part of the handle of a
craft knife. You can also use the gnurled part of the handle to make
a pattern in the clay. With clay on, you can see several of the different
textures that are possible - smooth, lumpy, hashed, segmented. Have some fun
making patterns in the clay with things lying around the room!
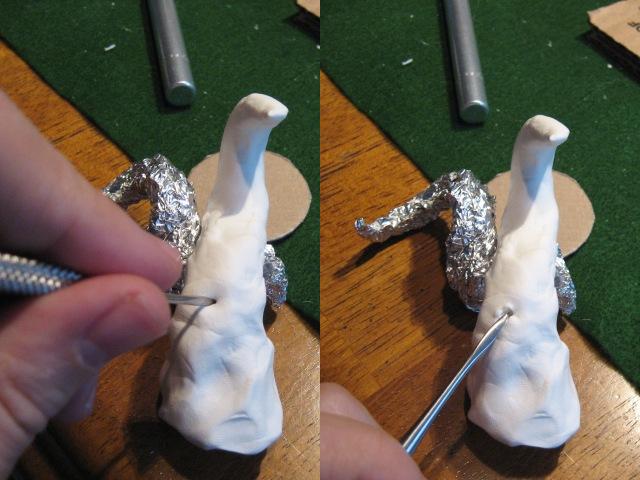 Besides lots of different textures, you are likely to want some of your
tentacles to have suckers on them. These are pretty easy. Just dig a
pointed tool (or toothpick) into the clay, then drag it out. Pushing in
will make the succer depression, and dragging (instead of pulling directly
out) will raise up a little lump around the depression. Now, rinse and
repeat!
Besides lots of different textures, you are likely to want some of your
tentacles to have suckers on them. These are pretty easy. Just dig a
pointed tool (or toothpick) into the clay, then drag it out. Pushing in
will make the succer depression, and dragging (instead of pulling directly
out) will raise up a little lump around the depression. Now, rinse and
repeat!
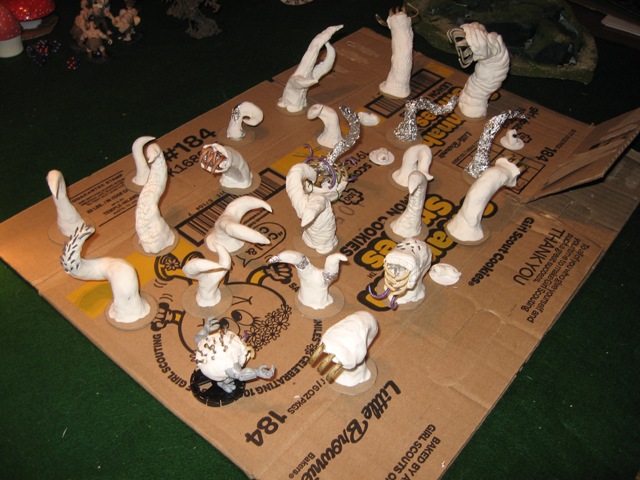
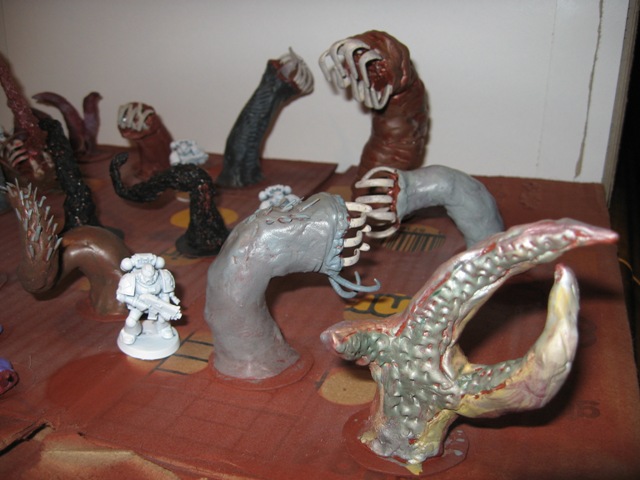
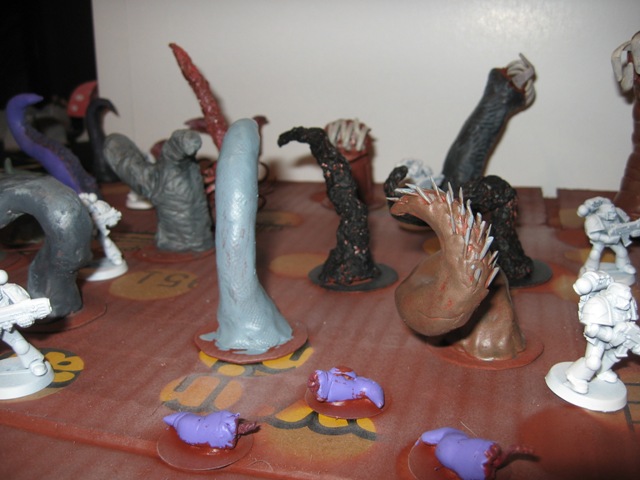

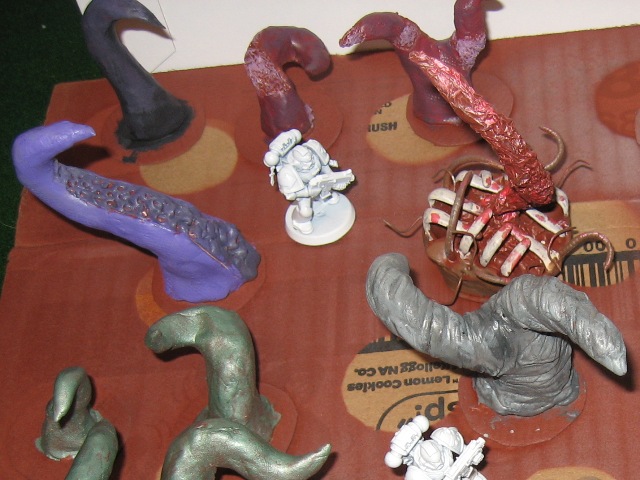
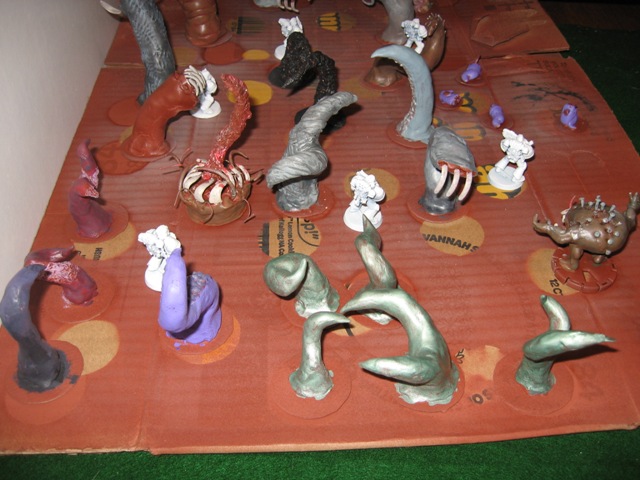
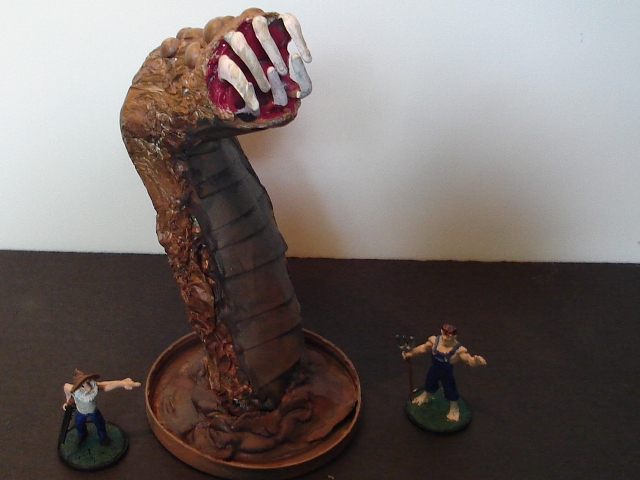
Here are some close ups of the pieces after painting. The standard Mk1Mod0 Space Marine is provided for size reference. These are big tentacles. Some other details I haven't mentioned yet:
- A number of them were shaped to hold 28mm figures
- Spines. I just stuck in bits of old 28mm spear I had lying around
- The Sarlac-esque one has floral wire and small plastic tentacles around the mouth
- The chupacabra's arms and legs are left over from making haemonculi for my son And last but not least, Ol'Jeb and Jethro have their hands full...
No comments:
Post a Comment