Converting and Painting Reaper Bones
Although mine haven't arrived yet, the Reaper Bones Kickstarter
shipments are wending their way across the world into eager hands, some
of which have never picked up a paintbrush before. I had another Bones
figure on hand to do some converting tests upon, and figured it might be
helpful to go through my painting process to offer advice to folks who
now have several hundred figures to paint up. Don't worry new painters!
It's not all that hard, it just takes some patience and practice. My
tips after the jump.
Tools: Hobby Paints
Getting started on your Bones minis might seem a bit daunting. Paints?
Brushes? What to pick? For paint, I prefer Vallejo paints. They come in
small dropper bottles, so you can dispense just a single drop of paint
if necessary, and they are remarkably smooth and "thin". There are a
number of basic sets to get you up and running (for example
Vallejo Orcs and Goblins Paint Set,
Vallejo High Elves Paint Set,
Vallejo Medieval Colors Paint Set )
or you can purchase them individually. I've found that I have more
shades of brown than any other color (ranging from deep chocolate browns
to khaki and ivory, with a diversions into greenish gray or warm orange
red browns) because they are useful for all manner of belts,
shoes, scabbards, hair, furs, skin tones, etc.
Games Workshop paints
are also popular, but I found the flip top lids lead to the paints
drying out after a year or two in some cases. Still, they seem to be
lingua franca amongst figure painters, so it's easy to match colors when
someone mentions a shade they used.
There are a number of other brands of modeling paints (Reaper, Army
Painter, Coat D' Arms, just to mention a few) all of which are fine
products. You should get them.
Tools: Craft Paints
Modeling paints can get pricey though, so if you are just starting out
don't feel bad about picking up some craft paints. A number of figure
painters use craft paints exclusively, and produce very good results
with them. They are cheaper, more readily available, and come in just as
many shades as hobby paints. Color matching is a bit trickier, and I've
found they are thicker and require a bit of water to thin them out
before applying. I freely mix both types of paints depending on the
effect I'm trying to achieve.
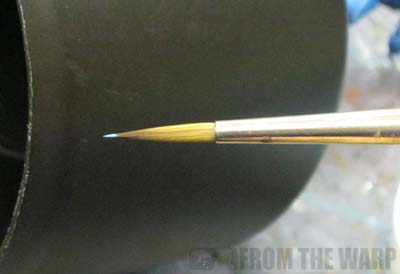
Tool: Paintbrushes
I go through paint brushes frequently. I've tried to go cheap on
brushes, and I don't think it's worth it. Steer well clear of
"watercolor" brushes (the bristles are too limp to control easily),
avoid synthetic brushes if possible. I try to find some natural sable
hair brushes. I picked up some
Army Painter brushes and have been very pleased with them.
Tools: Spray Paints
Reaper Bones don't require any spray primer, but if you branch out into
figures of any other material (metal, plastic, etc.) you'll need a can
of spray primer to give some tooth to the figure for the hobby paints to
grip. Regardless you'll want a can of matte spray to apply after
finishing a figure. The matte spray cuts down on the shine from certain
paints and washes, and applies a protective coat to help prevent
chipping or flaking to figures that will be handled by greasy pizza
fingers on the table.
I use Army Painter
Leather Brown Spray Primer for
most of my priming, although I'll use a black primer or white for
certain effects. I typically use Testor's Dull Cote for my final
overspray of finished models since I can pick it up at local craft and
hobby shops.
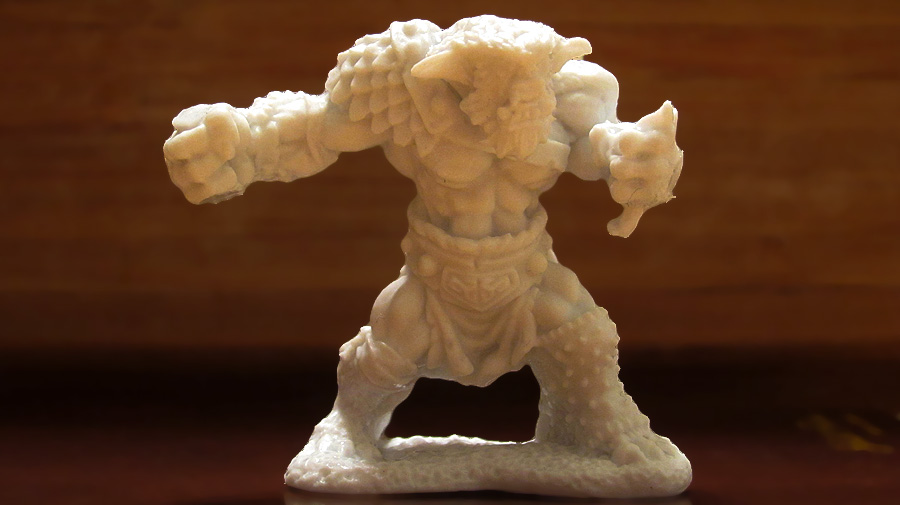
Converting Reaper Bones
I was happy with my
initial tests of painting a Bones figure.
For my next test I wanted to see if they could be converted. For this
bugbear I wanted to swap out its mornigstar for a spear, remove the
spikes from its shield (which were a little over the top for me) and
repose the shield arm so it was providing protection to the creature.
First I chopped off the morningstar and shield spike with a hobby
kniffe. I also removed the shield to reposition later too. The Bones
material is supposed to respond to heat, so I held the figure in boiling
water for 45 seconds, bent the shield arm closer to the figure's chest
and then held it in ice water for 45 seconds.
I drilled out the bugbear's weapon hand and used a wooden kebab skewer for the spear.
Painting Reaper Bones Bugbear
I usually start by "blocking in" the figure by giving each surface a
solid color. I hadn't quite worked out the color scheme for the bugbear,
so went about it bit differently this time. I started off blocking in
the exposed skin and fur.
Skin blocked in with
Vallejo Game Color Plague Brown
. The Vallejo paint was a bit thin, but I was pleased with how it took
to the Bones material. It almost acted like a wash, seeping into the
cracks and crevices of the sculpt, and leaving a tint to the raised
areas, naturally shading the figure. I picked up the technique of
painting "inside out" from other mini painters. Start with the flesh,
then work out (clothing next, followed by boots, belts, straps and packs
that are on top of the clothing)
Adding Vallejo Game Color Beasty Brown to the darker fur areas on its
head and back. To smooth the transition from the brown fur to lighter
skin, I dipped my brush in water, the dipped it in a drop of the paint
and applied it to the border between the fur and skin. The thin paint
tinted the lighter yellow skin and created a smoother transition between
the two.
Mostly blocked in. I chose a warm yellow and brown for the bugbear, and used
Vallejo Red Leather
and a dark green (a mix of Vallejo Black and light green craft paint)
for the various leather armors and cloth items. I wanted the creature's
fur and skin to be quite a bit darker than what you see here. The more
colorful reds and greens should add some visual interest to the
creature, but you can see I've left some of the straps unpainted at this
point. I wasn't sure how dark the eventual skin and fur were going to
turn out, and I wanted to be sure the straps placed over its skin would
contrast.
Next up I added a dark wash. I usually use Games Workshop washes, but I
didn't have any in the deep brown shade I was looking for, so I created
my own. I put down two drops of
Vallejo Game Color Charred Brown
on my palette and loaded my paint brush with water. Mixing the two gave
a very thin deep brown paint. Brushing it over the brown fur, it worked
its way into the deep crevices and tinted the highlights.
I washed all of the exposed skin and fur of the bugbear. Notice how it
picked out the details of the creature's face, defined the fingers and
toes, etc.
Now that the fur and skin were closer to their final color I picked a
light gray for the straps to contrast with the deeper skin color, and
finished blocking in the rest of the colors. With a similar wash to the
other straps, belts, cloth, and armor, this figure could be considered
table ready. I went on to add a few highlights and pick out some details
though to finish it off.
The scaled shoulder armor was blocked in with red leather (made from
dragon scales maybe?). To highlight them I mix a drop of the Red Leather
and a drop of light yellow craft paint. I painted the bottom half of
each scale with this lighter shade. Next, I added another drop or two of
light yellow to the mix and painted just the edge of each scale. It's a
bit fiddly. I used my small detail brush, and hold my breath while I
paint the scales. The goal is to get a suggestion of color on each
scale, so that at a foot or two of distance the scales "pop".
For metal studs, I painted each black and placed a dot of Vallejo Oily
Silver on each one. Teeth were picked out in Vallejo Bone White, tongue
in Red Leather, and raised surfaces of the skin (knuckles, the edges of
his pecs, thigh muscles, etc.) were given a dab of Vallejo Plague Brown.
I wasn't happy with the original shield, so I used the boiling water
method to flatten it, then reglued it with super glue into a more
traditional position.
I left the base unfinished as I'm planning on creating a unit of these
creatures for some mass fantasy battles in the future and will base them
all together, but that's a post for another day.
One of the big revelations to me in painting this bugbear up is how well
it takes thin paints. The white color of the Bones material allows you
to gradually build up colors by applying multiple layers of thinner
color. Also, the details on Bones are good, but comparing them to metal
versions I think they are a little shallower. I'd be very careful in
applying thick paint as it is likely to settle into crevices and obscure
detail more easily. Good luck with your own painting! Patience and
practice is all it takes :)
You might also like:


 ) To add to the generic barrels, if you want a few customs (besides
that generic one that is marked on the bottom to blow up when a figure
moves adjacent to it), here is some customization:
) To add to the generic barrels, if you want a few customs (besides
that generic one that is marked on the bottom to blow up when a figure
moves adjacent to it), here is some customization:


 Crates
are often used as part of larger terrain pieces but are also useful on
their own. They work well as objective counters or as random cover to
fill gaps on a table-top terrain layout. In this fairly quick project
Craig 'Nagasaurus' Hardt turns small pieces of scrap wood into
futuristic looking crates.
Crates
are often used as part of larger terrain pieces but are also useful on
their own. They work well as objective counters or as random cover to
fill gaps on a table-top terrain layout. In this fairly quick project
Craig 'Nagasaurus' Hardt turns small pieces of scrap wood into
futuristic looking crates. Matte
board is the thick cardboard used in picture framing (any thick card
will work). For the wood it is easiest to use a softer wood such as
pine, etc. and make sure to sand them lightly if the surface is rough.
Matte
board is the thick cardboard used in picture framing (any thick card
will work). For the wood it is easiest to use a softer wood such as
pine, etc. and make sure to sand them lightly if the surface is rough.  Littlemonk
tells us: I simply don't have the time to glue each board together to
make a wooden crate, so I came up with this simplified version.
Littlemonk
tells us: I simply don't have the time to glue each board together to
make a wooden crate, so I came up with this simplified version.

 Step 3: Assembly
 Even GW is in on the act, their pic on the right there shows that they've added blood to their artwork as well.