Sunday, May 19, 2013

Making Crates

Making Crates

Here's a quick tutorial on how I build crates using a block of foam, with basswood texture glued overtop. The solid construction ensures that the crates don't run the risk of collapsing during construction or gaming, and the foam keeps them lightweight.


Step 1: Cutting the Foam Blocks


Begin with a section of 1-inch thick insulation foam.

Working from one of the straight, smooth ends, measure out 1-inch increments.

Then, using a snap-off knife and a steel ruler, cut the foam at your measurements.

From there, cut the long blocks into shorter segments. For smaller, flatter boxes, cut the sections in half lengthwise.

Step 2: Coating the Blocks


Use something to hold the block (I've stuck a half-round file into the bottom of it) and apply some Liquid Nails on each surface. Wet your finger and smooth the Liquid Nails over the entire surface. The water will help keep the adhesive from sticking to your finger, but be sure to thoroughly wash your hands with soap and water afterward.

Coating each block this way will allow you to super glue the basswood right to the surface. Why not just stick the wood on using Liquid Nails, you ask? Well, the Liquid Nails takes a little while to dry, and the pieces will slide around. The moisture in the L.N. will also cause the wood to curl slightly.


Super glue alone will eat into the foam without really adhering the wood, and hot glue also runs the risk of melting the foam without creating a secure bond. This is my preferred method for attaching things to foam.

Step 3: Attaching the Wooden Planks


This is where the real work begins. To cover the foam, use basswood. Most hobby shops carry a variety of shapes and sizes, and the pre-scored sheets are perfect, much easier than gluing individual strips. Get the sheet with 1/4-inch planks. You'll also need some 1/8-inch styrene strips (they'll come in later). Each of these is 1/16-inch thick.

Begin by cutting the panel into three one-inch sections, using the grooves as your cutting guide.

Next, cut the long strips into one-inch squares.

Super glue these squares to the ends of the crate.

For smaller crates (like I mentioned above), you can remove sections of the square to fit the height of the crate. If you keep things measured in quarter inches, you can easily use the grooves on the wood as your cutting guide. These two crates are 1/2-inch and 3/4-inch high.

The strips to cover the long sides of the crate need to overlap the wood on the ends, so use the crate to measure out where to cut the panel.

Cut four pieces (one for each side) and super glue them to the crate.

Because the foam is cut to exactly one inch, and the wood is also one inch wide, there will be a slight gap on each corner. To take care of this, cut some thin wooden "runners" from the spare basswood. These runners don't have to be terribly precise, merely cut them around 1'16-inch wide. (I just eyeballed it.)

Trim the runners to the length of each crate. Then run a bead of super glue in the gap and place the runner into it.

Now you have a neatly framed out wooden crate.

Step 4: Building the Metal Straps


Metal straps can be created using the 1/8-inch styrene strips mentioned above. Lay the crate on its side, and mark the crate's width and where the rivet will fall in the center of each plank.

You can make easy rivets using a rotary hand sewing punch. This tool (intended for leather working) will press a divot in ove side of the plastic, leaving a raised bump (our rivet) on the opposite side. Cut the strip and super glue it to the crate about 1/4-inch from the end.

Repeat this to make four vertical strips and then measure the top strip so it overlaps the ones on the side.

There you have it– A wooden crate with metal straps. Because these crates will be glued down on some terrain, I've left the straps off of the bottom so they will sit flat. If your crates will be loose pieces for your battlefield, you can build the straps all the way around and paint all the sides so the crates can be positioned or stacked anywhere.
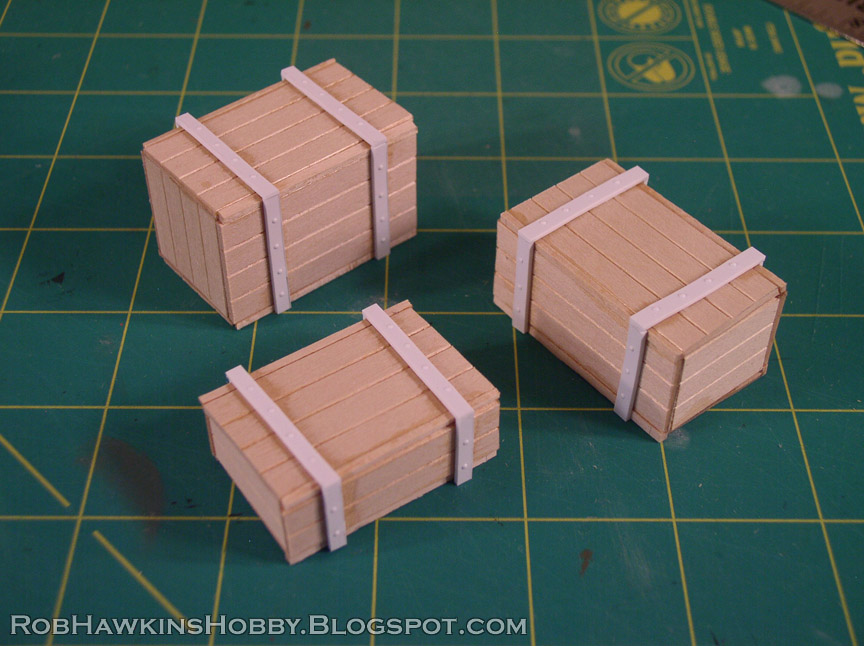
To add a bit of weathering, use your hobby knife to make some V-cuts between the planks.

Now you can build a pile of cargo for your game table. Perfect for adding detail to factory and shipyard settings, and useful for taking cover from an enemy model's fire!

'Til next time!

Terrain Tutorial: Desert Mesas

Terrain Tutorial: Desert Mesas

Given the time crunch I'm usually under for the terrain commissions, I don't know if I'll get to post another start-to-finish project journal like I did for the Wrath of Kings diorama. The idea of posting a series of short terrain tutorials appeals to me, and there was some positive response to last week's crate tutorial. So, here's another one recreating the style of mesa that I used for the Wild West Exodus table.


Start with stacks of 2-inch insulation foam. Stack them as high as you like for your mesas. When attaching them, use a bead of Liquid Nails construction adhesive around the edge, and some hot glue in the center. The hot glue will provide an immediate bond so you can work without the foam pieces sliding around. Once the Liquid Nails dries (usually overnight) it will create a more permanent bond.

To texture the rocky surface, begin by making horizontal cuts in the foam about 1-inch deep using an extendable knife. Vary the spacing between cuts and angle the blade to make some V-cuts in a few places.

Then, pick at the foam to pull out chuncks and vary the surface.

You can also make some vertical or diagonal cuts to make pulling the foam apart a little easier.

Work the surface to get a nice mix of raised and recessed stones.


As you approach the top, make the horizontal cuts deeper so you can crack off portions of the foam and create some stepped, flat stones.

Here, the stonework is just about finished. The horizontal seams between the pieces of foam have been obscured among the layers of stone cuts, but the vertical seams where the pieces butt together are still visible.

To camouflage the vertical seams, cut a deep section across the seam and pull out a piece of the foam.

Get an appropriately sized piece of foam from the off-cuts and glue it in place so it straddles the gap.

Do this along the length of the seam until it blends in with the rest of the mesa's surface.


Finally, rub your hand gently over the surface to knock off any loose pieces of foam. Any bits that fall off wouldn't have stood up to vigorous drybrushing. Better to get rid of them now than in the middle of painting.

To make freestanding mesas, the same techniques apply. Just stack the foam, and make the cuts all the way around.

When texturing the table with sand and gravel, add some to the tops and "shelves" of the mesas.

Desert mesas, ready for painting!  Check out the painting tutorial here.

'Til next time!

Terrain Tutorial: Pipes

Terrain Tutorial: Pipes

Here's a quick and easy way to make piping for your buildings, useful whether it's a sci-fi or steampunk setting.


What you will need:


A selection of styrene rod and tubes

Heat gun

Hobby knife

Thin super glue


The styrene rod will be bent into shape to form the pipe, and a ring cut from a section of tube will be added overtop to create the illusion of cuffs where the pipe segments join.


For this tutorial, I'm making pipes in two different sizes. The larger pipe uses 4.0mm rod and 5.5mm tube. The smaller uses 2.5mm rod and 4.0mm tube.


When selecting styrene for the thickness of your piping, be sure the tube fits perfectly over the rod without any gap.


Bending the Pipes


A heat gun is made for stripping paint, but it works just as well to bend plastic. Make sure you read all the safety information, and work in a well ventilated area with an appropriate respirator so you don't inhale any toxic fumes (you are melting plastic, after all). 


I suppose it's possible that a hair dryer may do the trick, but I don't know if they get hot enough to evenly melt thicker plastic. It would certainly take longer. A heat gun is only $25-$30 and is a pretty handy tool to have for terrain building.


To create bends in the pipe, hold the rod over the edge of your table, and turn the heat gun on. The low setting is usually enough. (Keep the heat clear of your cutting mat and table so they don't burn.)


Hold it over the spot you want to bend and wait for the plastic to go "limp noodle."


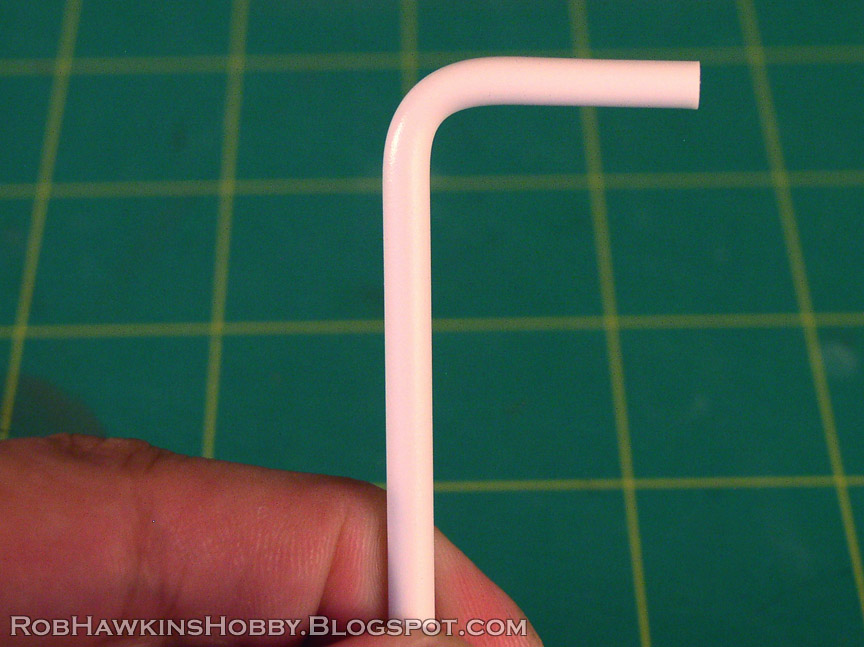
When it starts to bend, turn off the heat gun and use the handle of a tool to hold it at the desired angle. Wait a few seconds for the plastic to cool...


...and you'll have a clean bend without any crimping.


Add as many bends as you like, and create turns in the pipe by bending the rod in perpendicular directions.


It may take a few attempts to get the feel for bending the plastic. Occasionally, you'll get a wonky corner. If that happens, hit it with more heat to soften it again and square off the bend. (Crooked bends can be useful for making dented or damaged pipes, so don't throw them away if they become unsalvageable.)


Be careful not to heat the rod too much or the plastic could swell, making it impossible to fit the rings over the bend in the next step.


Once all the bends are made, trim the ends of the pipe to the desired length.


Cutting the Rings


Use a new, sharp blade for this step. Measure about 1/16 to 1/8 inch from the end of the tube (I just eyeball it). Place your knife on the tube and roll it back and forth to score all the way around.


Keep the knife straight and controlled so the cuts line up all the way around. This image shows a cut that didn't line up properly. If this occurs, just cut off the end section and try again.


If the tube is small enough and the blade sharp enough, you may be able to make a clean cut by pressing straight through. The "rolling cut" technique will allow you to cut evenly without squishing the tube. Either way, make sure you have a backstop to prevent the pieces from shooting across the room when you're cutting.


Try to keep the rings a uniform thickness. Don't sweat it if you have to cut more than you'll need. Compared to the amount of styrene rod used, you'll have plenty of spare tube to make mistakes on.


Attaching the Rings


Once you have enough rings, it's time to assemble the pipes.


Slide a ring over the end and around the bend.


Then, add a drop of thin super glue. I'm using Zap-A-Gap Thin CA glue (in the pink bottle). The thin CA glue will run around the seam and secure the ring in place.


Then, add a second ring, creating the illusion of an elbow segment joining two straight pieces.


Finish off the pipe with a ring on each end. If you have a particularly long straight section, you could add a few rings along the length so it looks like several sections joined together. It probably bears mentioning that you should work from the center out toward the ends since you can't slide the rings over each other.


Here's a large and small pipe side-by-side.


Placement and Painting


The perpendicular bends are useful for fitting pipes into corners.


By adding multiple pipes you can create a visually interesting space, and step up the level of detail on your terrain.


This is the same arrangement from the side, as if the pipes were suspended from the ceiling and wall.


Paint the pipes with P3 Pig Iron and wash them with P3 Bloodstone for a rusty metal appearance.


For copper pipes, paint them with P3 Molten Bronze and wash them with a mix of P3 Thrall Flesh and P3 Arcane Blue to create a patina.


And there you have it– simple but effective pipes that will enhance any piece of terrain.