Showing posts with label Basic How Tos. Show all posts

Saturday, November 3, 2012

green stuffing to fluff terrain cars

The Blessings of Papa Nurgle

aka Converting Nurgle Tanks for Those Who Cannot Sculpt.

While I’ve never done a Nurgle army I have been unable to resist the lure of converting some vehicles for dedicated to the Plaguefather. It started with a Land Raider back in 2007 and since then I’ve found myself doing one every so often. I even pained a couple of them, which for me is a novelty.

There is one problem I faced when I came to start on doing some Nurgle dedicated tanks and walkers, namely when it comes to sculpting I have no ability whatsoever. Through various techniques I worked out as I went along this didn’t prove much of a hurdle afterall.

While not a step by step guide the following lays out the various techniques and materials I have used on the Nurgle vehicles I have converted – and in a couple of cases still in the process of working on.

Surface Texture I

This was the first technique I employed . I was testing out some paint stripper on a second hand sentinel I had to see how useful it was and discovered that the stripper softened the plastic and gave it an interesting surface texture.

When working on the Nurgle tanks I found I could achieve two different surface textures depending on the conditions I left the model when it was covered in the stripper.


This is the more subtle finish, edges are smoothed out slightly and a rippling effect occurs, the softness of the plastic allows you to distort the plastic and you can easily push something sharp through it to create holes. To get the effect the model was simply left for a couple of nights with the stripper plastered all over it.


This is the more extreme finish. By leaving the model in a cold area overnight then bringing it into the warm and adding more stripper the rough surface texture was created.

In both cases care has to be taken to mask off any areas you don’t want effected, such as details (vents, hatches and so on) and weapons (you don’t want barrel droop…).

I used the texture achieved with the stripper as a base to then add more effects over the top.

Surface Texture II & III


A combination of super glue and sugar sprinkled on for a diseased skin like effect. The sugar was built up with small amounts sprinkled on, with a final coat of super glue brushed on afterwards to seal everything.


Showing the WIP sugar and how it looks once some paint and washes have been applied (still PIP however)


For a different looking rough diseased skin like appearance I used thin tissue paper (clean tissues preferably, though I suppose used would be more Nurgley) superglued to the model. Often adding some sugar to the top covering of superglue gives even more texture. The tricky thing is how to end the area covered, often blending fleshy areas into it will work best.

Surface Texture IV


Using a rotary power tool (a dremel in this case) a pitted look is easily achieved. I found simply letting the tool choose where to go gets a more ‘natural’ look. Lightly bringing the tool into contact with the model and letting it jump and skip. Naturally care has to be taken so not to damage either the model or yourself. Occasionally I add more force to vary the look and bring more variety to the texture created.

Again a PIP picture to show the texture
once some paint and washes have been added.

Flesh

As I mentioned I can’t sculpt, frankly I can barely fill gaps with Green Stuff let alone accomplish something more ambitious. However I use plenty of GS on my Nurgle vehicles to add areas of ‘flesh’, deamonic flesh growing or merging with the vehicle. I don’t think it counts as sculpting as I am simply adding GS and then pushing, pulling and poking it into shapes and forms that look pleasing and interesting.

The quick and simple way of adding flesh.
Rather than simply covering a vehicle in GS I tend to use small areas or keep large areas uncovered. The aim is to add to the vehicle, not make it the filling in a GS bun.


The Dreadnought and Land Raider are examples where plenty of GS has been added but the shape of the base model is still clearly defined and much of the original pieces still show through. For vehicles which are not Deamonically Possessed I would add far less GS.

Another way to use the flesh is to cut into the model and fill with GS, this can be used to show that under the skin is the Daemon trying to get out or showing the vehicle ‘healing’ after damage.


Pustules and Growths

To break up the areas of flesh and to add interest I add ‘pustules’ and ‘growths’.


Pustules are a mix of GS balls, ball bearings and small balls taken from a water filter. The balls are pushed into the GS flesh, or arranged into groups as shown above.


The fungal like growths are made by using a lighter to heat one end of styrene tube. The tube softens and distorts into the shape shown. I use groups of three to mirror the Nurgle icon, in the picture you can see a variant where I have used different diameters of tube to allow one growth to fit inside another.

‘Gunk...’


Can’t think of a better term than gunk for the mucus like discharge or pools. This is a mixture of two part epoxy and glue from a hot glue gun. While still hot it can be manipulated and drawn out.

On the possessed vindicator shown in the pictures I imagined that the vehicle was ‘fuelled’ by victims being thrown into the liquid at the rear while waste parts are then discharged out the rear…I mixed in a grasping hand into the fuelling pool and added some bones to the discharge.


To finish here is a picture of the Land Raider – the first Nurgle tank I did finished off...


And to show that the same techniques can be used on a smaller scale here we have one of my Daemonically Possessed Plague ships from Battle Fleet Gothic...


I hope that small foray into the diseased world of my Nurgle vehicles was interesting. Please ask any questions you might have and drop into Recalcitrant Daze to see more of the vehicles above (and other things naturally...)

Thursday, October 25, 2012

paint conversion charts


Skull White: Pure White 9039
Chaos Black: Pure Black 9037
Scab Red: Mahogany Brown 9070 is closest (browner) or 9001 Red Brick (purpler). A mix of these would probably be the best of both worlds and match really, really close. ::):
Red Gore: Deep Red 9002 is close
Blood Red: Clear Red 9094
Blazing Orange: Phoenix Red 9005
Fiery Orange: Clear Orange 9130
Golden Yellow: Marigold Yellow 9007
Sunlight Yellow: Sunlight Yellow 9008
Bad Moon Yellow: Clear Yellow 9095
Bilious Green: Spring Green 9146
Scorpion Green: Moth Green 9145
Goblin Green: Field Green 9167 is close
Snot Green: Clear Green 9096
Dark Angels Green: Pine Green 9010 is close, or mix Swamp Green 9175 with some Clear Green 9096.
Camo Green: Camoflage Green 9177
Catachan Green: Military Green 9176
Scaly Green/Jade Green etc.: The Reptilian Greens Triad 9184/9185/9186
Hawk Turquoise: Marine Teal 9077 is close
Ice Blue: Mix Clear Blue 9097 with Pure White 9039 to match
Lightning Blue: Sky Blue 9018 is close
Enchanted Blue: Cyan Blue 9117 or Sapphire Blue 9016 are close
Ultramarines Blue: Ultramarine Highlight 9189
Storm Blue: Ritterlich Blue 9115
Midnight Blue: Ultramarine Shadow 9187
Regal Blue: Brilliant Blue 9116
Nauseating Blue: Deep Amethyst 9079
Tentacle Pink: Close would be Pale Violet 9027 with a drop of white added
Warlock Purple: Clear Magenta 9098
Liche Purple: Clear Plum 9132
Imperial Purple: Clear Purple 9099
Codex Grey: Rainy Grey 9038
Shadow Grey: Twilight Blue 9020
Space Wolves Grey: Snow Shadow 9021 is close
Ghostly Grey: Ghost White 9063
Bleached Bone: Yellowed Bone 9143
Bubonic Brown: Tanned Leather 9031
Vomit Brown: Burnt Orange 9111; Leather Brown 9030 if you want it more
brown
Beastial Brown: Intense Brown 9138
Scorched Brown: Blackened Brown 9137
Snakebite Leather: Half-orc Highlight 9204
Leprous Brown: Saffron Sunset 9182
Vermin Brown: Chestnut Brown 9071 is close; a 50/50 mix of this and 9072
Rust Brown is close to perfect
Rotting Flesh: Bloodless Skin 9150 is very close
Elf Flesh: Rosy Highlight 9069
Bronzed Flesh: This color is very orange, and alarmingly close to Burnt
Orange 9111; however, I prefer a more natural skintone, 9044 Tanned
Skin, as a substitute for this one. If you want more warmth, mix 50/50 Tanned Skin 9044 with Golden
Shadow 9091.
Dwarf Flesh: Rosy Shadow 9067
Dark Flesh: Dark Skin 9041 would be closest. Add a drop of Ruddy Leather 9109 to deepen the color.
Burnished Gold: New Gold 9051
Shining Gold: Antique Gold 9050
Dwarf Bronze: Ancient Bronze 9049
Brazen Brass: Tarnished Brass 9198
Tin Bitz: Scorched Metal 9125
Mithril Silver: Polished Silver 9054
Chainmail: Honed Steel 9053
Boltgun Metal: Shadowed Steel 9052

Newer or previously neglected GW Colors:

Graveyard Earth: Uniform Brown 9127 is close, as is a 50/50 mix of 9161 Shield Brown and 9162 Driftwood Brown (though the latter is a little more grey)
Kommando Khaki: Terran Khaki triad is close
Fortress Grey: Misty Grey 9090 or Icy Grey 9174 may be close
Terracotta: Terracotta Clay 9170 is close
Desert Yellow: Dune Shadow 9154 is closest
Tanned Flesh: Fired Clay 9171 is closest
8001 Blood Red: Close to upcoming 9134 Clotted Red
8002 Firehawk Red: Close to 9005 Phoenix Red
8003 Dragon Red: 9003 Blood Red
8004 Ember Orange: 9006 Fire Orange
8005 Desert Gold: Close to 9074 Palomino Gold
8006 Spring Yellow: Close to 9009 Lemon Yellow
8007 Sunlight: 9095 Clear Yellow
8008 Elven Green: 9014 Forest Green
8009 Kilt Green: 9015 Grass Green
8010 Emerald: Close to 9016 Jade Green
8011 Plains: No equiv.
8012 Breonne Navy Blue: 9055 Breonne Blue
8013 Night Sky: 50/50% mix of 9152 Military Blue and 9080 Indigo Sky
8014 Dragon Blue: 9015 True Blue
8015 Ice Blue: No equiv.
8016 Imperial Purple: Close to 9023 Imperial Purple
8017 Liche Purple: Close to 9024 Amethyst Purple
8018 Rose Quartz: No equiv.
8019 Armor Grey: 9088 Stormy Grey
8020 Ash Grey: 9089 Cloudy Grey
8021 Granite: 9038 Rainy Grey
8022 Dove Grey: 9090 Misty Grey
8023 Walnut: 9136 Walnut Brown
8024 Woodland Brown: No equiv, closest to 9029 Earth Brown
8025 Volcano Brown: Upcoming 9179 Volcano Brown (June 2006)
8026 Chestnut Brown: 9071 Chestnut Brown
8027 Hill Giant Brown: Close to 9067 Rosy Shadow
8028 Buckskin: Close to 9075 Buckskin Pale
8029 Caucasian Flesh: Close to 9046 Fair Shadow
8030 Fair Maiden: Close to 9047 Fair Skin
8031 Ruddy Flesh: Closest to 9044 Tanned Skin
8032 Dwarf Flesh: No equiv.
8033 Orc Flesh: Close to 9036 Pale Olive
8034 Ghoul Gray: Close to 9148 Ghoul Skin
8035 Olive: 50/50% mix of 9034 Muddy Olive and 9035 Olive Green
8036 Bloodstone: 4:1 mix of 9077 Marine Teal and 9096 Clear Green
8037 Sea Floam: No equiv.
8038 Ivory: 9144 Creamy Ivory
8039 White Leather: 9062 Leather White
8040 Linen White: 9061 Linen White
8041 Dragon White: 9039 Pure White
8042 Dragon Black: 9037 Pure Black
8043 Oiled Leather: 9110 Oiled Leather
8044 Slate: Close to 9056 Templar Blue
8045 Pink: No equiv.
8046 Maroon: Bloodstain Red
8047 Slime: Closest to 9145 Moth Green
8048 Aged Red Brick: 9070 Mahogany Brown
8049 Troll Flesh: Close to 9034 Muddy Olive
8050 Hawkwood: Close to 9030 Leather Brown
8051 Ocean Blue: Close to 9116 Brilliant Blue
8052 Stone Grey: 9087 Weathered Stone
8053 Amethyst: 9079 Deep Amethyst
8054 Burnt Orange: 9111 Burnt Orange
8056-8057, No equivs.
8058 Pine: Upcoming Mist Green, 9168, due June 2006
8059-8062, No equivs.
8063 Glacier Blue: Close to 9018 Sky Blue
8064 and 8065, No equivs.
8066 Rust: 9072 Rust Brown
8067 Shield Brown: 9161 Shield Brown
8068 Blue Black: 9066 Blue Liner
8069 Bright Blue: 9097 Clear Blue
8070 Bright Red: 9094 Clear Red
8071 Bright Orange: 9130 Clear Orange
8072 Griffon Tan: Close to 9032 Amber Gold

How to hold onto your model while you paint it


If you're always having trouble holding onto the base of your model with one hand while you paint with the other... try this out.

Grab an old paint pot or similar sized object and set a blob of "ticky-tack" (the stuff you use to hold up posters) or something similar on top. Press your model down into carefully and you're all set. Now you can easily hold onto the object and not worry about messing up your model with messy fingerprints.

hy you need two cups of water for painting


Here's what I do to make sure I don't end up with metallic flakes all over my brand new paint jobs. All you need is 2 separate cups for your water... one for regular paints and one for metallics ONLY.

I've even gone as far to add a third cup for my brushes that have glue or when I'm putting decals on my guys.

Turning cardstock into plasticard


Adeptus Custodes with purity seals

With all the sculpting that I do, I've developed a way to turn simple cardstock into plasticard and make a very sturdy base for me to sculpt on when I need it. Using plasticard and greenstuff is an art. Some folks do it better than others... I'm not one of those and that's how this trick came about.

I've been asked before how I do this particular thing and I figured it was time to show exactly what I do to make the change from cardstock to plasticard.

You'll need two things
Cardstock and SuperglueCardstock to plasticard conversion

When it comes to cardstock, I prefer the simple stuff like a regular index card. You can use posterboard if you want, you just need to make sure it's not the glossy kind or that it has any kind of coating to it. You want the stuff that will absorb liquid.

As for the superglue, I use the cheap stuff myself. The trick though is getting a kind that is like water. You want it to be very runny and nothing like a gel. You want to be able to apply it to the cardstock and have it be absorbed into it easily.

What I use this technique for
While I'm sure there are more uses, I tend to focus on just a couple of things. Purity seals (the long flowing kind), and support structures for when I sculpt things like tabards. Those are the two main things.

I also use this approach when I'm building armour plates like my Pre-Heresy Terminator shoulderpads and greaves.

How it works in practice
In the case of things like purity seals, I simply cut out the shape I want, bend it into position carefully and then attach the piece to the model with a tiny drop at the connection point. Once it's secured, I go through and "coat" the cardstock with superglue by adding a few drops here and there and allowing them to absorb into the cardstock.

When it comes to tabards, it's the same thing. Cut your cardstock to shape, attach it to the model and then coat with glue.

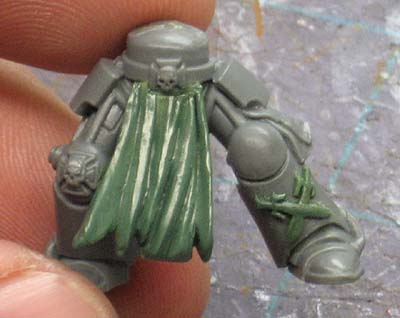
Space Marine tabard

Space Marine tabard greenstuff

I usually only coat one side of the cardstock and that's the side I'll be applying the greenstuff or any paint to. The other side is left alone. It can still be worked on since the glue has soaked through the cardstock and solidified the whole thing.

What to be careful of
The big thing is applying too much superglue. This only matters on things like the purity seals since too much superglue will dry and once the cardstock has absorbed all it can, the rest will pool up on the surface creating unwanted texture.

In the case of half tabards, it doesn't matter since you'll be covering the whole thing with greenstuff anyway.

The second problem comes when you rush the drying. Don't mess with the superglue as it's drying or you run the risk of pushing it around on the surface and creating waves of texture. The idea is for all the glue to absorb and leave a smooth surface you can work over it without having to worry about the water in your paints affecting the cardstock underneath and eating away at the stability of your model.

And there you have it, how to take regular index card (cardstock) and turn it into "plasticard" so that you get the rigidity and support you need in the end while keeping the flexibility and ease of working with cardstock in the beginning.

Magnets: Making Modular Landspeeders


Posted by Man Boy Genius Tuesday, January 10, 2012
There seems to be a general trend lately of moving to Land Speeders to provide mobile firepower for Space Marine Armies.

However with 6th Edition looming in the far distance like a fat shadowy enigma, it may be better to magnetize everything these days to take full advantage of any new rules changes.

I made a few Land Speeders up recently and had a blast magnetizing pretty much everything, lol.

Lets take a look at how I did it.

Part List

Several 1/8" magnets for the main weapons
Several 1/16" magnets for the crew weapons
Pin vice with 1/8" and 1/16" Drill Bits

How I did it
First off I grouped up all my weapons and got out some stacks of magnets. I used 1/8" for the main weapons, and 1/16" for the crew manned ones.


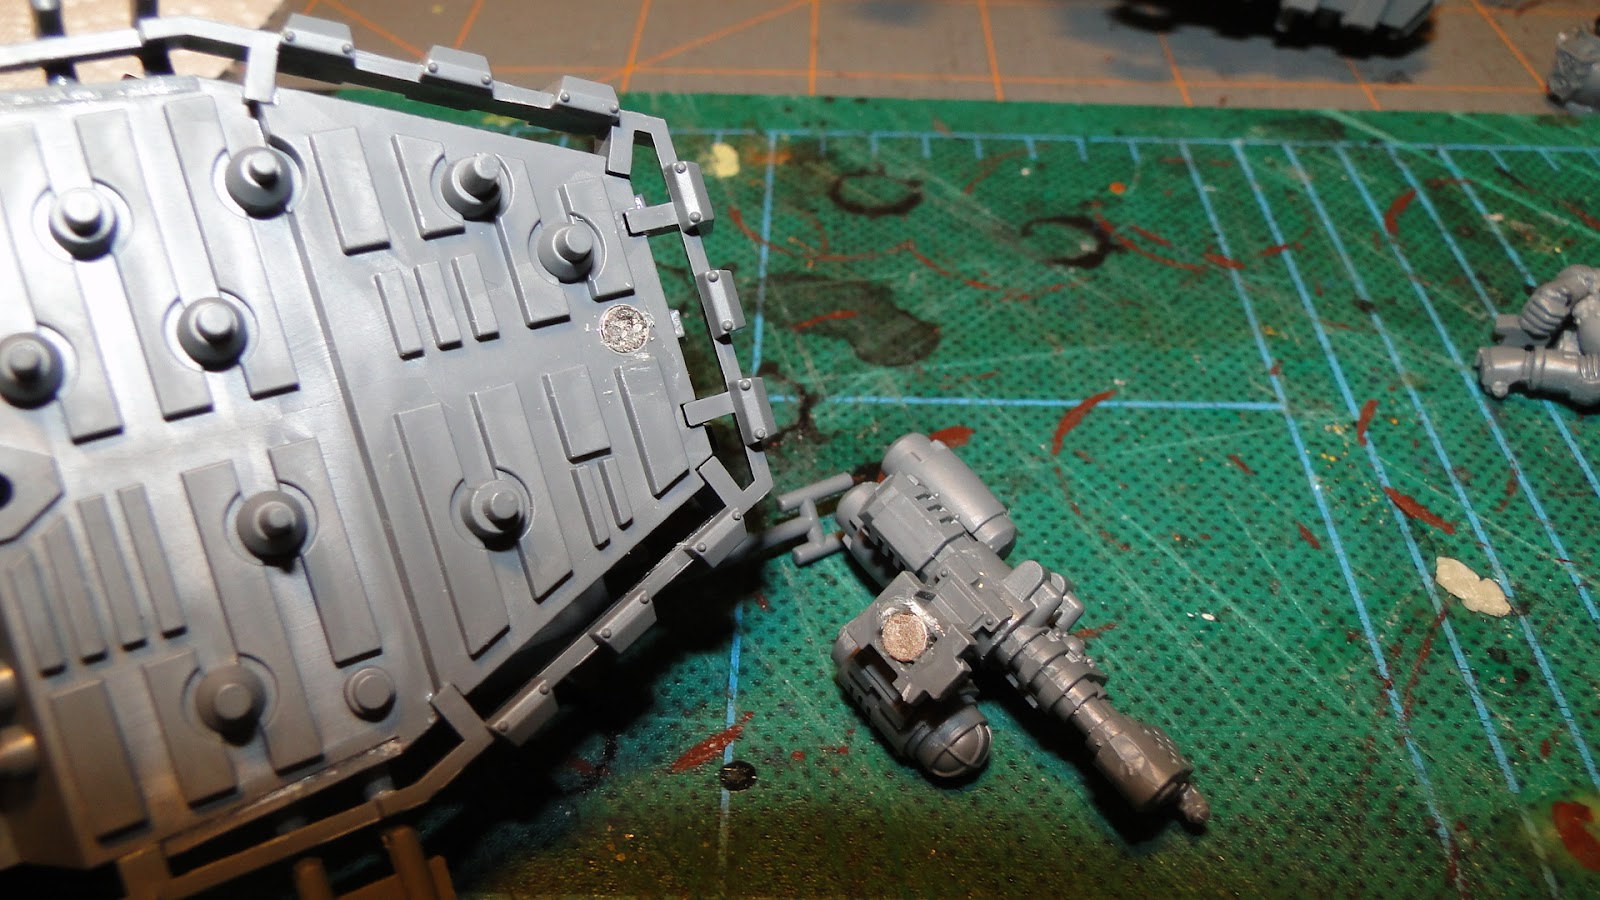
To attach the chin mounted ones I carefully drilled a 1/16" pilot hole first, then used a 1/8" drill bit to enlarge the hole for the magnet. Drilling pilot holes first gives you better control (smaller bit), and reduces the chance for error with the bigger drill bit as it's doing less work.

With the new speeders the chin mount for the weapon kinda fits in like a jigsaw to the bottom of the hull, so make sure you line that up before you drill your first hole.


Then I drilled out holes the same way in the weapons for the chin, and attached magnets into the holes using superglue and kicker.

Make sure as you are gluing the magnets down, that you check your the polarities of the magnets! You don't want your weapon to shoot off into space because you glued a magnet in wrong.

I usually just put a dab of glue in the hole, and then sink a magnet into it that has been doused with some kicker.  Keeping the magnets attached together in a long shaft also makes it easier to control as well.


Drilling a pilot hole really came into play with the Typhoon Launchers, as every surface of this bit is frail, and will break.  I managed to nail it but had a few close calls.


Drilling the hole for the Typhoon mount is a little easier, but that door is very frail- so use care.


The crew weapons were pretty easy to bore out. I didn't use a pilot hole on these because of their small size, I already had a lot more control.  You can see the magnet locations in red above. Even being as small as they are, the weapons stay attached very well. Magnets: it's almost cheating.

Checkout the weaponized pictures below, feels like a Transformer, lol.


Hit me up with any questions, and if there are any other kits would you like to see a feature on magnetizing? -MBG?

Hobby Basics- Magnetizing How Does it Work?


Posted by Man Boy Genius Monday, September 26, 2011
It's the age old question- Magnets how do they work?

Some say magic, but I am almost 100% sure Tom Cruise has something to do with it.  Regardless, they just work and its awesome!

Today we have a Two-Fer for you, how to magnetize your Stormraven, and how to magnetize stuff in general.

So back earlier in the year I posted up my Stormraven assembly guide, and explained how to magnetize the kit. Well it turns out I was a little magnet crazy, and you don't really need that many magnets to keep this kit together.

After I magnetized the first one, it was so heavy in the back that it rose up off the ground on it's rear skids like a firebird funny car!  Not good.....

I think because Games Workshop designs kits on the computer now they have such tight tolerances (uniformity of the gaps between each part), that most stuff just sticks together with little or no meddling.  Once you paint it, the parts are even more secure.

Magnetizing 101

Let's take another look at this Stormraven kit and how to magnetize it. As it turns out, you only need one set of magnets to make the wings stay on!

To magnetize your model, you will need a few things; glue, kicker, and the magnets/ a drill that matches them.

I use use the pump kicker, as spraying the stuff gives me nausea.  You can use any super glue with the kicker really, Zap, GF9, or P3 it all works fine for this.


First off build a superstructure for a magnet under the intake assembly out of spare sprue. Be sure to dry fit the magnet to so it sits flush with the bottom of the intake, that way everything sits flat on the jet itself.

Use some plastic glue on the sprue and super glue on the magnet to lock it down. Now go back and add a tad of kicker to the superglue around the magnet to accelerate the drying process on this one. If you have to add more glue to secure the magnet as well!

When using kicker- take the nozzle out of the bottle and gently depress the top, which drips some kicker out of the bottom feeder tube.

This way there is no spray and the kicker goes right where u need it.


For the magnet itself, use a 3/8" x 1/16" thick one and line it up to mate to a 1/4" one in the jet.  Because the first one is nice and big, if you messed up lining up the two magnets chances are it would still be close and the whole thing would still work.


Next up just put a ton of sharpie marker, or paint, on the magnet and push it flat into place. Now it should have rubbed off some and you will see the place where you can drill the other magnet so they will line up.

Get out your handy drill and make a 1/4" hole for the next magnet. When mating magnets into recesses I like to dry fit them to make sure they'll work right. After that take a stack of the magnets you are going to use, and dribble some kicker down them.


Then after checking your polarities with the top magnet, put a tab of glue in the hole, and insert your magnet stack.


I like using magnets in stacks because it gives you better control of them. You can also gauge the depth of the hole you are putting them into using the lines between each one.

That way no matter how deep the hole is you can generally line a magnet up flush to the top.


So now you magnet should be glued firmly into place.  Test out the pull of the two together and then stick on the wings and you're done!

Now your Stormraven will break down for storage easier!  No expensive or large foams required!

I put a few shots of my new Iron Hands Stormraven for you to checkout below.


Hobby Basics: Priming 101


Posted by Man Boy Genius Sunday, August 22, 2010
We've all issues with primer- whether it was too much, too little, flakes, or fuzzy paint it's one of the most frustrating parts of the hobby.  Mastering this basic technique is easy however- as the most common solution is to not prime your minis in high humidity.

Also keep in mind the distance between the spray nozzle and your miniatures. Some primer such as the Army Painter Sprays require a distance of six to eight inches to your models, while Citadel sprays require longer distances.


Here is the technique I use when I prime my models.  I think it gives me pretty good coverage as I hit them from every angle.  So flaking is at a minimum.


First I place the models right side down on some cardboard.  Then I hold them in one hand and spray the models as I rotate them on the tray.  Remember don't hold the spray nozzle down fully. You have to let on and off the nozzle so you don't soak the models in paint!


Let the models sit for about 5 minutes, then move them over to their other side.  Repeat the process above for the new side. :-)


Now take the models (make sure you waited at least 5 min for them to surface dry!!!) and place them upright and hit them again from every angle, and then let them dry for a few hours.  That's it- follow these hints and your models primer job should turn out great.


  •  
    One thing I just learned recently (although being over 10 years in the hobby) is don't prime your models when it's cold... I just got a flaked result on the back of a converted Necron Destroyer Lord, and nothing can get the 2 layers of undercoat off...
  • One tip I was taught was to start the spray aimed off the mini, then slowly but steadily pass over the mini until completely past then stop the spraying. Doing it this way, stops build up of primer on the model if you start & stop directly aimed at the model. I found it may take more passes, but does end in a more smooth/even coverage.I have screwed up so many figures with bad priming techniques.
    I've resorted to using a 'priming stick' when doing more than a couple of models.
    I blue tac them to a four sided stick and then rotate them as I prime.