 |
« on: October 08, 2008, 01:35:41 AM »
|
 Quote Quote
|
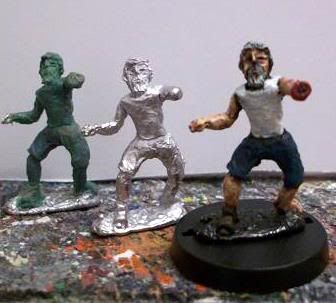
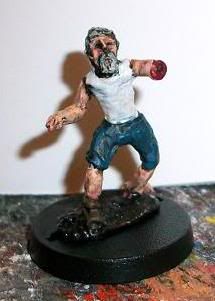
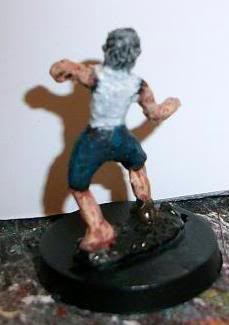
so i sat down with a bunch of ebob armatures in hand and thought....."what could i sculpt that is in high demand" and instantly i thought ZED (zombie). most of the dudes over on the future wars forum seem to be going bezarck for zombies at the moment. so i set about making one, basic features. and gave him a lopped off gory arm!
i was going to put him up for sale painted in his green state, but i decided not to and i decided to go one step further.....and cast him up.
most of the stuff needed to cast was provided in the kit i bought,

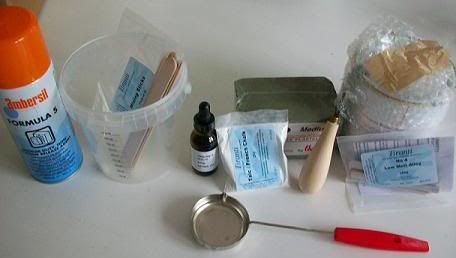
>silicone rubber (for making the molds)
>metal (for casting with)
>ladle (melting metal) chalk (for mold) release agent (to prevent walls of mold box and mold halves sticking together)
>catalyst (to help the silicone set)
and some other bits and bobs.
but i also needed (from home)
>two pans (one old and destroyable-reason being if there is over spill you might burn the pan) and one new or old (it doesn't matter)
>elastic bands
>Lego
>scouring pad
>thick or leather gloves (NOT woolen)
>matches or cocktail sticks
>tissue
>balsa wood
heres how the casting process went in stages
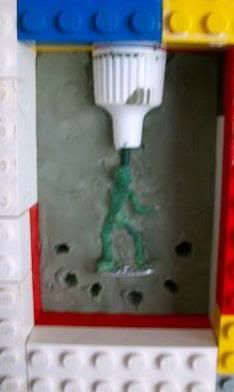
1. i took some Lego bricks and built a rough box around the figure allowing about 1-2cm on each side. (just to get an idea of measurements)
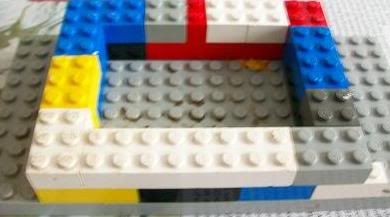
2. i then took some of the plastecene with the kit and pressed it into the box (only built to "2" bricks high"
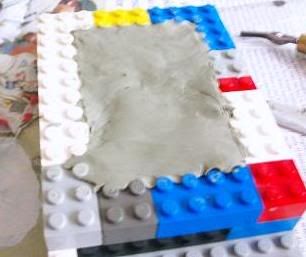
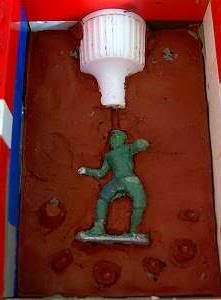
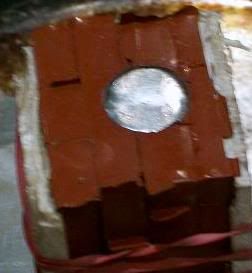
3. i then half embedded the figure face down into the plastecene. and put a Vallejo paint lid in the top of the plastecene (to act as a weight in the gravity casting) and a small length of wire going to a part of his head.
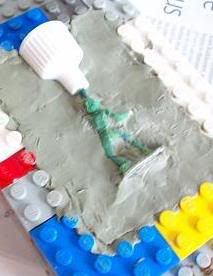
4. i then built up the remaining two layers of bricks and gave the whole thing a liberal spray of mold release. (i MEAN liberal) i also stick a pencil nib into the mold a few times to create holds, to align the two halves when they are used in casting.
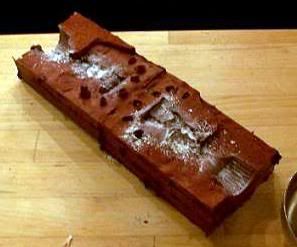
5. i measured out by eye the amount of silicone i needed and weighed it, then by using the manual worked out how much catalyst i needed.(it was about 16 drops). after giving the whole thing a good mix i poured it into the mold. and left it to set for four hours (you can leave it for longer but this is the minimal time i think )
6. when the mold is dry you can slowly pull away the bricks outside the silicone and peel off the silicone, if it is obviously not dry as you start to peel leave it over night.
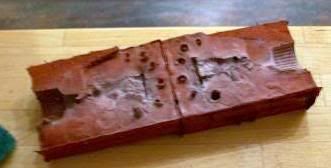
once you have peeled it off and admired your work you can turn the mold in the box give it a very big spray of the release agent, remix the silicone and mold the second half.
......repeat step 6.....but at the end also leave the mold open for an hour to dry the two halves thoroughly.
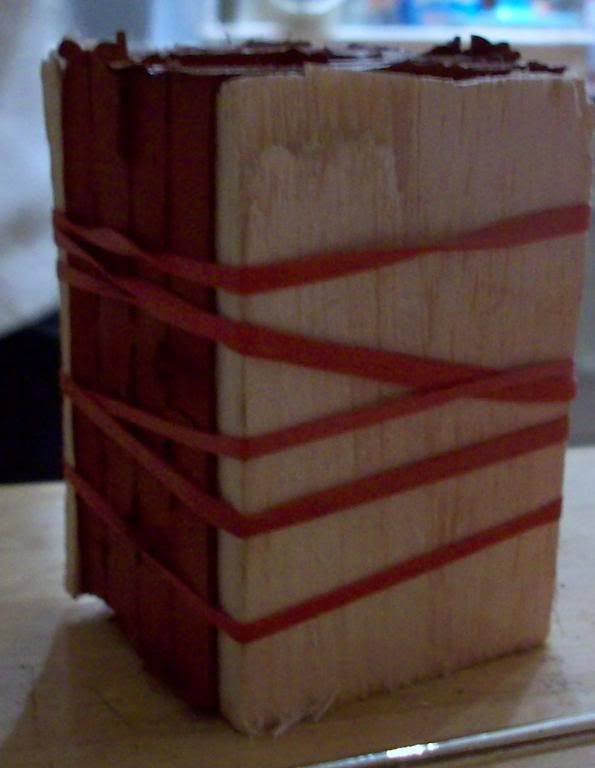
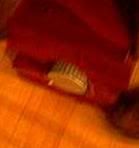
7. i then took the two dry halves and talcked them with the French chalk. using the scouring pad. i blew off excess and bashed the two halves together lightly.
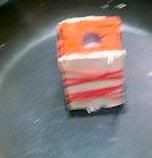
8. i then put two pieces of balsa either side of the mold and pressed it together. and wrapped it in elastic bands tightly.
9. i put the old pan on the stove and heated it for about 5 minutes.
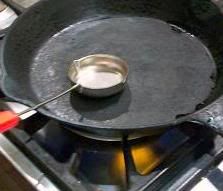
i put the new pan next to it on the marble surface and put the mold in it, the point of this is to catch over spill.
then i put the ladle on (with the , may i add. rather stupid PLASTIC handle) the pan and added enough metal to fill the mold.
i actually used one stick to make about 8 figures. at this point i also put on my gloves
Remember children ALWAYS USE PROTECTION

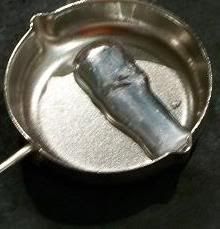
10. i let the metal melt for about 2minutes reaching a very fluid consistency, and then i poured the metal straight into the mold and carefully/ LIGHTLY. tapped the mold with a wooden spoon.
11. i left the metal to dry for about 5 minutes the first time, but you really only need to let it dry for about 1-2 minutes,
KEEP IN MIND THE METAL WOULD HAVE BEEN MOLTEN THEREFORE STILL VERY WARM AND MAYBE HOT!!!
once dried i slowly pulled open the mold and found sadly that it hadn't worked.
MAIN REASONS WHY IT WONT WORK FIRST TIME AND NOT TO GIVE UP HOPE
> no air escaping (need to vent the mold) (might be a term i made up but it means that you need to cut lines with the sprue cutter to the top of the mold to let air out)
>not enough metal (just take the metal used RE-melt it and add more then try again.
>mold not ready / mold melts and or breaks. (sorry no fix you will have to start again)
if it does work CAST CAST CAST.
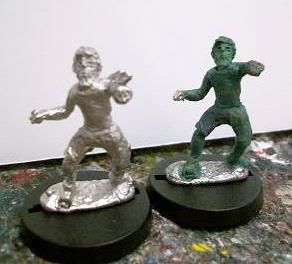
here are some of my results (varied success rate)
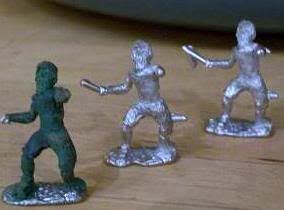
and here are some painted pics and scale pics.
No comments:
Post a Comment